The fastest way to prevent birds from nesting behind your shutters is to seal every gap around the shutter frame before breeding season begins, ideally in late winter (February through early March in most of the U.S.). If birds are already nesting there right now, you have to stop, confirm whether the nest is active, and wait out the cycle before you can close anything up. If you need to remove a nest on your porch, the key is to confirm whether it is active and follow humane, legal steps before sealing any access points get rid of bird nest on porch. Sealing over an active nest is not just inhumane, it is a federal offense under the Migratory Bird Treaty Act. So the first step is always: look before you seal.
How to Prevent Bird Nests Behind Shutters: A Humane Guide

Maya Carver
15 Jun 2026
Quick assessment: is it an active nest or an abandoned one
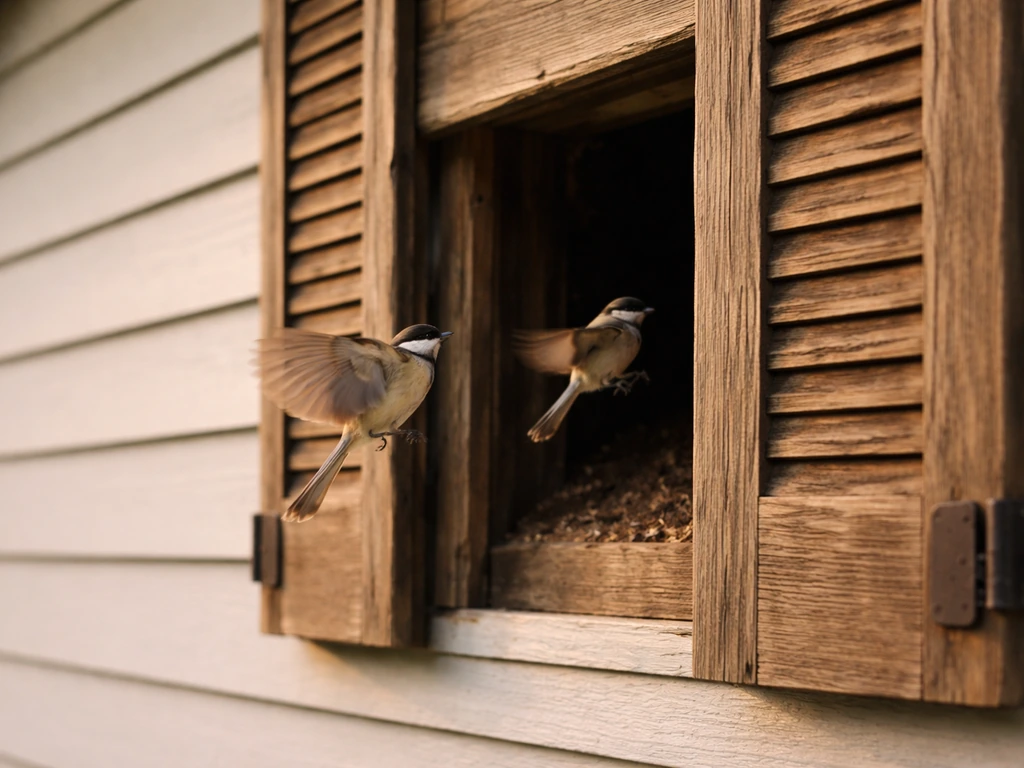
Before you touch anything, spend a few minutes watching from a distance of at least 15 to 20 feet. You are looking for adult birds flying in and out of the shutter gap, carrying nesting material or food, or perching nearby and acting defensive. Any of those signs means the nest is active, and you need to leave it alone for now.
A nest is legally active from the moment the first egg is laid until the chicks have fledged and are no longer dependent on the nest. In practical terms, that covers the full incubation and nestling period. Once nestlings hatch, most small songbirds fledge within 10 to 18 days, so if you know eggs have hatched recently, mark your calendar and check back. The whole cycle from egg-laying to fledging typically runs 3 to 5 weeks depending on species.
If you have not seen any adult activity in a while and you are wondering whether the nest is abandoned, the guidance from NestWatch and Smithsonian is clear: wait at least four weeks from the last time you observed an adult at or near the nest before concluding it is abandoned. This accounts for incubation gaps and natural parental behavior. Do not rush this. Nests that look still or quiet may still be in active use.
| What you observe | Nest status | What to do |
|---|---|---|
| Adults flying in and out with food or material | Active (nesting or feeding chicks) | Do not disturb. Monitor and wait. |
| Eggs visible, no adult seen recently | Possibly abandoned, but wait 4 weeks from last sighting before acting | Observe daily and log dates |
| No eggs, no chicks, no adult activity for 4+ weeks | Likely abandoned | Safe to remove nest and seal gaps |
| Nest material only, no eggs, no birds observed | Pre-nesting or unused nest | Remove nest material and seal immediately |
| Chicks visible or audible | Actively nesting | Do not disturb. Wait for fledging (10–18 days from hatching) |
Immediate actions to take today (and what not to do)
If you confirm the nest is inactive or no nest exists yet, you can act right now. Here is what to do today, in order of priority.
- Observe from a distance first. Spend 10 to 15 minutes watching before approaching the shutter area.
- If the nest is empty and clearly inactive (no eggs, no chicks, no adults for 4+ weeks), remove the nest material using gloves and a mask. Place it in a sealed bag.
- Photograph every gap around the shutter frame before you touch anything. This gives you a record and helps you plan your sealing work.
- Block temporary access with a physical barrier (a piece of hardware cloth or foam backer rod pressed into the gap) if you cannot do the full repair today. This buys you time without permanently sealing anything.
- Do not use chemical repellents, sticky gels, or loud auditory devices near an active or recently active nest. These can cause harm or distress to nesting adults and chicks.
- Do not seal any gap while birds, eggs, or chicks are present inside. Even if the birds are "just sparrows," most species in the U.S. and Canada are covered by federal and state protections.
The one thing people most often get wrong is sealing too fast. It feels urgent once you spot the nest, but moving quickly here can trap birds inside the shutter cavity, which creates a much bigger and more distressing problem. Slow down, confirm the nest status, and then seal with confidence.
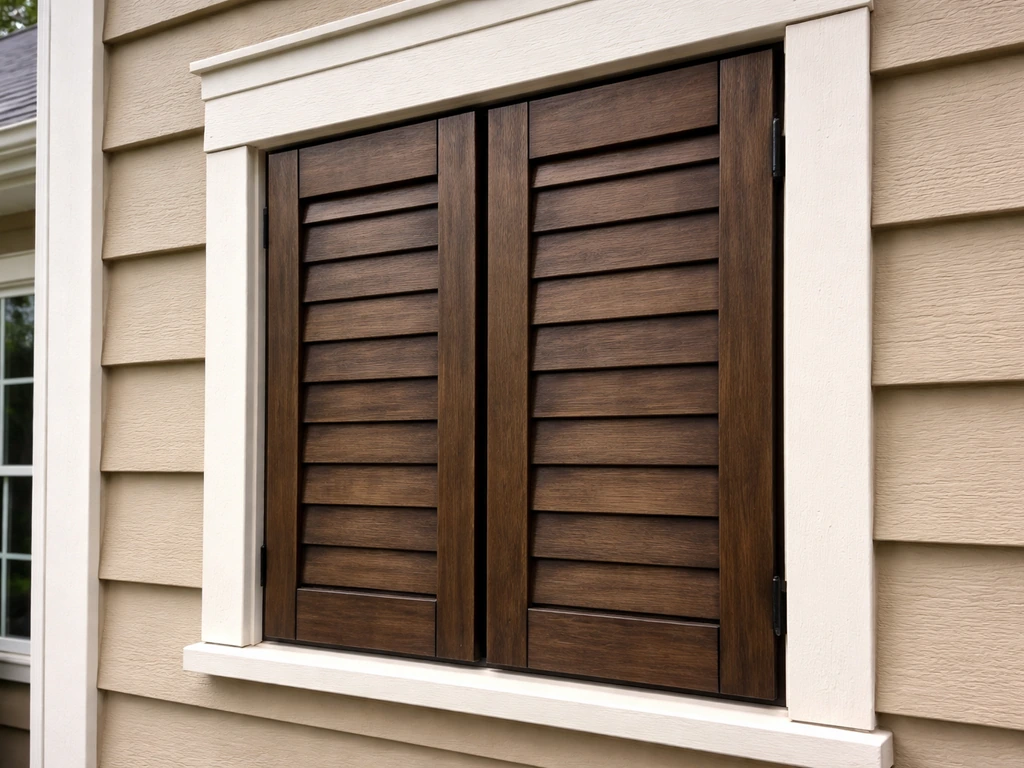
Find and seal the access points behind shutters (step-by-step)

Shutters create nesting opportunities mainly because of the gap between the shutter panel and the siding or trim behind it. On louvered shutters, individual louver slots can also funnel birds into cavities if the shutter is not properly mounted flush. Here is how to find and close every entry point.
Step 1: Inspect the shutter mounting and gap profile
Work with a helper whenever you are on a ladder near eaves. Wear non-slip footwear and use a ladder stabilizer to keep the ladder away from the siding. Once you are safely at shutter level, check the following: the gap between the back of the shutter and the siding (anything over a half-inch is wide enough for a sparrow or starling), the top edge of the shutter where it meets the soffit or trim board, any broken or missing louver slats, and the condition of the mounting hardware (loose shutters shift over time and open new gaps).
Step 2: Measure gaps and choose the right fill material
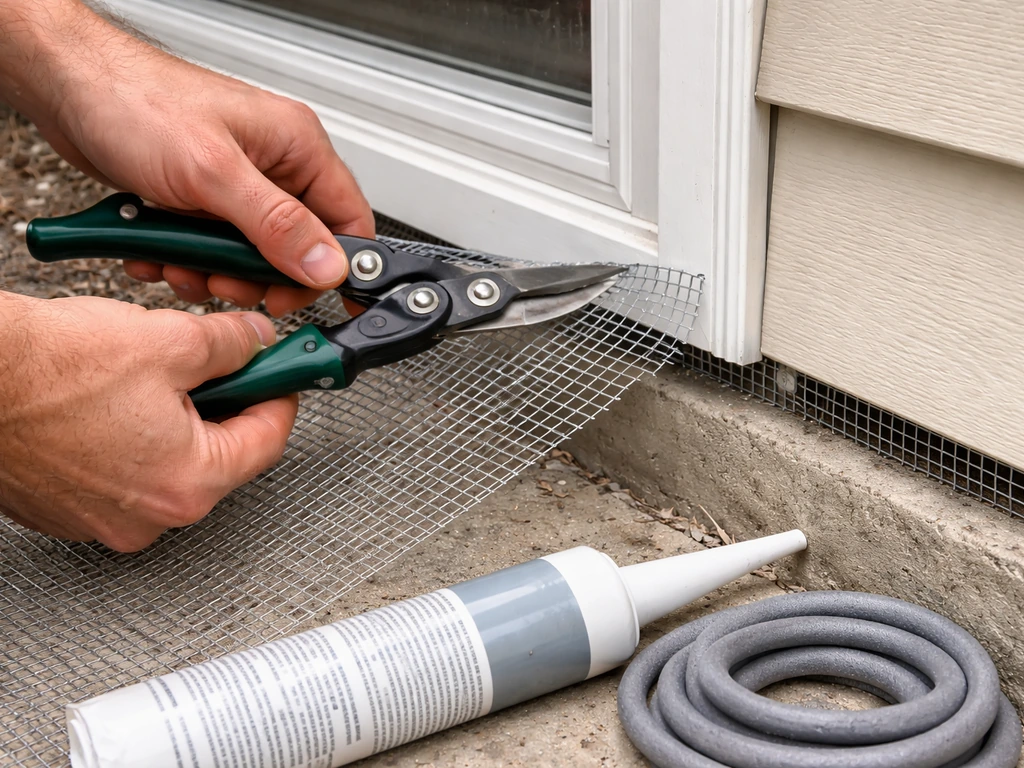
For gaps under a quarter-inch, paintable exterior caulk or foam backer rod is sufficient. For gaps between a quarter-inch and about an inch, use hardware cloth cut to fit and secured with construction staples or screws and washers. Hardware cloth comes in 1/8-inch, 1/4-inch, and 1/2-inch mesh sizes. For blocking bird access, use 1/4-inch or smaller mesh so even small birds like house sparrows cannot squeeze through. For gaps larger than an inch or irregular openings behind the shutter frame, a combination of hardware cloth plus a trim board or molding to cover the edge works well and looks clean from the street.
Step 3: Remove the nest material and clean the cavity
Once you are certain the nest is inactive, remove all nesting material. Birds are drawn back to familiar nesting sites by smell and memory, so leaving old nest material in place increases the chance they return next season. Dispose of the material in a sealed bag. If you can see into the cavity behind the shutter, wipe the surface with a damp cloth and let it dry before sealing. You do not need to disinfect aggressively, but removing debris eliminates the attractant.
Step 4: Seal the perimeter gaps
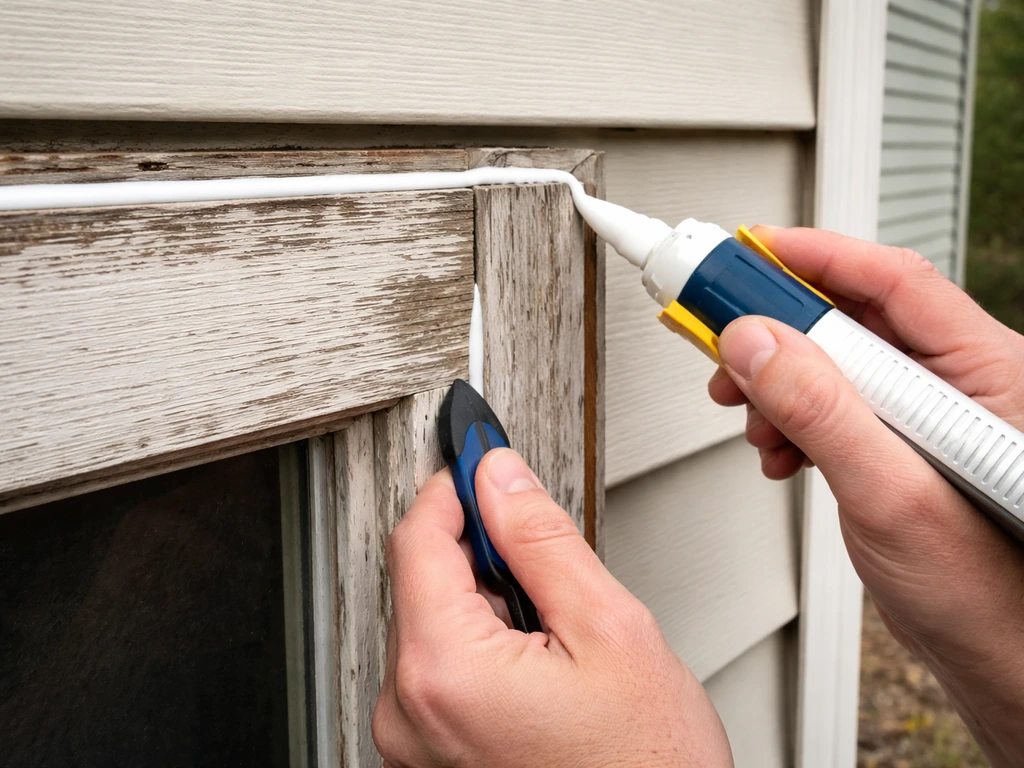
Starting at the top edge of the shutter, work around the frame and seal every gap you identified. For the gap between the shutter back and siding, cut a strip of 1/4-inch hardware cloth to match the height of the shutter and staple or screw it to the siding so it bridges the gap without blocking the shutter's decorative function. For the top edge where the shutter meets a soffit, use exterior caulk or a trim filler piece. At the bottom edge, make sure water can still drain out if needed, so use a breathable fill like hardware cloth rather than solid foam that can trap moisture.
Step 5: Re-secure or replace loose shutters
A shutter that sits flush and is firmly mounted leaves very little gap for birds to exploit. Replace bent or missing mounting hardware, and if the shutter has warped away from the wall, replace it or install spacer blocks behind it to eliminate the void. Vinyl and aluminum shutters rarely warp, but wood shutters are prone to it as they age.
Humane deterrents and habitat changes that work around eaves
Physical exclusion is always the most reliable long-term method because it eliminates access rather than trying to persuade birds to go elsewhere. That said, adding deterrents to nearby surfaces can reduce pressure on your shutters, especially if birds have been nesting in the same spot for multiple seasons and are strongly habituated to the site.
- Bird netting over the eave above the shutters: Use UV-resistant polypropylene netting with a 3/4-inch or smaller mesh, attached taut to the soffit edge and anchored at the wall. This prevents birds from approaching the shutter gap from above.
- Anti-perch strips or stainless-steel spike strips: Install on the top edge of the shutter, the window sill directly below or above, and any nearby ledge or trim board where birds commonly land and scout the nesting site. These are not harmful, they just make perching uncomfortable.
- Optical deterrents: Reflective tape, flash tape, or hanging reflective discs within 3 feet of the shutter gap can disrupt birds during the early scouting phase. Effectiveness drops if birds habituate to them, so rotate positions occasionally.
- Remove nearby attractants: Trim back branches that overhang or touch the shutters, remove any bird feeders within 15 to 20 feet, and check for standing water sources or insect activity near the eave that might attract foraging birds.
- One-way exclusion doors: If birds are already inside a cavity but no eggs are present, commercial one-way exclusion devices (designed for sparrows and starlings in vents and soffits) let birds exit but not re-enter. These are a cleaner option than flushing birds out manually when you are not sure if all birds have left.
Auditory and chemical deterrents are generally less reliable for shutter situations. Birds nesting in tight, enclosed cavities are less affected by sounds than open-area roosting birds, and chemical repellents applied to exterior trim can weather off quickly and create maintenance headaches. Stick to physical methods wherever possible.
Seasonal prevention plan and best timing for exclusion work
Timing your exclusion work around the nesting season is the single biggest factor in how easy or complicated this job gets. Do it in late winter and the whole project is straightforward. Wait until April and you may find yourself watching and waiting for weeks before you can act.
| Time of year | What to do |
|---|---|
| January to early February | Plan your inspection. Order materials (hardware cloth, caulk, mounting hardware, netting). |
| Late February to early March | Ideal window for full inspection, nest material removal, gap sealing, and deterrent installation. Most songbirds have not yet claimed nesting sites in the northern U.S. |
| Mid-March to April (Southeast) / April to May (Northeast) | Nesting season begins. Inspect early in this window. If no nests present, seal immediately. If nests found, do not disturb. Wait and monitor. |
| April through August | Peak nesting season across most of the U.S. and Canada. Avoid any disturbance to active nests. Monitor for fledging and seal as soon as each nest becomes inactive. |
| September to November | Post-season window. Remove remaining inactive nest material, inspect for new gaps or damage from the season, and do any deferred sealing and repair work. |
| After any major storm | Inspect immediately. Wind and water can shift shutters, crack caulk seals, and open gaps that were previously closed. |
In the Southeast, resident birds can begin nesting as early as mid-March, and in warm southern states, some species start as early as March 1. If you are in Florida, Texas, or the Gulf Coast region, move your late-February deadline to early to mid-February to stay ahead of the season. In the Northeast, you generally have until mid-April, but earlier is always better.
Troubleshooting repeat nesting and common failure points
If birds keep coming back after you have sealed the shutters, something in your exclusion is failing. Here are the most common reasons and what to fix.
- You missed a gap: Birds are persistent and will find any opening you overlooked. Go back to step one of the inspection process and look at the shutter from multiple angles, including from above if safely possible. Use a flashlight to check the cavity behind the shutter panel.
- The mesh size is too large: A 1/2-inch mesh will not stop house sparrows. If you used 1/2-inch hardware cloth and small birds are still getting in, replace it with 1/4-inch mesh.
- The seal failed: Exterior caulk cracks over one to two winters, especially in climates with freeze-thaw cycles. Re-inspect every spring and re-caulk any cracks before breeding season begins.
- Old nest material was left behind: Even a faint scent of a previous nest can attract birds back to the same spot. If you sealed but left the old nest material inside the cavity, try reopening the cavity, cleaning it out, and resealing.
- You only deterred, you did not exclude: Reflective tape, noise devices, and visual scare tactics alone will not stop a determined bird that has successfully nested in a spot for one or more seasons. Physical exclusion sealing the gap has to be the foundation.
- Adjacent gaps are drawing them in: If you sealed the shutter gap perfectly but there is an open soffit vent, a crack in the trim board above, or a gap around a nearby electrical or pipe penetration, birds may be nesting just a few feet from where you are looking. Check the full eave and soffit section, not just the shutter itself.
Repeat nesting is common with house sparrows and European starlings because both species are strongly site-faithful and non-migratory in much of the U.S. They will probe the same spot repeatedly across multiple seasons. For these species in particular, a thorough exclusion with 1/4-inch hardware cloth and fresh caulk every spring is the realistic long-term maintenance plan.
Problems behind shutters often connect to a broader eave and soffit issue. If you are also dealing with birds getting into walls or roof lines, the approach is similar but the scale of sealing work is larger. If you are dealing with a bird nest inside a wall cavity, the safest approach is still to confirm whether it is active, then close the access point with appropriate materials after the nesting period birds getting into walls. If the nesting problem is specifically in your roof or soffit area, the same exclusion and sealing approach applies to get rid of the bird nest safely how to get rid of a bird nest in roof. The same principles apply: confirm nest status, wait if active, then seal methodically.
Safety, legal protection notes, and when to call a wildlife pro
Working safely at height
Most shutter work requires a ladder, and ladder falls are the most common home-repair injury. Always have a second person present when working above 6 feet. Use a fiberglass extension ladder rated for your weight plus tools, set at the correct 4:1 angle (one foot out for every four feet of height), and use a ladder stabilizer (standoff bracket) to keep the top of the ladder off the siding and away from the shutter itself. Wear gloves when handling hardware cloth as cut edges are sharp. A dust mask is a good idea when removing old nest material.
Legal protections you need to know
Under the Migratory Bird Treaty Act, it is illegal to destroy, move, or interfere with an active nest (one containing eggs or dependent chicks) without a federal permit. This covers the vast majority of bird species you are likely to encounter behind shutters, including house finches, swallows, wrens, and robins. House sparrows and European starlings are the notable exceptions to MBTA coverage, but many states have their own protections, so check your state wildlife agency's guidance before acting on any nest. California, for example, has state-level prohibitions on taking or disturbing nesting birds and eggs that go beyond federal minimums.
Permits for removing active nests are generally only issued by the U.S. Fish and Wildlife Service when there is a documented human health or safety concern, not for general nuisance situations. Do not assume you can get a permit quickly. The realistic path for most homeowners is to wait out the nesting cycle.
When to call a wildlife professional
Call a licensed wildlife control professional or contact your state wildlife agency if you encounter any of the following situations: If you are asking whether pest control can remove a bird nest, a licensed wildlife control professional can advise you based on whether the nest is active and what permits may be required call a licensed wildlife control professional.
- You cannot safely access the shutter area with a standard ladder (two-story or higher eaves with restricted access).
- You find a bird species you cannot identify and are unsure whether it is protected or whether a waiting period applies.
- The nesting situation involves a large colony of birds (cliff swallows, barn swallows, or similar), which can involve dozens of nests across an eave and require a coordinated exclusion plan.
- You suspect a nest is inside a wall or structural cavity rather than just behind the shutter panel, which crosses over into a more complex removal scenario.
- You have an injured or abandoned chick that has fallen from the nest.
- You have tried exclusion twice and birds continue to access the area through an entry point you cannot locate.
When you call a wildlife professional, have the following information ready: the species if known, how long the nest has been present, what you have already tried, and a photo of the access point and shutter gap. This helps them assess the job accurately and bring the right materials. USDA Wildlife Services can also provide referrals and guidance in some areas if you are dealing with a protected species situation.
Your ongoing maintenance schedule
Preventing re-nesting is a seasonal commitment, not a one-time fix. If you still have a bird nest in a window after you have sealed the gaps, check for any remaining access points and remove the nesting material only after the nest is inactive how to get rid of bird nest in window. Build these checks into your regular home maintenance routine and the problem becomes much easier to manage year after year.
- Late February: Full visual inspection of all shutters and eave gaps. Re-caulk any cracked seals. Check hardware cloth for rust, shifting, or gaps at the edges.
- April (after any winter storms): Quick check for new gaps opened by wind or settling. Make any repairs before nesting season is fully underway.
- After any major storm (any time of year): Inspect all sealed areas for damage. Birds will exploit a newly opened gap within days if they are actively scouting.
- September: Post-season inspection. Remove any inactive nest material, repair any gaps that appeared during the season, and note any areas that need reinforcement before next winter.
- Every 2 to 3 years: Replace or re-apply caulk at all shutter perimeters even if no visible cracking is present, as UV degradation can make caulk ineffective before it visibly fails.
FAQ
How long should I wait to assume a nest behind shutters is abandoned before sealing?
A good sign it is inactive is no adult birds entering or perching at the shutter gap for at least four weeks, but also check for fresh nesting material placement or droppings directly under the shutter. Quiet for a few days is not enough, because some species pause feeding during weather changes and still return to the same cavity.
What should I look for if I only have time to check the shutter once?
Don’t rely on “no birds flying right now” if the shutters face a spot where birds can still access at dawn or dusk. Instead, do two short observation windows (for example, morning and late afternoon) from 15 to 20 feet away, and look specifically for material-carrying behavior, not just general bird presence.
What happens if I accidentally seal over an active nest?
If you seal when birds are active, you can trap adults and chicks inside the cavity and cause injury or death. Even if the law is the bigger issue, the practical consequence is higher cleanup later, because dead or rotting material can lead to stronger odors and more debris removal.
What mesh size should I use if I am not sure what bird is nesting there?
Choose hardware cloth mesh based on your largest gap and the species in your area, but when in doubt for common nesters like house sparrows, use 1/4-inch mesh or smaller. If you use a larger mesh size, birds can still probe through and wedge nesting material into cracks.
Can I just use caulk or expanding foam to block the shutter gaps?
Caulk and foam can work for very small gaps, but they are poor choices at the shutter-to-siding void because foam can expand, deform over time, and create moisture traps. For the main shutter access gap, hardware cloth (bridging the void) is usually the most durable option, while caulk is better saved for sealing the top edge where it meets trim or soffit.
Is it safe to remove nesting material if I cannot see whether eggs have hatched?
Yes, but only after you have confirmed inactivity, and you should remove material in a way that does not disturb any remaining nest contents. If you cannot see clearly into the cavity, treat it as potentially active and wait, because birds can remain dependent even when eggs appear old.
What are the safest setup practices when sealing gaps around shutters on a ladder?
Ladder work gets safer when you add a stabilizer (standoff bracket) and avoid leaning the ladder against the shutter itself. Also plan your tool path so you are not carrying sharp or bulky items on a rung, use a second person when you are working above about 6 feet, and consider staggering the job so you minimize time on the ladder.
If I sealed the shutters and birds still nest there, what should I inspect first?
If birds keep returning after sealing, start by checking for “micro-gaps” where trim pieces meet, missing or loose shutter mounting screws, and any warped areas that reopened a void. Also inspect adjacent eaves, soffits, and nearby vents, because birds may be exploiting a second access route you did not close.
Do motion lights, noise devices, or bird repellent sprays work behind shutters?
Not all deterrents are created equal for this situation. For enclosed shutter cavities, sounds and most chemicals are unreliable because birds can remain largely protected from them, and chemicals can wear off quickly while still creating ongoing maintenance. Physical exclusion (hardware cloth and solid gap bridging) is the most dependable approach.
How should I decide between waiting and acting if I am unsure whether the nest is active?
If you see adults actively bringing food or material, treat it as active regardless of how “neat” the nest looks. If you are unsure, delay sealing and switch to documenting the activity (quick photos or brief notes), then resume once you meet the inactive waiting window.
When would a permit or wildlife pro be necessary instead of waiting it out?
If you suspect human safety risk (for example, a nest is blocking an emergency egress or creating a hazardous electrical or structural condition), a licensed wildlife professional may be able to advise on permit and mitigation options. For general nuisance cases, permits are not typically granted for quick removal, so you usually must wait for the cycle to complete.
How should I plan timing if I live in a warmer climate where nesting starts earlier?
If you are in a warm region, start earlier than late February and plan around resident birds that can begin nesting mid-month. A practical step is to set a yearly “exclusion window” based on your local climate, then do the final gap checks a week before that window so you are not rushing during active nesting.
How do I prevent re-nesting season after season after I seal the shutters?
Don’t assume the problem ends when the shutter gaps are sealed, because birds often re-use the same micro-voids year after year. Add a quick seasonal inspection routine, check for loose hardware or warped shutters, and reapply caulk only where it is failing, while replacing any degraded hardware cloth.
Next Article
How to Get Rid of Bird Nest in Window Safely
Step-by-step safe removal of a bird nest in a window, plus cleaning, deterrents, and proofing to prevent re-nesting.
