To bird-proof your roof, you need to do three things in order: get any birds out first, identify every gap or ledge they are using, then seal or deter each one with the right method for that specific spot. Skip any of those steps and you will either trap birds inside (a serious legal and humane problem) or find the same birds back within a week.
How to Bird Proof Your Roof: Emergency and Prevention Steps

Maya Carver
31 May 2026
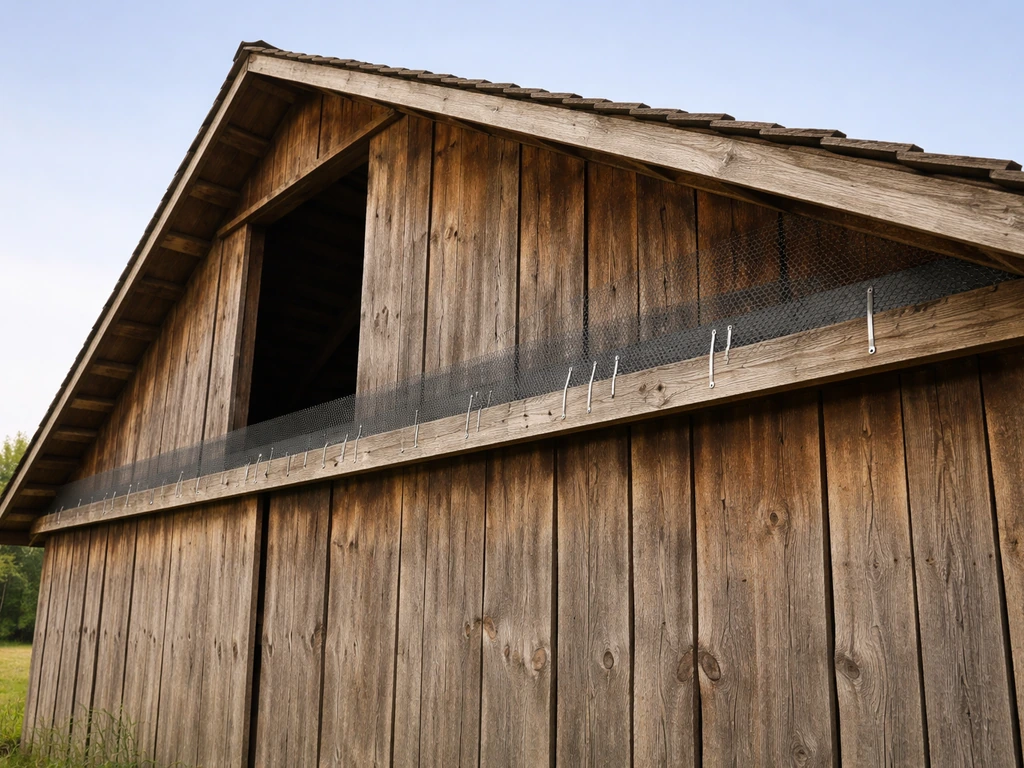
This guide walks you through all three in order, starting with what to do if birds are getting in right now. If you are dealing with a barn specifically, the same inspection-and-proofing approach helps you seal entry points and prevent re-entry without harming birds how to bird proof a barn.
If you are wondering what a bird stop on a roof is and where it should be installed, the section on common entry points can help what is a bird stop on a roof.
Quick emergency response: get birds out safely today
If birds are actively inside a roof space, attic, or soffit cavity right now, your first job is to get them out without harming them and without sealing anything while they are still inside. Sealing a bird in is not just cruel, it is illegal under the Migratory Bird Treaty Act for most common species. Here is what to do immediately.
- Stop and listen for 10 minutes. Scratch sounds, cooing, or chirping inside the roof space confirms birds are present. Note the time of day, as most birds leave the roost at dawn and return at dusk.
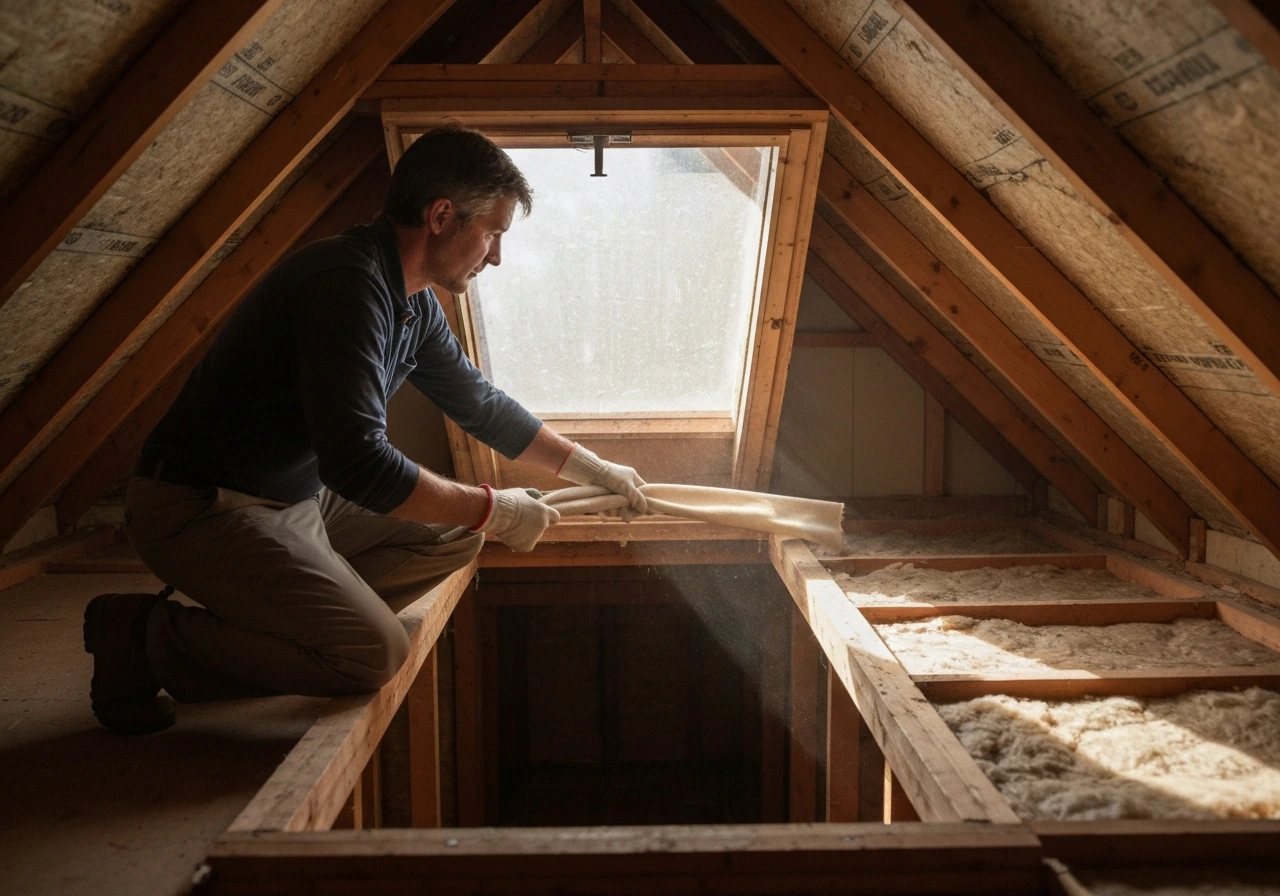
- Put on an N95 or P100 respirator, safety glasses, and gloves before entering any confined space. Bird droppings carry histoplasmosis and other pathogens.
- Do not seal any openings yet. Mark suspected entry points with tape or a chalk mark so you can find them again.
- If a bird is trapped in a living area (not the roof cavity), open the nearest window or exterior door, darken the room except for that exit, and wait. Most birds will fly toward the light within minutes.
- If there are nestlings (baby birds) or eggs visible, stop completely. Do not move the nest. Note the location and call a licensed wildlife rehabilitator or your state wildlife agency before doing anything else.
- Monitor the entry point for at least 48 hours before beginning any exclusion work. Watch at dusk and dawn to confirm all birds have left. Cornell University's pest exclusion guidance specifically recommends this two-day observation window before sealing.
Once you are confident the space is clear, you can move into the inspection and proofing stages below. If you are not certain the space is empty after 48 hours of observation, wait longer or call a professional. The cost of patience is low. The cost of sealing a bird in is much higher.
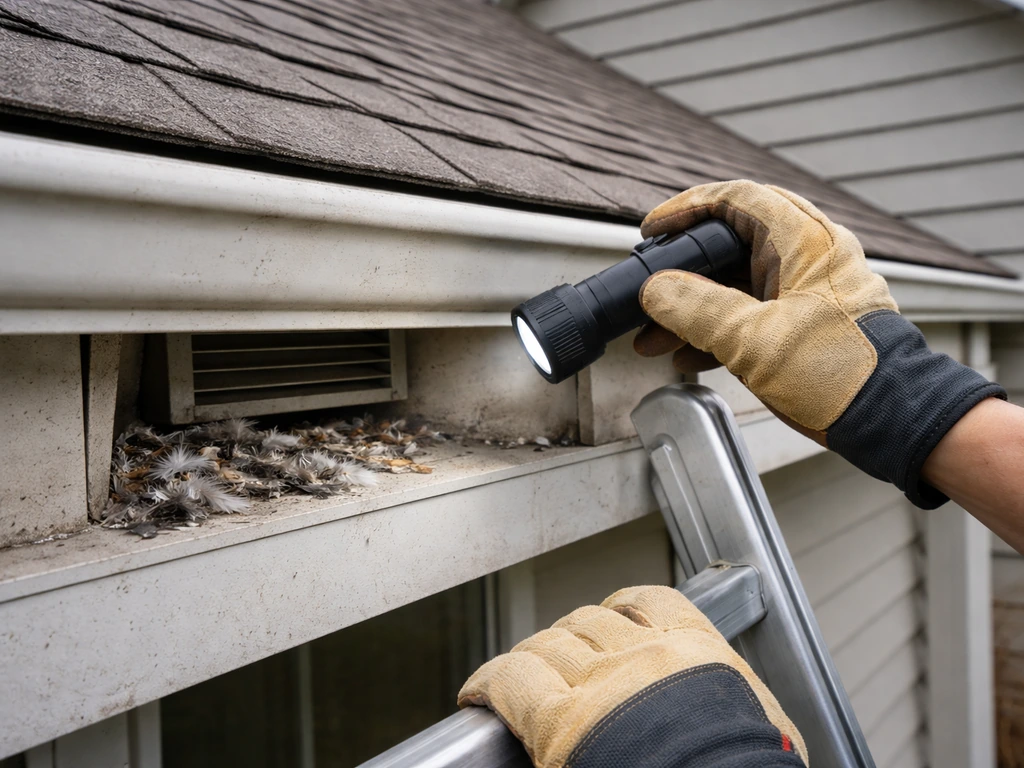
Roof bird inspection: find entry points, roost sites, and damage
A thorough inspection is the most important step most homeowners skip. If you miss an entry point, the birds will simply use it instead of the one you sealed. Walk the whole roof perimeter from the ground first with binoculars, then get closer where safe to do so. You are looking for four things: entry holes, roost evidence, nesting material, and damage.
What to look for during your inspection
- Gaps wider than half an inch anywhere along soffits, fascia boards, or where the roof deck meets the wall
- Displaced, cracked, or missing roof tiles, especially near the ridge or valleys
- Dark staining or grease marks around a gap (this is feather oil and indicates heavy use)
- Droppings concentrated in one area, which signals a regular roost or perch spot
- Nesting material (twigs, straw, feathers) visible inside vents or sticking out from under eaves
- Damaged or missing vent covers, including ridge vents, soffit vents, and gable vents
- Chimney flues or caps that are cracked, missing, or uncapped
- Gutters filled with debris that create sheltered ledge-like areas birds can nest in
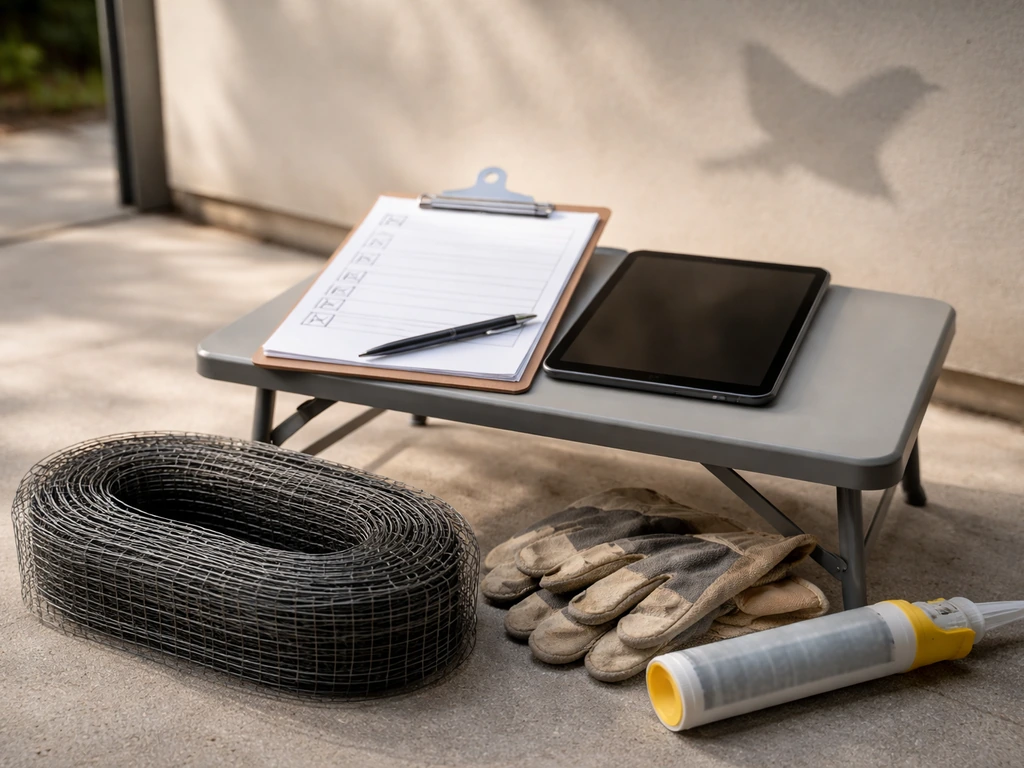
Your inspection checklist
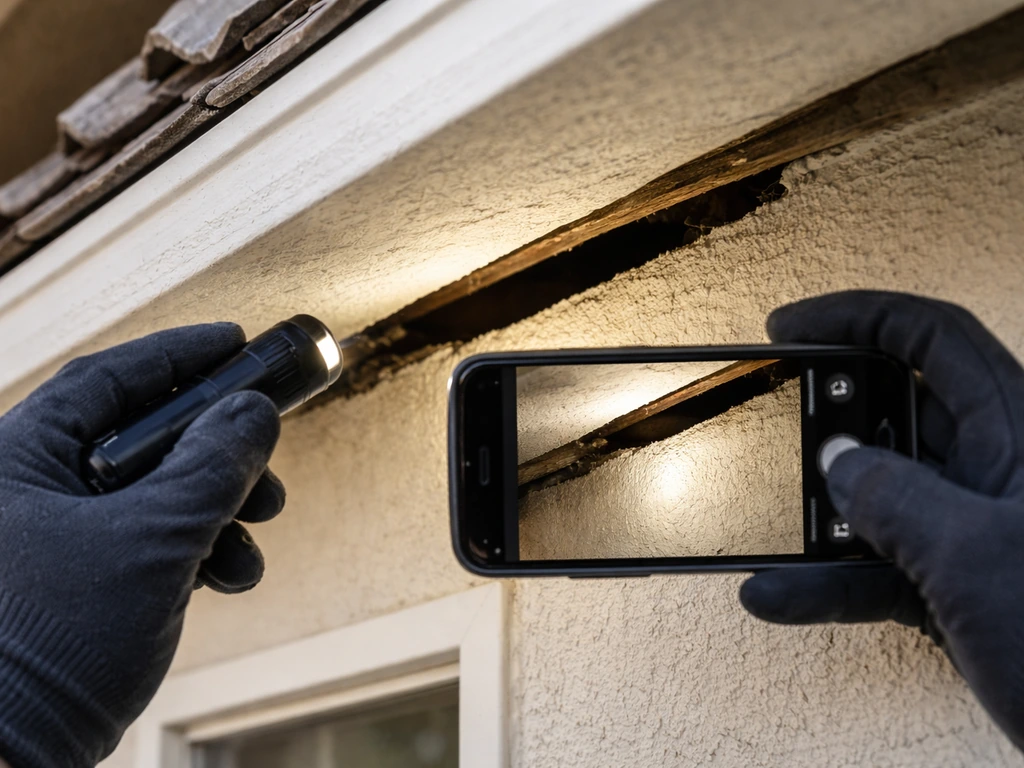
Work your way around the building systematically. Use this checklist and photograph every problem spot with your phone before touching anything. Those photos are useful later if you need to brief a professional, file an insurance claim, or simply remember what you found.
| Location | What to check | Common bird entry or roost sign |
|---|---|---|
| Ridge line | Ridge caps, ridge vent mesh | Sparrows, starlings nesting under loose caps |
| Soffits | Gaps at fascia-soffit junction, broken vent screens | Starlings, house sparrows, swallows |
| Gutters | Debris buildup, sagging sections, downspout openings | Nesting in debris; pigeons perching |
| Roof vents (passive/turbine) | Intact cap, intact mesh, no rust holes | All small birds, especially starlings |
| Chimney | Cap present and intact, flue screen condition | Chimney swifts (protected), starlings |
| Gable vents | Screen condition, frame gaps | Starlings, pigeons, sparrows |
| Flat or low-slope areas | Parapet ledges, AC unit surrounds, skylights | Pigeons, gulls roosting |
Once you have a complete photo log and a marked-up sketch of the roof, you know exactly what materials and methods you need. Buying materials before doing this step is one of the most common DIY mistakes, and it usually results in buying the wrong product or the wrong quantity.
Humane exclusion rules: what you must never do
Before you start any sealing or deterrent work, understand the legal and ethical lines. The Migratory Bird Treaty Act protects the vast majority of wild birds you will encounter on a roof in the United States, including their active nests, eggs, and chicks. Violating it carries real penalties.
- Never seal an opening without confirming all birds have left. If you trap a bird inside a wall or roof cavity, you have caused unnecessary suffering and potentially broken federal law.
- Never remove or destroy a nest that contains eggs or chicks, or where young birds are still dependent on the nest. Wait until the nest is fully vacated and the breeding season is over.
- Never use glue traps, poisons, or any method intended to kill birds. These are illegal for migratory species and ineffective as a long-term solution anyway.
- Never disturb a chimney swift colony. Chimney swifts are a federally protected species that specifically use chimneys to nest, and removal is prohibited during the nesting season (roughly May through August).
- Avoid bright lights or loud noises used as harassment devices near active nests, as this may also constitute illegal disturbance.
- If you catch a bird accidentally during exclusion work, release it immediately at the site and document what happened.
The MBTA does explicitly allow building owners to use exclusion devices (mesh, hardware cloth, caps, and similar physical barriers) to prevent birds from re-entering once a space is confirmed empty. The key phrase is "once empty and confirmed." Federal regulations at 50 CFR 21.14 specifically authorize patching holes and installing bird exclusion devices as part of authorized prevention actions. So the method is legal. The timing is what matters.
DIY bird-proofing by roof area
Different parts of your roof attract birds for different reasons and need different solutions. Here is a location-by-location breakdown of what works.
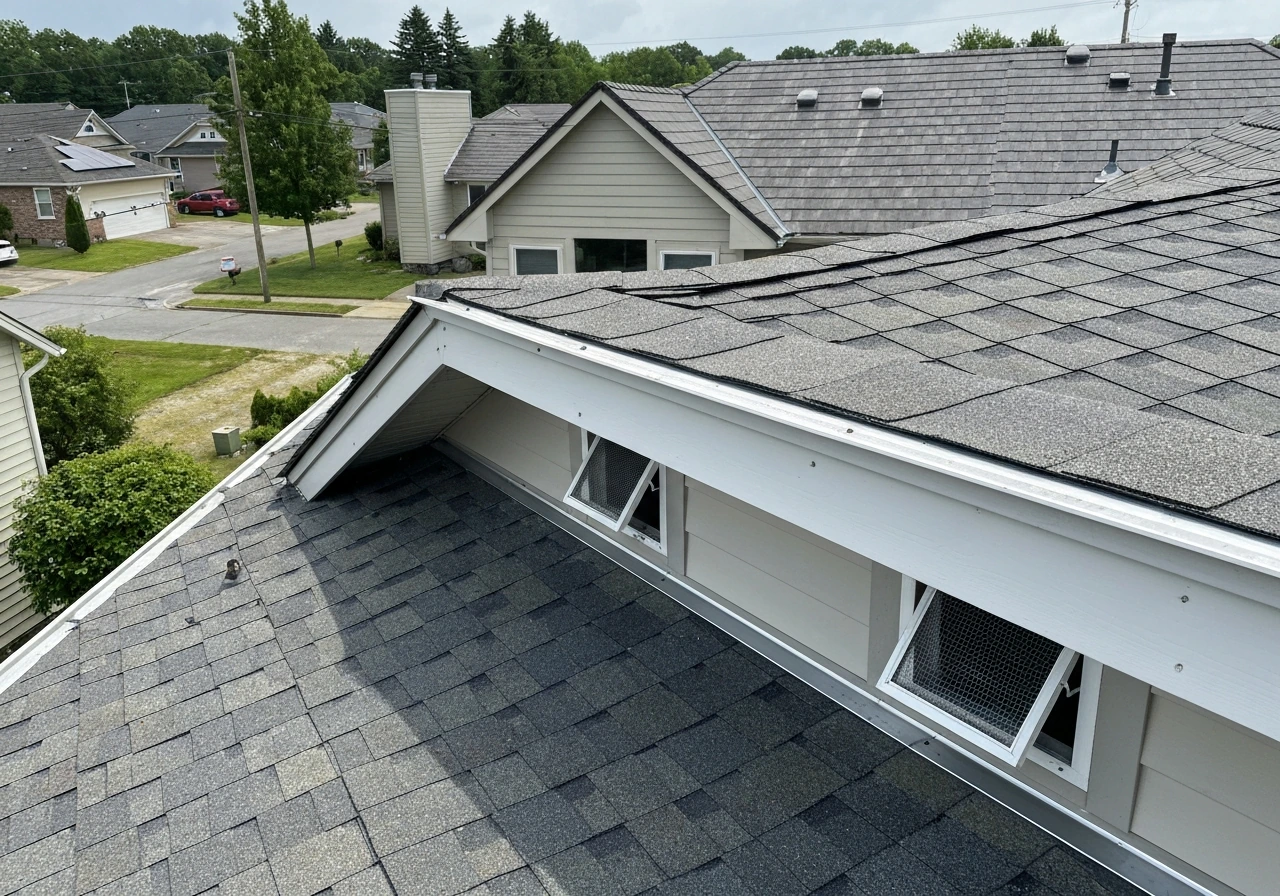
Roof vents

Passive roof vents and turbine vents are the number one entry point for starlings and sparrows. The fix is straightforward: replace any damaged plastic vent covers with metal ones, and cover all vent openings with a half-inch galvanized hardware cloth screen (not standard window screen, which birds can push through or peck holes in). Cut the hardware cloth to size, fold the edges over the vent frame, and secure with sheet metal screws or staples rated for exterior use. Check that the mesh does not restrict airflow enough to cause attic moisture problems. For turbine vents, a commercially available turbine vent cage guard slips over the turbine and keeps birds out without affecting rotation.
Soffits and fascia
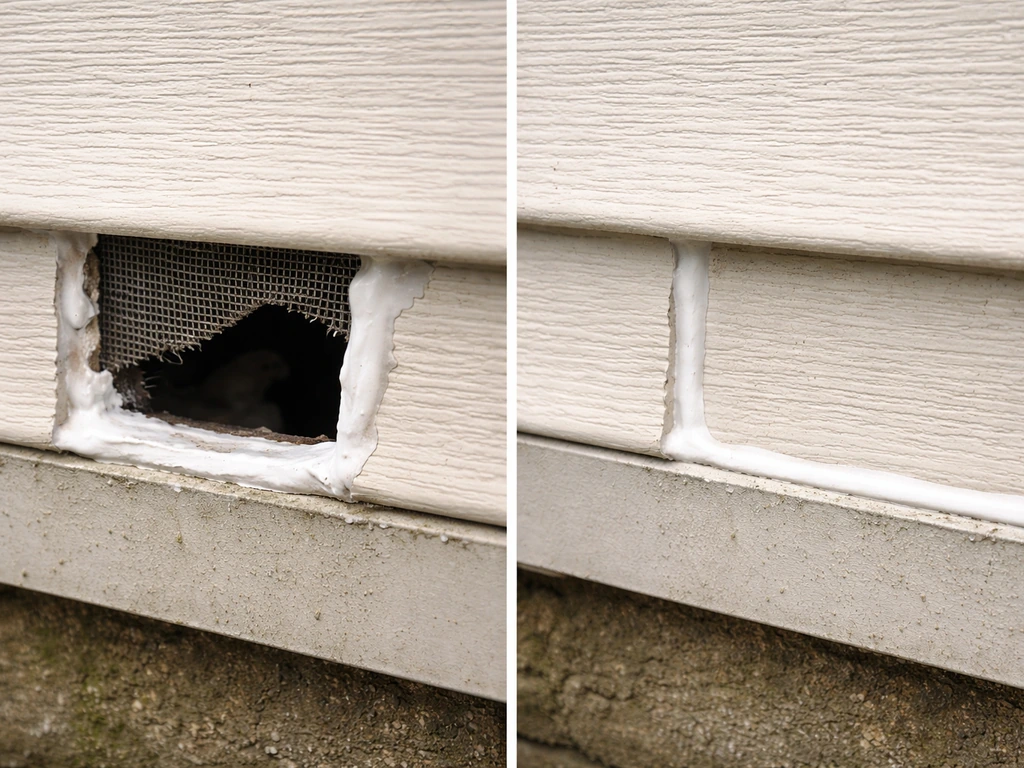
Gaps between the soffit board and the fascia, or between the soffit and the exterior wall, are favorite nesting spots for starlings and house sparrows. If the gap is less than one inch, fill it with paintable exterior caulk or expanding foam rated for outdoor use, then paint over it to match. For larger gaps or damaged sections of soffit board, replace the board and seal the new joint properly. Soffit vents with cracked or missing screens should have the screen replaced with half-inch hardware cloth stapled from inside the soffit cavity.
Gutters
Gutters themselves rarely let birds into the roof structure, but they are prime perching and nesting spots, especially when packed with leaf debris. Clean gutters at least twice a year and install gutter guards (mesh-type guards work better than solid covers for bird deterrence). For birds nesting at the open ends of gutters where they meet the downspout, fit a downspout strainer. On the underside of gutter overhangs where swallows build mud nests, the most effective deterrent is a physical barrier like bird netting hung a few inches below the eave, making the surface inaccessible.
Ridge lines
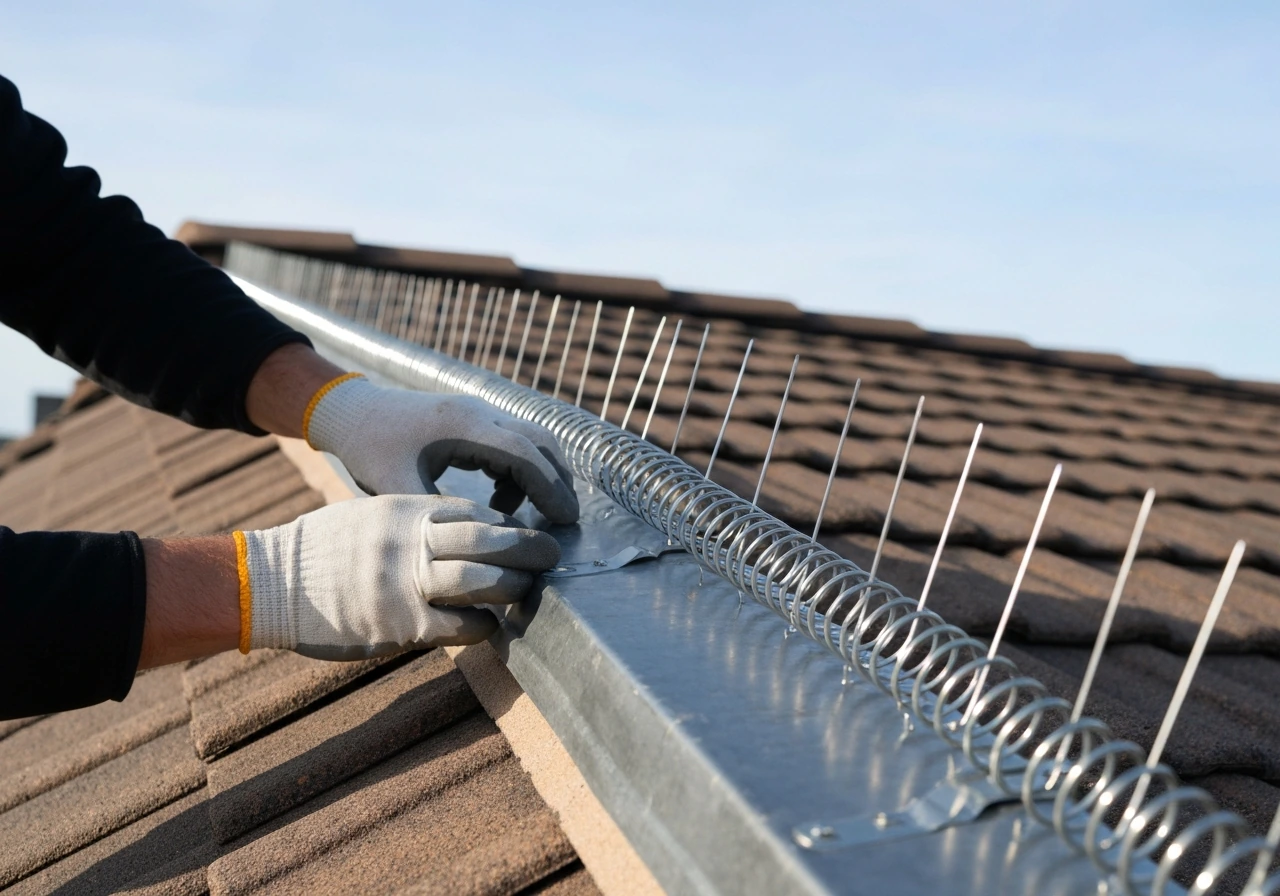
The ridge is a prime perching and roosting spot for pigeons and gulls because it offers a clear view in all directions. Bird spikes or bird coil (a spring-coil type rail) installed along the ridge peak physically prevent landing. For ridge vents, inspect the mesh insert that runs the length of the ridge: any section with missing or torn mesh should be replaced with a ridge vent end plug and mesh insert kit available at roofing supply stores. Do not use spray foam to seal ridge vents, as this can trap moisture in the attic.
Chimneys
An uncapped chimney is essentially an open invitation. Install a stainless steel chimney cap with a mesh skirt rated for the appropriate flue diameter. These are sold at hardware stores and online for most standard flue sizes and take about 30 minutes to install without needing a roofer. Before capping, lower a flashlight into the flue and check for nests. If you find a chimney swift nest with eggs or young, do not install the cap until the nest is vacant (typically after August). If you find starling nests with no active eggs, remove the nesting material first, then cap. Make sure the cap mesh size is no larger than half an inch to exclude sparrows and similar small birds.
Choosing and installing deterrents and exclusion materials
Not every product works for every situation. Use the DIY bird-proofing work order checklist to sequence your materials and roof inspection steps so your proofing does not fail. Here is a comparison of the main options so you can match the right tool to the specific problem you found during your inspection.
| Product | Best for | Least effective for | Typical lifespan | DIY difficulty |
|---|---|---|---|---|
| Stainless steel bird spikes | Ridges, ledges, flat parapet walls, gutters | Enclosed cavities, small gaps | 10+ years | Easy |
| Bird coil/spring coil | Ridge lines, wide ledges | Narrow soffits, vent openings | 5-8 years | Easy |
| Heavy-duty bird netting (UV-rated) | Large open areas, eaves, solar panel gaps, barn roofs | Small vent gaps | 7-10 years | Moderate |
| Half-inch galvanized hardware cloth | Vent covers, soffit gaps, gable vents | Wide ledges, ridge lines | 10+ years | Easy to moderate |
| Stainless steel chimney cap | Chimney flues | Open eave areas | 10-15 years | Easy |
| Optical gel deterrents (UV-reflective) | Pigeons on flat roofs, AC units | Swallows, small cavity-nesting birds | 1-2 years | Easy |
| Exterior caulk or expanding foam | Small soffit gaps under 1 inch | Large holes, vent openings requiring airflow | 5-7 years | Easy |
Installation tips that make the difference
- Spikes must be installed in continuous, overlapping rows with no gap wider than the bird's body. A six-inch gap left between spike strips is all a pigeon needs to land and nest.
- Bird netting must be taut and secured at every anchor point. Loose netting can trap birds, which defeats the purpose entirely.
- Hardware cloth should be cut with tin snips and folded over at least half an inch on each edge before fastening to prevent rust-prone cut ends from failing early.
- Any sealant used on exterior surfaces must be rated for outdoor use and UV exposure. Interior caulk will crack and fail within one season.
- Avoid sonic or ultrasonic deterrent devices for roof use. Research consistently shows birds habituate to them within days, and they have no effect on cavity-nesting birds inside a roof space.
- Reflective tape and predator decoys (plastic owls) work briefly but birds typically habituate within one to two weeks. They are not substitutes for physical exclusion.
Troubleshooting: why did the proofing fail?
If birds returned within a few weeks of your proofing work, run through this short diagnostic before spending money on more materials. If you are still seeing the same bird problem on roof after your proofing, double-check for any secondary entry points you may have missed. If you are facing a bird problem, the right steps depend on identifying where the birds are getting in and why they are choosing your roof bird problem solving.
The most common failures are: a missed secondary entry point (always go back to your photo log and check every spot, not just the obvious one), spikes or coil installed with gaps large enough for the target bird species to land between them, netting that has sagged or pulled away at one anchor point, or sealant that cracked after the first temperature cycle because it was not rated for exterior use.
Occasionally, a new bird species with different body size or behavior moves in after the original problem bird is excluded, and that requires a different deterrent entirely.
Preventive maintenance and seasonal timing
Bird-proofing is not a one-time project. If birds are entering through window gaps too, you will want to follow this same approach for how to bird proof windows safely and effectively. Roofs shift, materials age, storms dislodge mesh and caps, and birds are persistent. A simple seasonal schedule keeps you ahead of problems instead of reacting to them.
Annual maintenance schedule
| Season | Task |
|---|---|
| Late winter (February-March) | Inspect all exclusion materials before nesting season begins. Replace any damaged hardware cloth, tighten loose netting, re-secure spike strips. This is your last chance to seal gaps before migratory birds arrive and nesting activity makes exclusion legally restricted. |
| Late spring (May-June) | Walk the perimeter and note any active nests without disturbing them. Document locations and species if you can identify them. Do not attempt exclusion near active nests. |
| Late summer (August-September) | After nesting season ends, clear any old nest material from gutters, vents, and eaves. Old nest material is an attractant for the next season. Install any new exclusion hardware before migratory arrivals wind down. |
| After major storms (any season) | Check that all vent caps, chimney caps, and netting anchors are still in place. High winds are the most common cause of sudden re-entry gaps. |
| Autumn (October-November) | Clean gutters thoroughly. Check gutter guards. Inspect soffits for any storm damage before winter. |
The late winter window is the most important one. If you can inspect and fix everything in February or early March, you close gaps before birds establish nesting territories for the season. Once a pair of starlings or sparrows has decided your soffit is their home, exclusion becomes more complicated and legally restricted. Getting there first is always easier.
After a storm: quick check protocol
- Walk the perimeter from ground level with binoculars within 24 hours of any storm with winds above 30 mph.
- Check chimney caps (they are the most commonly dislodged component) and ridge vent mesh.
- Look for any soffit boards that have blown loose or shifted, as even a half-inch gap is enough for a sparrow.
- Photograph any new damage before repairing it, especially if you are documenting for insurance purposes.
- Make repairs within two to three days if possible, especially in spring and summer when birds are actively seeking nest sites.
When to call a wildlife professional
Most straightforward roof bird problems are genuinely DIY-able if you are comfortable on a ladder and willing to do a careful inspection. But there are specific situations where calling a licensed wildlife professional is the right move, both to stay legal and to actually solve the problem.
Call a professional if any of these apply
- You have found an active nest with eggs or chicks and are not certain of the species or the applicable legal protections. A professional can identify the species and advise on the legal timeline for exclusion.
- The birds are chimney swifts. These are a federally protected species with specific seasonal restrictions, and professional advice is essential before any chimney work.
- You have sealed entry points twice or more and birds keep returning, which usually indicates a missed entry point that requires a more systematic assessment.
- The infestation involves a large colony, such as dozens of pigeons or a significant gull colony on a commercial roof, where exclusion requires staging and specialized equipment.
- The entry points are in inaccessible locations, such as a steep metal roof, a high-rise parapet, or behind HVAC equipment where working safely requires professional rigging.
- You are noticing structural damage from droppings or nesting material, such as rotted wood or blocked drainage, that needs a roofer and a wildlife professional working together.
- You are a facility manager dealing with a protected species and need documented compliance records for your organization.
What to tell the professional when you call
The more information you give upfront, the faster and cheaper the professional visit will be. Before you call, have your photos organized by location, note how long the problem has been occurring, describe the species if you know it (or describe the bird's size and markings), list every entry point you found, and note any exclusion methods you already tried. If you have documented the problem over time with timestamped photos, that is genuinely useful for a professional assessment and for any permits that may be needed. Connecting with a professional is also the right step if you are dealing with a broader bird problem across the whole building, not just the roof.
Your bird-proofing work order checklist
Before you start buying materials or climbing ladders, use this checklist to make sure you are working in the right order. It is a quick summary of everything covered above. If you have a Bird Buddy connected to a solar roof setup, you may also need to plan how to remove that solar roof safely before you do any exclusion or proofing work remove solar roof from Bird Buddy.
- Confirm no birds are currently inside the roof space (observe at dawn and dusk for 48 hours).
- Check for active nests with eggs or chicks. If present, stop and seek professional advice.
- Complete a full roof inspection using the location checklist and photograph every problem area.
- Identify the species involved if possible, to confirm legal status and choose the right deterrent.
- Purchase exclusion materials matched to each specific location (see comparison table above).
- Install exclusion materials, starting with the primary entry points confirmed by feather oil staining or concentrated droppings.
- Check all installations for gaps wider than half an inch and correct them before considering the job done.
- Schedule follow-up inspection in 2 weeks to confirm no re-entry.
- Add roof bird inspection to your seasonal maintenance calendar.
- If birds return after two rounds of exclusion, call a licensed wildlife professional.
FAQ
How long should I wait after the roof seems clear before sealing everything permanently?
Even after you see no birds, keep watching the entry areas for at least 48 hours. If you are not confident the space is empty, wait longer before installing exclusion devices, because timing matters for the legal requirement that birds are already out.
Can I use spray sealant or expanding foam to close every roof opening?
Not safely or reliably. Some products fail after temperature cycles, some can block airflow and create attic moisture problems, and some can be illegal if used while a bird is still inside. Use caulk or exterior expanding foam only for the specific gap situations you identified, and follow the match-to-location approach.
Is hardware cloth always the right mesh size for roof vent openings?
For vent and many small openings, half-inch galvanized hardware cloth is the correct standard described in the guide. Using standard window screen is a common mistake because birds can push through or peck holes, so stick to the specified hardware cloth and verify it is rated for exterior use.
What if I find a nest under a eave or in soffit areas during inspection?
Do not begin exclusion work immediately. Leave the area alone until the nest is vacant, or follow guidance specific to the bird and nesting status you find. If you cannot confirm whether it is active, pause and contact a wildlife professional to avoid illegal actions.
Will bird spikes or bird coil stop all types of birds on the ridge?
They help prevent landing, but the spacing and installation details matter. If the spikes or coil have gaps large enough for the target species to land between them, birds can still use the area. Re-check alignment and spacing against the bird size you are seeing.
How do I prevent soffit ventilation problems when I cover vents with mesh?
Before and after installation, confirm the mesh does not overly restrict airflow. If you cover vents, choose the correct mesh and check attic conditions, because reducing intake or exhaust airflow can contribute to moisture issues even if exclusion succeeds.
Do I need to clean gutters before installing guards or adding netting?
Yes. If gutters are packed with leaves or debris, they become more attractive for perching and nesting. Clean the gutters first, then install guards or additional barriers like downspout strainers or netting at swallow mud-nest areas.
What should I do if birds keep returning but I cannot see new entry holes?
Re-run the inspection using your photo log and look for secondary entry points, not just the obvious ones. Also check for installation failures such as netting sagging at an anchor, mesh pulled away, or sealant cracking. Returning within weeks is often an indication of a missed or reopened access point.
Are there times of year when roof bird-proofing is riskier or more restricted?
Yes. The late winter window is the easiest time because you can close gaps before birds establish nesting territories. If birds are already nesting or there is active breeding evidence, exclusion becomes more complicated and should be handled with appropriate timing or professional support.
How can I tell the difference between a roosting issue and an entry point problem?
If birds are present but you find no fresh gaps or damage, they may be roosting on exposed surfaces like ridges or eaves while still using an unseen access point. Look for roost evidence, nesting material, and entry holes during your systematic perimeter walk, and photograph each location for later comparison.
What information should I collect before hiring a wildlife professional for roof bird-proofing?
Organize timestamped photos by location, note how long the problem has occurred, identify the species if possible (or describe size and markings), list every suspected entry point, and record any exclusion methods you already attempted. This usually speeds up diagnosis and helps determine whether permits or special timing are needed.
How should I plan bird-proofing if I have solar-related roof equipment like a solar roof setup?
Plan for safe removal or repositioning before you install mesh, caps, or barriers. If your setup uses a Bird Buddy connected to a solar roof, the guide indicates you may need to remove the solar roof safely before exclusion and proofing work, so coordinate the sequence to avoid gaps you cannot reach later.