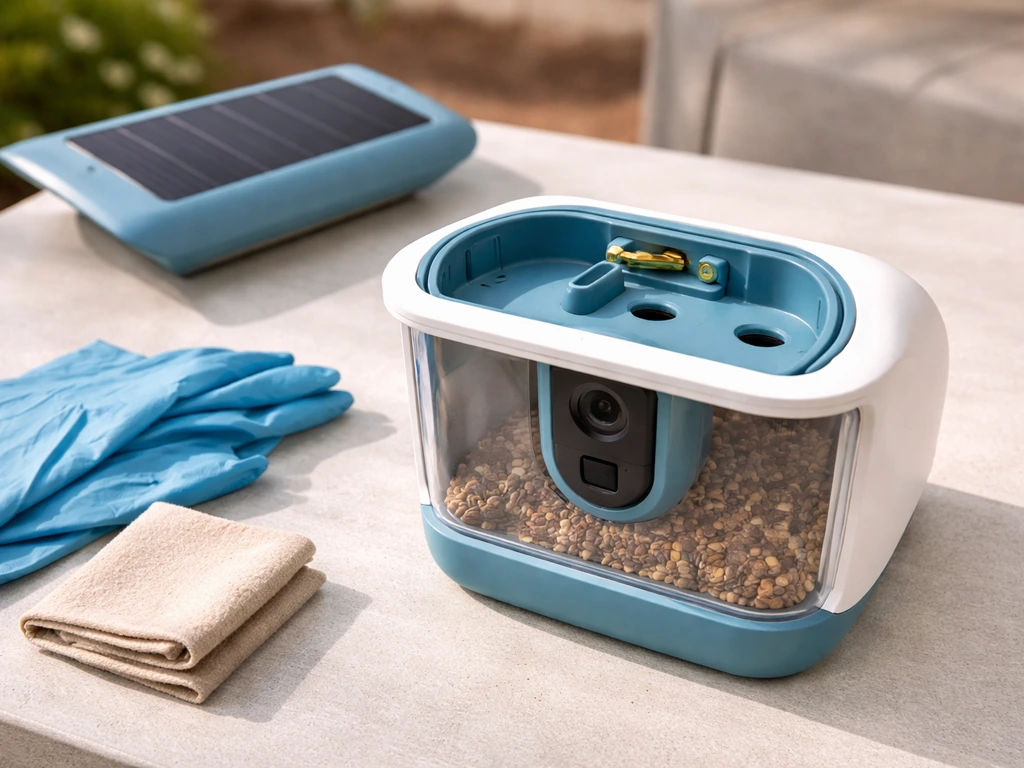
Removing the Bird Buddy solar roof is a tool-free job in most cases. On the original Bird Buddy, you pull it off with moderate, even force since it snaps onto the feeder roof with a clip-style coupling. On the Bird Buddy 2, you press both snaps simultaneously and lift the solar roof and battery insert out of the main housing.
How to Remove a Solar Roof From Bird Buddy Safely

Maya Carver
6 May 2026
For Bird Buddy 2, Birdbuddy Support also describes the solar roof and battery as a removable insert, which you can press both snaps and lift out of the main housing Pair your Birdbuddy 2. Either way, you also need to disconnect the USB-C cable that runs from the solar roof to the camera module before the whole thing comes free.
Done carefully, the whole process takes under five minutes and leaves the feeder ready for immediate reinstallation or a swap to the other side.
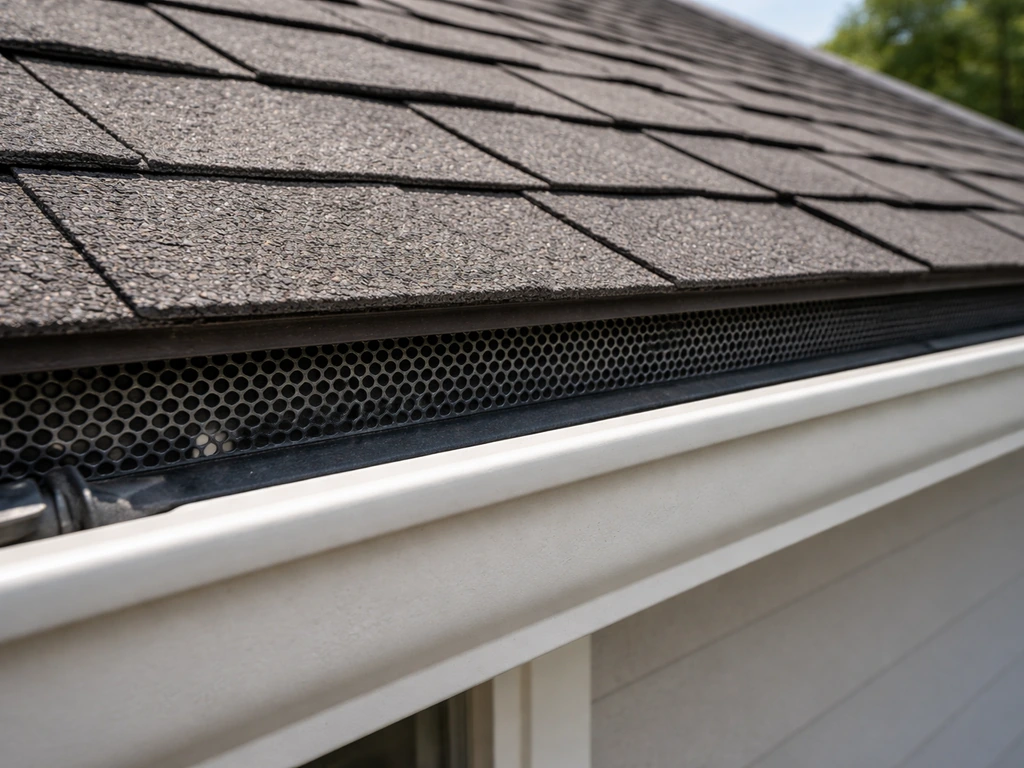
What the Bird Buddy solar roof actually is (and why it can feel stuck)
The Bird Buddy solar roof is a snap-on panel that sits over the existing roof of your Bird Buddy smart feeder. It connects to the camera module below via a USB-C cable that gets tucked along the exterior of the feeder body, keeping moisture out. That cable routing is the main reason the solar roof feels "stuck" to new users: it is not just clipped on, it is also tethered by that cable, so it will not come off freely until you disconnect or release the cable.
On the original Bird Buddy, the solar roof couples directly to the feeder roof via a snap or press-fit. On the Bird Buddy 2, the solar roof is part of a combined solar roof and battery insert that lifts out as a single unit after you release two snaps. Knowing which version you have saves a lot of frustration because the release mechanics are slightly different.
Common reasons people need to remove it include: a firmware or hardware swap, cleaning the panel after dust buildup reduces charging efficiency, swapping the solar roof to the other side of the feeder for better sun exposure, or troubleshooting a charging fault. All of these are legitimate DIY jobs, and none require tools in normal conditions.
Check for birds before you touch anything
Bird Buddy feeders attract birds constantly, and if yours is pole-mounted or placed near vegetation, there is a real chance a bird has started nesting nearby or even using the feeder housing as a sheltered spot. Before you remove the solar roof, spend 60 seconds observing the feeder from a few meters away. Look for repeated entries, dried grass or nesting material visible around any gap, or a bird that flies directly at the feeder and does not just land on the perch.
This matters legally, not just ethically. Under the U.S. Migratory Bird Treaty Act, most songbirds and their active nests, eggs, and young are federally protected. Disturbing an active nest can constitute an illegal "take" even if unintentional. An empty nest (no eggs, no young) is not legally protected against removal under the MBTA, so if you find one you can clear it safely. But if the nest is active, stop and do not proceed until it is naturally vacated. Contacting your nearest USFWS Ecological Services Field Office is the right call if you are unsure.
- Watch the feeder for at least 60 seconds before touching it
- Look for nesting material tucked into any gap or along cable routes
- Listen for chick sounds if the feeder is enclosed or the solar roof has a gap
- If any bird repeatedly enters and exits, treat the nest as potentially active
- Active nest with eggs or young: do not remove the solar roof yet
- Empty nest: safe to clear and proceed with removal
- Unsure: contact your USFWS Ecological Services Field Office before proceeding
Also check the physical situation around the feeder. If it is pole-mounted at height or on a roof edge, treat this like any elevated work: wear non-slip footwear, use a stable step ladder rated for your weight, and have someone nearby. Do not rush the job. The solar roof is not going anywhere.
What you need before you start
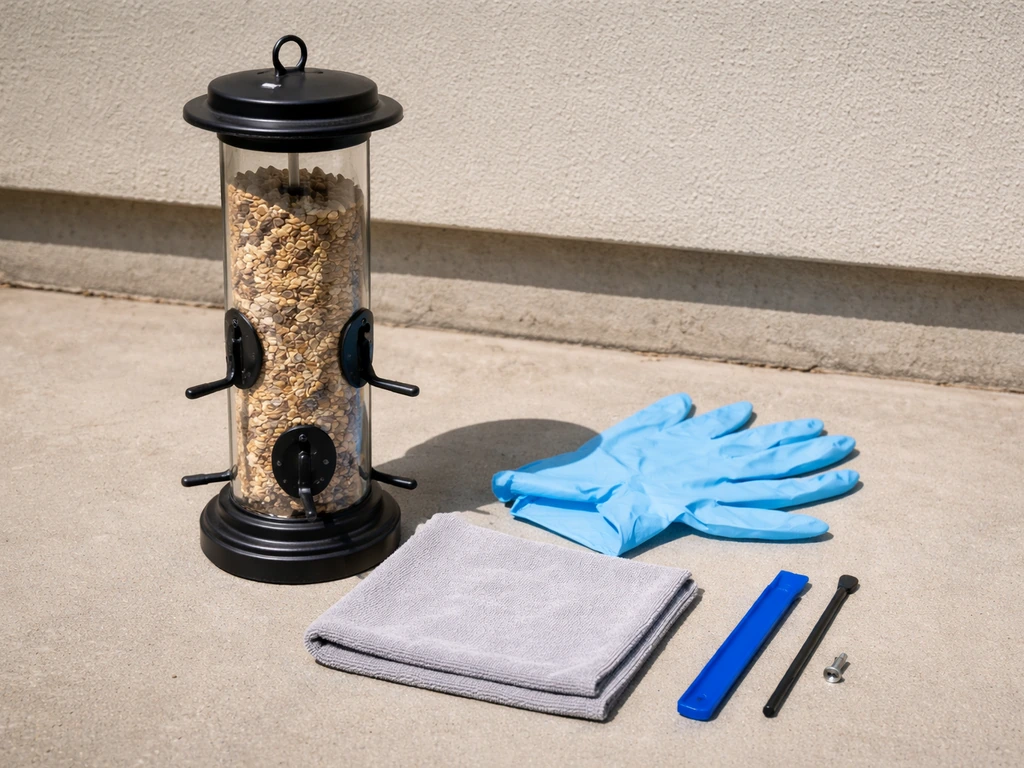
One of the best things about the Bird Buddy solar roof is that it was designed to be removed without tools. You should not need a screwdriver, drill, or pry bar for a standard removal. That said, having a few things on hand makes the job cleaner and protects the unit.
- Clean, dry hands or thin nitrile gloves (to protect the solar panel surface from oils)
- A soft cloth or microfiber towel (to set the solar roof on after removal)
- Mild dish soap and water in a small bowl (for cleaning the panel if needed)
- A well-lit workspace or good outdoor light (you need to see the USB-C port and cable clearly)
- The Bird Buddy app open on your phone (so you can confirm charging status after reinstall)
- Penetrating oil such as WD-40 (only needed if brackets or snap points appear corroded)
- A rubber-grip opening tool or spudger (only for stubborn snap-fits, not standard removal)
Before you go hands-on, open the Bird Buddy app and note the current battery and charging status. This gives you a baseline to compare after reinstallation. Also check whether you have the original Bird Buddy or the Bird Buddy 2, since the removal steps differ slightly at the snap-release stage.
How to remove the Bird Buddy solar roof, step by step
Work through these steps in order. Skipping the USB-C disconnect before trying to pull the solar roof is the most common mistake and the most likely way to damage the cable or the port.
Original Bird Buddy
- Bring the feeder to a stable, flat surface if possible. If it is pole-mounted, work at a comfortable height with a secure foothold.
- Locate the rear door of the feeder. Pull the rear door handle to open the panel and expose the interior access point.
- Slide the rear window panel out of its grooves carefully, moving it straight out rather than at an angle to avoid cracking the panel.
- Find the small 'duster' cap on the top of the camera module and remove it. This uncovers the USB-C port where the solar roof's cable is connected.
- Gently unplug the USB-C cable from the camera module port. Hold the connector, not the cable, when pulling to avoid stressing the joint.
- Untuck the USB-C cable from its routed position along the exterior of the feeder. It is tucked to resist weather, so ease it out gently rather than pulling sharply.
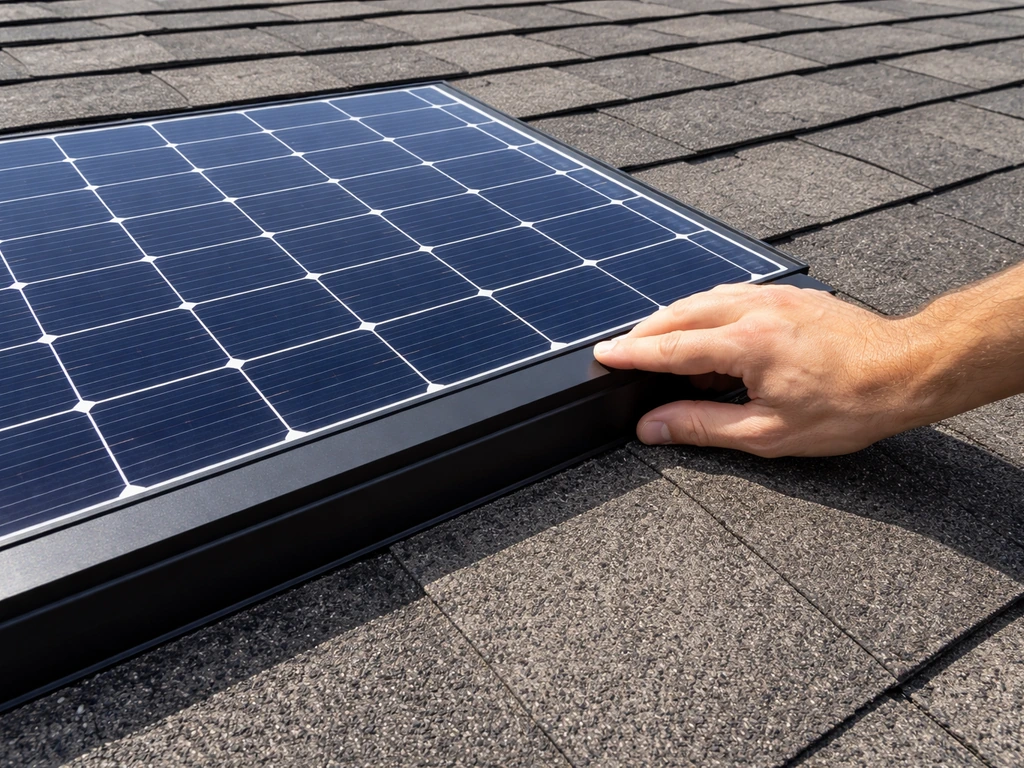
- With the cable free, grip the solar roof on both sides evenly and apply moderate, steady upward force. It is a snap-fit, so it will release with a click or a firm pop. Do not twist or lever it.
- Set the solar roof face-up on your soft cloth immediately after removal.
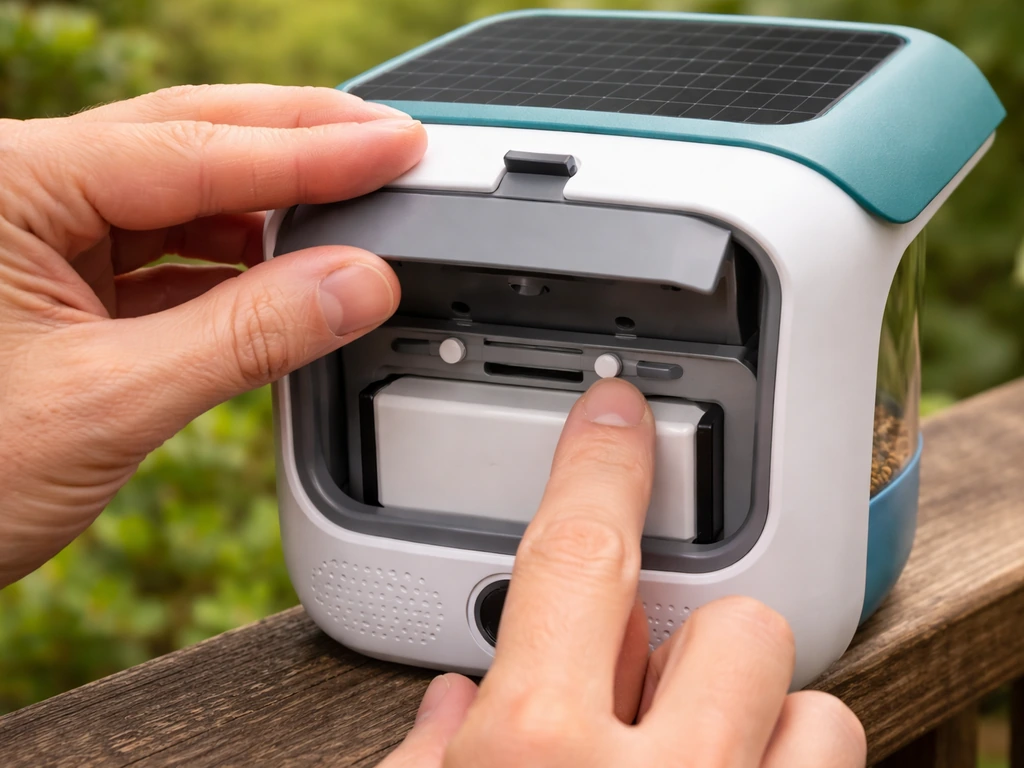
Bird Buddy 2
- Locate the two snaps on the solar roof and battery insert assembly. They are positioned on the sides of the insert housing.
- Press both snaps simultaneously with your thumbs and hold the pressure in while lifting the entire solar roof and battery insert upward as a unit.
- Once the insert is out of the main housing, locate the two release buttons on the battery and solar insert itself.
- Press those two buttons and lift the solar roof free from the battery insert.
- Disconnect the USB-C cable from the camera module port as described above if the cable remained attached.
- Set all components on your soft cloth in the order you removed them so reassembly is straightforward.
In both versions, the fit is intentional tight. Bird Buddy's own documentation notes that the solar roof coupling is designed to be snug and that moderate force is expected and normal. If it feels like it absolutely will not budge even with firm, even pressure, stop and go to the troubleshooting section below before applying more force.
Putting it back together, weatherproofing, and testing
Reinstallation is the reverse of removal, but a few steps deserve extra attention because they directly affect whether the feeder stays weather-tight and charges reliably.
- If you cleaned the solar panel, make sure it is fully dry before reinstalling. Water trapped between the panel and the feeder roof creates moisture issues over time.
- Route the USB-C cable so the connector faces toward the back of the feeder before you seat the solar roof. Bird Buddy is explicit about this cable orientation. Getting it wrong means the roof will not sit flush.
- Tuck the cable neatly along the exterior channel. The tuck is the weatherproofing for the cable connection, so take your time routing it correctly rather than leaving it loose.
- Align the solar roof with the feeder roof edge-to-edge and press down evenly with both hands until you hear or feel a distinct click. Do not press on one side only or the snap-fit will seat crooked.
- On Bird Buddy 2, lower the solar roof and battery insert into the main housing and press until both snaps click into place.
- Reinsert the duster cap over the USB-C port on the camera module.
- Slide the rear window panel back into its grooves, again moving it straight rather than at an angle.
- Close and secure the rear door.
- Place the feeder in direct sunlight for a few minutes, then open the Bird Buddy app and look for the lightning bolt icon and 'Charging' status on the battery indicator. That confirms the solar roof is connected and working.
If the cable feels slightly pinched between the solar roof and the hanging cord when you reinstall, that is normal. Bird Buddy notes the fit is very tight with the hanging cord present but that the plastic USB cable will not be damaged by slight pinching. Still, try to avoid a severe fold or sharp kink in the cable at the routing point.
Troubleshooting when it does not go smoothly
The solar roof will not release even with moderate force
First, confirm the USB-C cable is fully disconnected. A connected cable prevents the roof from separating from the feeder body and feels exactly like a stuck snap-fit. If the cable is free and the roof still will not budge, inspect the snap points for visible corrosion or debris. A thin application of penetrating oil around the snap point edges, left for five minutes, usually breaks the bond. Use a rubber-grip spudger (not a metal pry tool) to ease the joint open from one side before lifting. Never force it straight up with a sharp yank; you will crack the plastic housing.
Rust or corrosion on mounting hardware
If your feeder is pole-mounted and you see rust or corrosion on any bracket or mounting hardware when you access the feeder, do not ignore it. Light surface rust on steel hardware can be treated with penetrating oil and a soft wire brush. If the bracket itself is structurally compromised, cracked, or shows deep corrosion, replace it before remounting the feeder. A failing bracket on a pole-mounted feeder is a safety hazard, not just an aesthetic problem.
Adhesive or sealant residue on the snap points
Some users apply weatherproofing sealant around the solar roof edge as an extra precaution. If someone did this to your feeder and it has cured, you will need to carefully cut through the sealant bead with a thin plastic tool or a hobby knife before the snap-fit can release. Use minimal pressure and cut parallel to the feeder surface, not into it. Clean the residue from both surfaces with isopropyl alcohol before reinstalling so the snap-fit seats cleanly.
The solar roof goes back on but sits crooked or does not click fully
This almost always means the cable is not routed correctly and is bunching under one side of the roof. Remove the roof again, re-route the cable flat along the exterior channel, confirm the connector faces the rear of the feeder, and try again. Also check for any grit or debris in the snap channels and wipe them clean with a damp cloth before reseating.
No charging indicator after reinstallation
If the app does not show the lightning bolt icon after a few minutes of direct sunlight, go through this quick checklist: USB-C connector is fully seated in the camera module port, the duster cap is removed from that port, the solar panel surface is clean (dirty panels charge significantly less efficiently), and the feeder is in direct rather than indirect sunlight. If all of those check out and there is still no charging indication, the cable or solar panel itself may be damaged.
| Problem | Likely cause | Fix |
|---|---|---|
| Solar roof will not release | USB-C cable still connected, or corroded snaps | Disconnect cable first; use penetrating oil + spudger on snaps |
| Solar roof seats crooked | Cable routed incorrectly or bunching | Re-route cable with connector facing rear; reseat roof |
| No charging after reinstall | USB-C not fully seated, dirty panel, or cable damage | Reseat cable, clean panel, test in direct sunlight |
| Snap-fit won't click closed | Debris in channels or sealant residue | Clean channels with damp cloth; remove sealant residue with isopropyl alcohol |
| Rust on bracket hardware | Weather exposure over time | Treat light rust with penetrating oil; replace structurally compromised parts |
When to stop and call in a professional
Most Bird Buddy solar roof removals are genuinely DIY-friendly, but a few situations call for outside help. Know when to put the feeder down and make a call instead.
- Active nest with eggs or young birds inside or immediately adjacent to the feeder: stop all work and contact your nearest USFWS Ecological Services Field Office. Disturbing an active nest of a protected migratory species can be a federal violation.
- Visible structural damage to the feeder housing, cracked snap points, or a fractured camera module: contact Bird Buddy support directly. Forcing a damaged unit risks destroying it entirely.
- The feeder is mounted at significant height and the mounting hardware looks compromised: hire a handyman or building maintenance professional for the access work before you attempt any component removal.
- The USB-C port on the camera module is visibly bent, corroded, or the connector no longer seats: this is a hardware repair, not a DIY removal job. Contact Bird Buddy support for a replacement camera module.
- You live in a state with additional bird protection laws beyond the MBTA (California, for example, has state-level protections): check your local regulations or contact a local wildlife officer if you have any doubt about what is nesting near the feeder.
When you contact USFWS, have the following ready: your location, the species you observed if you can identify it, a photo of the nest if accessible, and a description of what work you need to do. They can tell you quickly whether you are in the clear or need to wait. It is a five-minute call that can save you a significant legal headache.
For equipment faults, Bird Buddy's support team is responsive and the documentation is detailed. Given that the solar roof removal is designed to be a snap-fit consumer procedure, if you are genuinely stuck after following every step here, the most likely explanation is a manufacturing defect or shipping damage that warrants a warranty claim rather than more DIY force.
If you are dealing with a broader bird problem around the feeder location, such as birds roosting on the mounting pole or nesting in nearby roof eaves, the work you do on the feeder itself is separate from those structural bird-proofing questions. If birds are roosting or nesting around the barn itself, use the right bird-proofing steps for the structure, not just the feeder bird-proofing a barn.
If you keep running into repeated issues around the feeder, focus on bird problem solving for the surrounding location too, not just the solar roof mechanics. If you are seeing a bird problem on the roof around the feeder location, focus first on the surrounding nesting or roosting areas. If you want the deeper steps on how to bird proof your house, focus on the entry points birds use around roofs, eaves, and mounting areas structural bird-proofing questions.
Those broader issues around rooftops, eaves, and building exteriors follow different approaches that go well beyond the Bird Buddy hardware. For broader roof and eave protection, you can also learn how to bird proof your roof so birds do not keep returning to the same spots. If birds are also getting into the home through nearby windows, you can use window bird-proofing methods like screens, decals, and netting to stop repeat landings bird proof windows.
For overall room bird-proofing, focus on blocking entry points, covering windows or vents, and removing attractants so birds cannot access the space bird-proof a room.
FAQ
How long should I wait in the app after reinstalling the solar roof before deciding it is still not charging?
Before you start, make sure the feeder is not actively in a “charging transition” state (for example, the app shows no charging icon and the battery level is stable for a few minutes). If the app is actively updating, unplugging or reseating the USB-C can temporarily pause charging indicators, so wait 2 to 5 minutes after the cable is seated and the roof is latched to confirm the lightning bolt returns.
What should I do if I notice moisture or condensation around the USB-C connection after removing the solar roof?
If you see condensation under the solar roof after removal, do not reinstall immediately. Let the camera module area air-dry (at least 30 to 60 minutes in a dry, shaded place) and check that the USB-C connector faces the correct direction before snapping the roof back on, since trapped moisture can prevent a reliable USB-C seat.
Can I remove and reinstall the solar roof multiple times without damaging the USB-C cable?
Yes. If you need to remove it repeatedly, install and remove it in a way that keeps the cable routed along the exterior channel each time, and inspect the connector housing for any bent metal contacts or frayed cable jacket. Stop using it and contact support if you notice intermittent charging even when the connector is fully seated.
What if I suspect a nest is active but I cannot see eggs or young clearly?
If a bird is nesting but you cannot easily confirm whether eggs or young are present, treat it as active. Move the feeder to a safer, lower-access position only if doing so would not expose the nest further, then pause removal until you can verify vacancy or get guidance from the appropriate authority.
What’s the best way to recover if I reconnected the USB-C and the roof still will not snap flush?
If you accidentally reconnect the USB-C while the roof is partially latched or under tension, you can stress the connector and cable. Disconnect again, fully re-route the cable flat, then seat the USB-C connection and finally press the snap points closed evenly on both sides.
What should I use to clean the solar panel, and what cleaners should I avoid?
Don’t clean the panel with household solvents, glass cleaners, or abrasive wipes. Use a soft cloth and, if needed, a small amount of water or isopropyl alcohol on the cloth (not pooled on the edges), then let it fully dry before reinstalling to avoid water wicking into the housing seams.
Is penetrating oil safe to use on the snap points, and can it affect charging or weather sealing?
If you must use penetrating oil for stubborn snap points, apply it sparingly around the snap edges, then wipe excess off the surrounding plastic and let it sit only briefly as directed. Avoid flooding into the USB-C area or leaving oil on the solar panel surface, since residue can interfere with sealing and charging.
How can I avoid cracking the plastic housing when snapping the solar roof back on?
For the strongest “snug but not forced” seating, press the snap points in an even left-right pattern rather than pushing one corner at a time. If you feel resistance at the same snap location repeatedly, stop and check for grit or a misrouted cable, because repeated uneven pressure is the main cause of cracked housings during DIY installs.
When I move the solar roof to the other side for more sun, what checks ensure the cable routing and charging are correct?
If you are swapping the solar roof to the other side, you should confirm the cable has enough slack and that the connector is routed so it does not form a sharp bend at the roof edge. After switching sides, check charging in direct sunlight for a few minutes, because the app baseline battery level may make it look unchanged at first.
Are there any safety do’s or don’ts if my Bird Buddy is mounted high on a pole?
If the feeder is pole-mounted, set it up so you can keep both hands free, and avoid leaning your body over the snap joint. Use a step ladder on stable ground, and if you cannot maintain balance comfortably, do not proceed, place the feeder down safely if possible, and ask for help.
Next Article
What Is a Bird Stop on a Roof? Types and Installation
Bird stop on a roof explained with types, how to identify the right one, and step-by-step safe installation and maintena