To bird-proof your house, start by walking the entire exterior to find every gap, crack, open vent, and damaged soffit where birds can squeeze in, then seal or screen each one with the right hardware. This guide shows how to bird-proof windows so birds cannot enter or nest there.
How to Bird Proof Your House: Step-by-Step Plan

Maya Carver
3 May 2026
For most homes that means installing 1/2-inch welded wire mesh or hardware cloth over vents and eave gaps, using expanding foam or caulk for smaller cracks, and adding chimney caps and door sweeps where needed. If birds are already inside or actively nesting, handle that first before you start blocking anything up. If you suspect birds are already inside, you will need to bird-proof after the birds have left and the area is safe.
Quick emergency actions when birds are inside or nesting
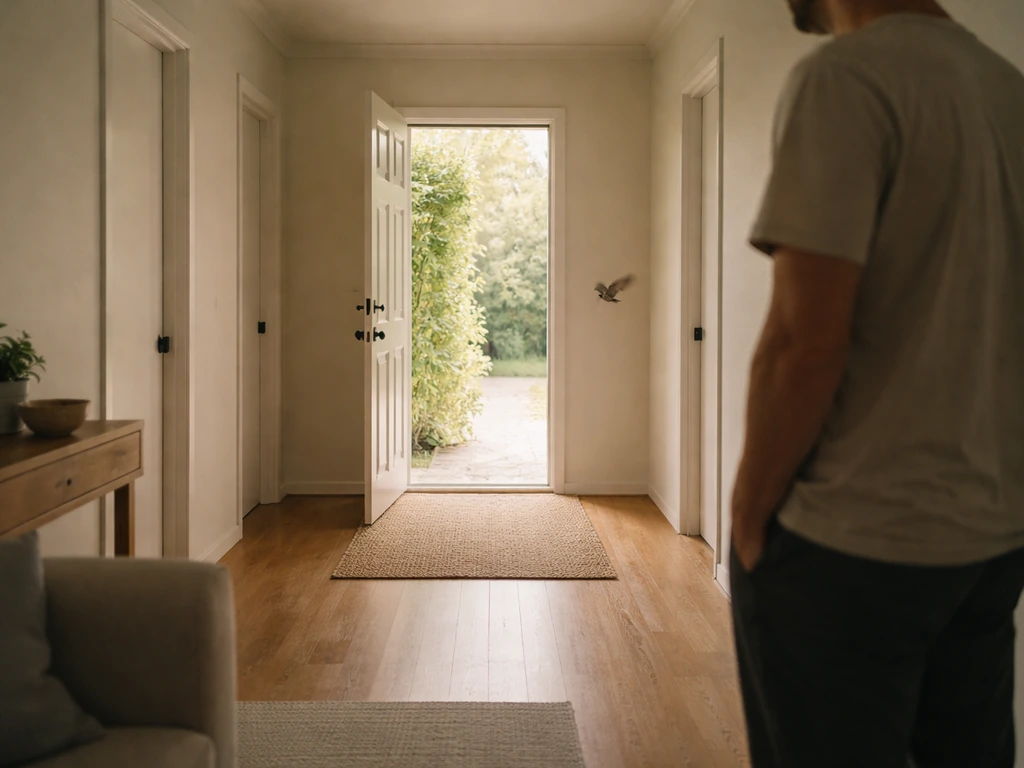
If a bird is actively flying around inside your house, stay calm and work quickly. The goal is to give it one clear exit and get out of its way. Close every internal door to confine the bird to one room, then open the largest window or exterior door in that room and stand back. Turn off interior lights so the bird orients toward natural light outside. Most birds will find the opening within a few minutes once the room is quiet.
If the bird is dazed from a window strike or is clearly injured, place it gently in a shoebox or ventilated cardboard box lined with paper towels, put the lid on, and set it somewhere dark, quiet, and away from pets. A bird stunned by a window collision often recovers within 20 to 30 minutes. Once it appears alert and upright, take it outside and open the box at ground level. If it cannot stand or fly after an hour, contact a licensed wildlife rehabilitator.
For a very young bird (no flight feathers, eyes barely open), do not remove it from the building yet. Contact a wildlife rehabilitator or your local animal control before touching it. Most nestlings cannot survive without the parent, and handling them without guidance often does more harm than good.
If you discover an active nest with eggs or chicks, stop what you are doing. Under the federal Migratory Bird Treaty Act, it is illegal to disturb, move, or destroy the nest of a protected migratory bird once eggs are present. That covers almost every common songbird you are likely to encounter. You need to wait until the nesting cycle is complete (typically 2 to 6 weeks depending on species) before sealing that entry point. Mark the spot, note the date, and plan your exclusion work for after the birds have left.
- Close interior doors to confine a loose bird to one room
- Open one large exterior window or door and dim interior lights
- Never chase or grab a flying bird — let it find the exit on its own
- Dazed bird: dark box, quiet location, away from pets, release when alert
- Injured or orphaned bird: call a wildlife rehabilitator before handling
- Active nest with eggs or chicks: do not disturb — wait for nesting to finish
- Wear gloves and a dust mask if you are cleaning up droppings in the meantime
Bird-proofing inspection checklist
Before you buy a single product, walk your entire building systematically. Birds find entry points that even experienced homeowners overlook. Do this inspection from the ground first with binoculars, then use a ladder for any suspicious spots. Bring a flashlight, a notepad, and your phone for photos. You are looking for three things: active entry points, roosting ledges, and nesting hotspots.
Exterior entry points to check
- Roof vents and attic louvers: check for missing screens or bent mesh
- Soffits and fascia boards: look for gaps where the soffit meets the wall or roofline, and check for rot or missing sections
- Ridge vents: look for open ends or damaged covers
- Chimneys: confirm a cap and/or spark arrestor is in place and intact
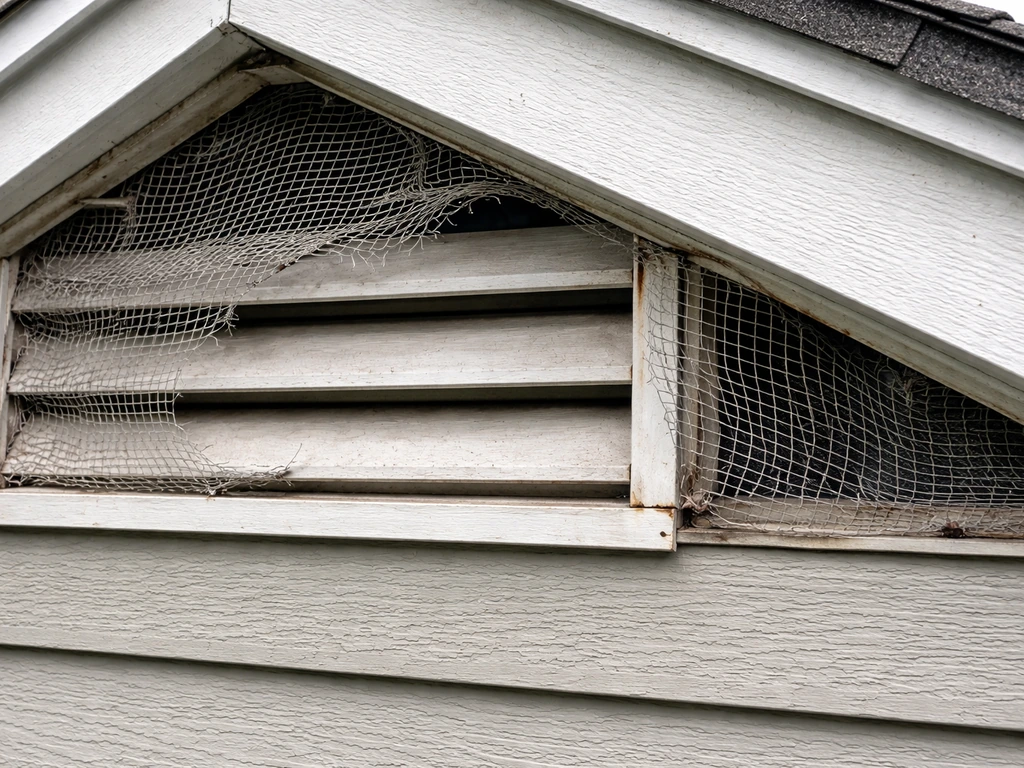
- Gable vents: inspect screen condition from inside the attic
- Dryer, bathroom, and kitchen exhaust vents: check that the damper flap opens and closes freely and that no gap exists around the collar
- Gaps around pipe penetrations, electrical conduit, and HVAC lines through the wall
- Damaged or missing caulking around window and door frames
- Open eave returns and overhangs with wide gaps
- Any place where two different materials meet (e.g., stucco-to-wood, siding-to-trim)
Roosting and nesting hotspots
- Flat or low-slope roof surfaces and parapet ledges
- Porch rafters, beam ends, and decorative corbels
- Behind security lights, sign brackets, and HVAC equipment on exterior walls
- Window ledges and AC unit tops
- Gutters with standing debris
- Dense shrubs or vines growing against the building
For any gap you are not sure is active, stuff a loose wad of newspaper into it and check back in 48 to 72 hours. If the paper has been pushed out or disturbed, something is using that hole. This simple test from wildlife control practice saves you from sealing a bird inside a wall cavity.
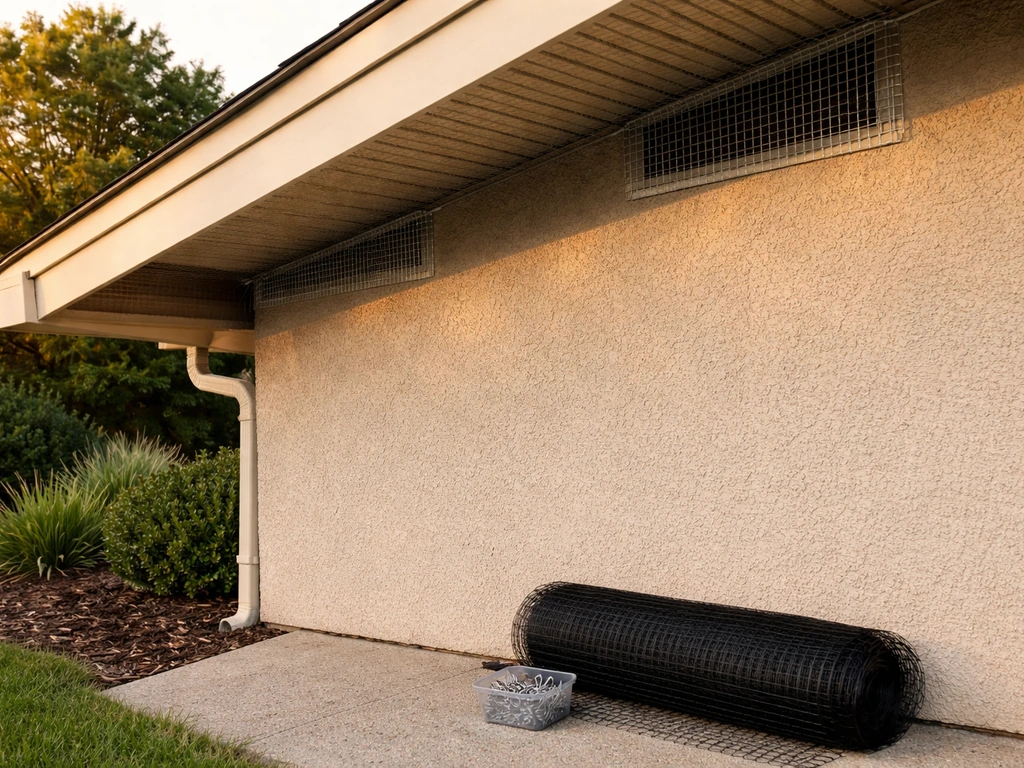
Block access safely: sealing, exclusion screens, and hardware choices
The exclusion hardware you choose matters as much as where you install it. Using the wrong material means birds will find their way back within a season or two. Here is a breakdown of the main options and where each one works best.
| Material | Best use | Key spec | Notes |
|---|---|---|---|
| Welded stainless steel mesh | Vents, eave gaps, larger openings | 1/2-inch square, 18-gauge wire | Most durable; resists rust and bird pressure; use for permanent installs |
| Galvanized hardware cloth | Gable vents, chimney bases, one-way doors | 1/4-inch or 1/2-inch openings | Less expensive than stainless; can corrode in coastal climates over time |
| Chimney cap / chimney guard | Chimney flues, fireplace openings | 18-gauge galvannealed steel mesh | Slip-in models available for quick retrofit; stops starlings and sparrows reliably |
| Foam backer rod + exterior caulk | Cracks under 1/2 inch, utility penetrations | Paintable polyurethane or silicone caulk | Not for active bird gaps — birds can pick through foam alone; use behind mesh |
| Expanding foam (sealant) | Void fill behind mesh barriers | Closed-cell type | Use as a filler inside the gap, then cover the face with mesh or trim |
| One-way exclusion door | Active entry hole while birds are still inside | Hardware cloth or plywood frame | Allows birds to exit but not re-enter; remove and seal permanently after 3-7 days |
For most vent openings, cut your mesh panel slightly larger than the opening, fold 1-inch tabs on the edges, and fasten with stainless screws or pop rivets into the surrounding frame. Avoid staples outdoors, they back out within a couple of seasons. For eave gaps, cut the mesh to fit and secure with self-tapping screws into the fascia board. If the fascia is rotten, repair or replace it first, or the fix will not hold.
For a chimney, the easiest solution for most homeowners is a slip-in chimney guard made with 18-gauge galvannealed steel mesh. These drop into the flue without masonry work and keep starlings and sparrows out year-round. If you also use the fireplace, choose a model that includes a spark arrestor.
If birds are currently using a hole and you need to evict them before sealing, build or buy a one-way door. A basic version is a cone of 1/4-inch hardware cloth that fits over the entry point: birds push through and exit, but cannot angle their way back in. Leave it in place for 3 to 7 days (not during nesting season), then remove it and seal the gap permanently. Because you have a solar roof, the safe way to remove or work around it depends on the unit model and your bird-exclusion plan remove a solar roof.
Stop roosting and remove attractants
Exclusion blocks entry, but if your building is full of appealing ledges, food, and shelter, birds will keep trying. Reducing attractants is the other half of the job.
Physical deterrents for roosting ledges
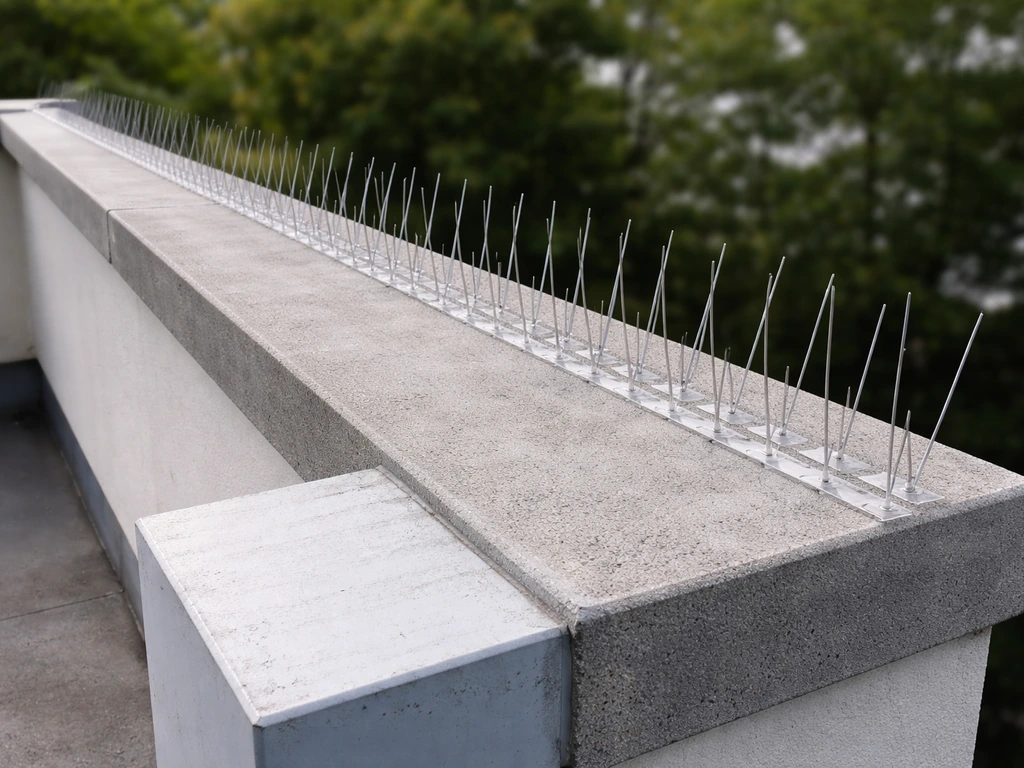
Bird spikes work on flat ledges, parapet tops, and beam ends where pigeons and starlings consistently roost. They do not harm birds, they simply make the surface uncomfortable to land on. Stainless steel spikes last longer than plastic; plastic can become brittle and blow off within a few years. Install them so the base covers the full depth of the ledge, with no gaps between strips where a small bird could tuck in.
Netting is the most complete solution for large open areas like loading docks, covered parking structures, or barns. For the same reason, applying bird netting on a barn can be an effective way to protect rafters and prevent birds from getting inside. It physically blocks birds from reaching rafters or ledges. Use a UV-stabilized polyethylene net rated for bird exclusion and anchor it securely, poorly tensioned netting can trap birds rather than exclude them, which is the opposite of what you want.
Repellent gels marketed for pigeons and starlings can reduce bird visits on ledges, but research shows they do not achieve complete exclusion. Birds habituate to them over time and effectiveness drops. If you use gel, treat it as a short-term supplement to physical exclusion, not a standalone fix. Some EPA-registered formulas exist for pigeons and starlings specifically; check registration status before purchasing.
Cleaning up droppings safely
Bird droppings are more than a cosmetic problem. Accumulated waste can cause indoor air quality issues and carries real health risks if you dry-sweep or vacuum it dry. Always wet the area first: apply a disinfectant solution and let it soak for several minutes before wiping or scraping. Wear an N95 respirator (not just a dust mask), nitrile gloves, and eye protection. Bag waste in heavy plastic and dispose of it as solid waste. For large accumulations in an attic or crawl space, this is a job for a professional remediation crew.
Landscaping and food sources
- Trim trees and large shrubs so branches do not overhang or touch the roofline — overhanging branches are a bridge to your roof
- Remove dense ivy or climbing vines from exterior walls; they are prime nesting habitat right against your building
- Clean gutters at least twice a year to eliminate standing water and debris that birds use for nesting material
- Move bird feeders at least 30 feet from the building, or remove them entirely if you have a persistent problem
- Secure compost bins and garbage cans with tight-fitting lids
- Fix any dripping outdoor faucets or low spots that collect water on flat roofs — birds need water and will return where they find it
DIY bird-proofing plan by building area
Work through the building systematically, from top to bottom. Do not skip to an easier area first and come back to the roof later, birds that are excluded from a roof gap often find a lower entry point and you end up chasing the problem down the wall. If you want to expand beyond vents and eaves, see how to bird proof your roof for the specific roofline steps and materials to use.
If you suspect a bird problem on roof vents or eaves, start your exclusion work at those top entry points first. If birds are getting onto your roof, you may be dealing with a bird stop or exclusion strip designed to prevent them from landing on roof edges and ledges.
Roof and ridge
- Inspect ridge vents from the attic and outside — check for open ends and gaps between the vent cover and the roof deck
- Install ridge vent end caps (plastic or metal) and confirm the vent body has intact mesh baffles
- Check for lifted or missing shingles near the ridge; repair them before birds find the gap underneath
- Look at any roof penetrations (plumbing stacks, electrical masts) and seal the collar with flashing plus roof caulk if the boot is cracked
Soffits and fascia
- Walk the full perimeter at ladder height and probe every soffit panel seam — vinyl soffit in particular can sag, creating a gap at the wall
- Replace any rotten fascia board before installing exclusion mesh; rotted wood will not hold fasteners
- Cover open eave returns (the gap where the soffit meets the wall) with 1/2-inch welded wire mesh cut to fit and screwed into the fascia and wall framing
- Seal the joint between the top of the fascia and the roof deck with caulk after the mesh is in place
Vents (attic, gable, dryer, bathroom, kitchen)
- Attic and gable vents: cut 1/2-inch stainless or galvanized mesh to overlap the vent frame by 1 inch on all sides, and fasten with stainless screws — do not rely on the vent's built-in screen alone, they are often too coarse
- Dryer and exhaust vents: replace any louvered cap missing its damper flap; use a pest-resistant cap model with a built-in cage guard
- Check that the duct collar is sealed to the wall with metal HVAC tape — gaps around the duct are a common entry point for sparrows
Chimney
- Confirm a chimney cap is installed and the mesh screen is intact — look for holes or rust
- If the cap is absent, install a slip-in chimney guard with 18-gauge galvannealed steel mesh before the next nesting season (chimney swifts nest in chimneys and are federally protected once they arrive)
- Check the mortar crown at the top of the chimney for cracks; birds and water both enter through the same gaps
Windows and doors
- Add or replace door sweeps on all exterior doors — a 1/4-inch gap at the bottom is enough for a small sparrow to enter
- Check the caulk bead around every window frame where it meets the siding and replace any that is cracked or missing
- Install window screens on any window you leave open regularly; repair tears immediately
- Consider window film or external screens on large glass panels if you are getting frequent window strikes — this also helps dazed birds and is covered in more detail in a related guide on bird-proofing windows
Porches, decks, and attached structures
- Check open porch ceiling junctions where a rafter tail meets the exterior wall — swallows and sparrows nest here repeatedly if left open
- Install bird spikes or angled slope guards on top of porch beams and ledges where pigeons roost
- Close any gap behind light fixtures, camera mounts, or sign brackets with caulk and a backing plate
- For open-rafter porches, consider stapling bird netting across the top of the porch interior if birds keep nesting in the rafters
Seasonal timing and maintenance schedule
Timing your work correctly is just as important as doing it right. If you seal a gap during active nesting, you risk trapping birds inside or separating chicks from parents, both of which are harmful and potentially illegal. Here is how to plan your year.
| Season / Month range | What is happening | What you should do |
|---|---|---|
| Late summer to early fall (Aug-Oct) | Most nesting is finished; birds are not yet returning to overwinter roosting sites | Best window for full exclusion work: inspect, repair, and seal all entry points now |
| Late fall to winter (Nov-Feb) | No nesting activity; some species roost in large groups in attics and soffits | Install remaining exclusions; apply spike/netting deterrents; use one-way doors to evict roosting birds if needed |
| Early spring (Mar-Apr in Southeast; Apr-May in Northeast) | Migratory birds return; nesting begins earlier in warmer climates | Finish any remaining exclusion work before birds scout nesting sites; do not start if you spot birds investigating a gap |
| Active nesting season (varies by region and species, roughly Apr-Jul) | Eggs and chicks present in nests | Do NOT disturb active nests; monitor and document; plan exclusions for post-fledging |
| Year-round | Ongoing maintenance | Inspect after every major storm; clear gutters spring and fall; check mesh fasteners annually |
Nesting season timing shifts by region and species. As a general rule, long-distance migrants start nesting roughly one month later for each step north: mid-April in the Southeast, mid-May in the Northeast. House sparrows and pigeons, which are not protected migratory species, can nest year-round in warm climates, so do not assume you are automatically clear in winter for those birds.
The highest-risk period to accidentally trap birds is March through July. If you are reading this in spring and birds are already investigating a gap you want to seal, use the newspaper test first and check for activity. If in doubt, wait two weeks and check again before sealing.
When to stop DIY and call a professional
Most residential bird-proofing is straightforward DIY work, but there are specific situations where you need to stop, put the tools down, and pick up the phone.
Protected species and legal limits
The Migratory Bird Treaty Act protects nearly all native songbirds, swallows, swifts, woodpeckers, and many other species. Their nests, eggs, and chicks cannot be touched without a federal permit, and violations carry serious penalties. House sparrows, European starlings, and pigeons (rock doves) are not protected under the MBTA, but virtually everything else you are likely to encounter around a house is.
If you discover a nest and are not sure whether the species is protected, treat it as protected until you confirm otherwise. The USFWS administers more than 20 permit types for activities involving migratory birds, and 50 CFR §21.14 specifically addresses birds in buildings that create health or safety hazards. If you have a situation where birds are actively preventing normal use of a building, a licensed wildlife control operator (WCO) or pest management professional with migratory bird permits can act under that provision in ways a homeowner legally cannot.
Situations that need professional help
- Active nest with eggs or chicks of any protected species — do not disturb; call a WCO or wildlife rehabilitator
- Large roost colonies (hundreds of birds) producing significant accumulations of droppings — remediation is a health hazard job
- Chimney swifts nesting in a chimney — strictly protected, cannot be evicted during nesting; a pro can advise on timing and legal options
- Birds inside a wall cavity that you cannot safely access without structural work
- Any attic or crawl space with heavy contamination from droppings — professional cleaning and PPE required
- You are working more than one story off the ground on a steep roof — fall risk outweighs DIY savings
- The building has historical or heritage designation that restricts what materials you can attach to the exterior
What to tell the professional when you call
- Describe the species if you can identify it, or describe the size and markings
- Tell them whether there is an active nest and whether you have seen eggs or chicks
- Note how long the problem has been occurring and what entry points you have already identified
- Mention any exclusion work you have already done so they do not duplicate it
- Ask specifically whether the operator holds a federal or state migratory bird permit if a protected species is involved
For a bird that is simply lost inside the house with no nest involved, animal control or a local wildlife rehabilitator can often advise by phone and you may not need anyone to come out at all. For a bird that is simply lost inside the house with no nest involved, animal control or a local wildlife rehabilitator can often advise by phone as part of bird problem solving and you may not need anyone to come out at all. For persistent structural problems, large-scale roosting, or anything involving a protected species actively nesting in your building, a licensed WCO is worth the cost and keeps you on the right side of the law.
FAQ
What’s the biggest mistake people make when trying to bird proof your house?
Bird-proofing works best when you combine exclusion and attractant control. If you only seal holes, birds may still roost on nearby ledges and find a new entry point, so also reduce accessible food (seal trash, stop leaving pet food outside) and remove nesting materials from eaves and rooflines after each inspection.
Can I seal a gap if birds are just hanging around, or do I need to wait for a nest to be obvious?
First confirm whether there’s nesting activity at the specific spot, not just nearby. Use the newspaper check on the gap, and if you see disturbance, wait until the nesting cycle finishes before sealing. If you’re unsure of the species, treat it as protected and avoid sealing until you can verify no active nest is present.
Will expanding foam and caulk by themselves stop birds from getting in?
Do not rely on foam or caulk alone for larger openings. Expanding foam and caulk can fill some cracks, but birds often reopen or bypass soft materials, so use hardware cloth or mesh for vents, eaves, and soffit-style openings, and only use sealants as secondary gap fillers around the edges.
How long should I leave a one-way door in before sealing permanently?
If you find active birds using an entry point, install a one-way exit device and keep it in place long enough to ensure birds have fully left. A common range is 3 to 7 days, but you should also re-check for return activity (fresh droppings, disturbed newspaper, or new scratches) before you remove the device and permanently seal.
How do I prevent netting from trapping birds instead of excluding them?
Netting and mesh both require correct anchoring and tension. Poorly tensioned netting can create loose areas where birds can get trapped or reach inward, so ensure the net is taut, securely fastened to structural members, and cut edges are tucked or bound so birds cannot slip underneath.
What should I check after installing screens or mesh so birds don’t come back?
For window or vent screens, use material that cannot be easily deformed. A practical rule is to choose welded wire mesh or hardware cloth rated for bird exclusion and fasten it so there are no serviceable gaps around the perimeter, then periodically inspect after storms because loose fasteners are a common failure point.
Is it safe to clean bird droppings by dry sweeping or vacuuming?
Wet waste is important because dry cleanup can aerosolize droppings and increase exposure risk. If the droppings are in a tight attic or crawl space with poor ventilation, consider a professional remediation crew, especially when there’s extensive accumulation or strong odor that suggests buildup behind surfaces.
What’s the safest approach if a bird is flying around indoors after hitting a window?
If a bird hits a window, do not handle it immediately unless it’s injured. Give it a clear exit by opening one exterior door or the largest window in the room, keep the room quiet, and turn off interior lights so it orients to daylight. Only box it if it’s dazed or injured and cannot recover quickly.
What if I’m not sure whether a bird is inside, and I want to seal an exterior entry point?
If you suspect a bird is in the house but you cannot locate it, still avoid sealing exterior entry points that might trap it inside. Instead, focus on confining the bird to a room using closed interior doors and creating an exit, then only do exterior sealing after you confirm the bird is out and the entry point is inactive.
Do I handle a baby bird I find under an eave, or should I leave it alone?
If you encounter nestlings that cannot fly (for example, barely open eyes or no flight feathers), pause all DIY exclusion and contact local animal control or a wildlife rehabilitator. Handling nestlings can separate them from parents, and waiting is often the difference between survival and mortality.
When should I stop DIY bird-proofing and call a wildlife control operator?
If the birds are preventing normal building use or you have a covered, ongoing conflict like repeated entry through protected-species nesting, a licensed wildlife control operator with the proper permits may be able to act under specific legal provisions. For homeowners, the safest decision aid is: stop work on that entry point and call a permitted professional if you see eggs, chicks, or a species you cannot confidently identify as unprotected.
Do bird spikes eliminate the need for sealing gaps?
Bird spikes and similar deterrents work only on the surfaces where birds land, and they do not fix entry holes. Use them as a complement to exclusion hardware, and install so the base fully covers the ledge depth with no gaps, since small birds can slip in at strip seams.
What’s a practical way to time exclusion work if I’m starting during spring?
Timing matters, so confirm local nesting windows and then plan to do exclusion after the highest-risk period. If you’re sealing in spring and birds are investigating, use the newspaper test first, then wait and re-check before sealing if you see any signs of active use.