To bird-proof a barn, you work through a four-stage process: stop active entry, inspect every gap and roost site, install physical exclusion barriers (hardware cloth, netting, one-way doors, and sealed vents), then clean up and maintain. The fastest wins come from closing large openings first, installing one-way doors on active entry points, and timing your exclusion work to avoid trapping birds or disturbing protected active nests. Done right, a barn can go from a full-time pigeon or starling hotel to a clean, bird-free structure in a few weekends.
How to Bird Proof a Barn Step by Step Guide

Maya Carver
18 May 2026
Quick response: stop the problem safely today
If birds are actively inside your barn right now, the priority is to reduce the problem without trapping birds or destroying any active nests (more on the legal side of that below). more on the legal side of that below how to bird proof your house. Here is what to do in the next 24 to 48 hours.
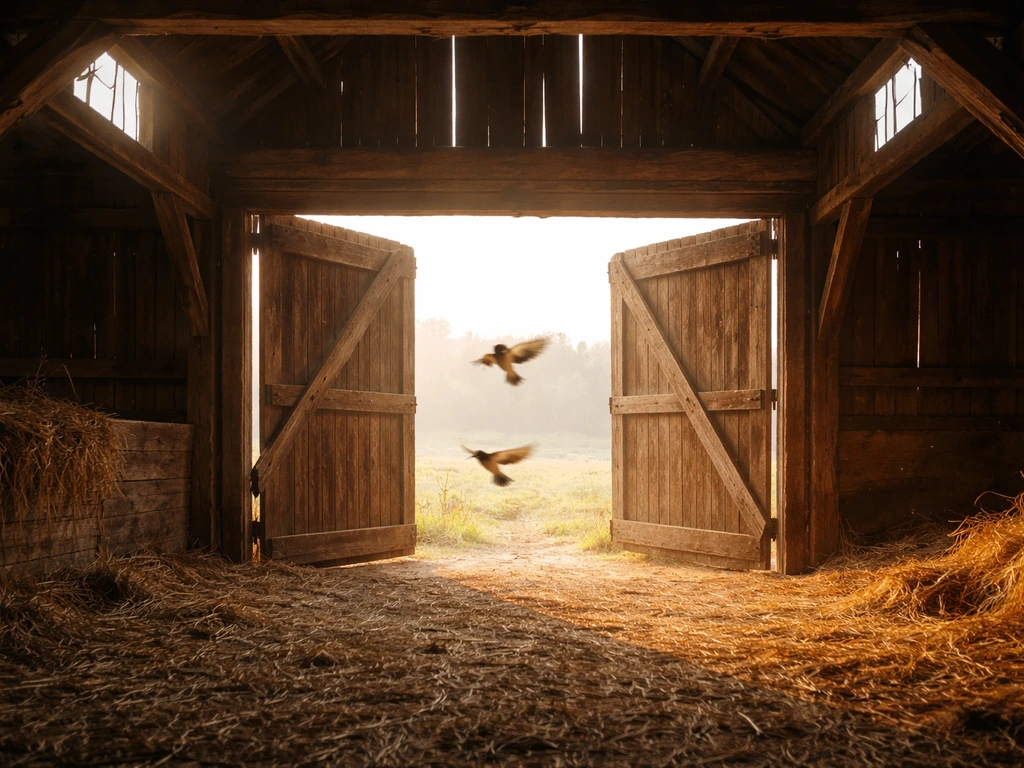
- Open as many exits as possible. Prop barn doors wide open, open any windows or vents that swing out, and let birds find their own way out. This works best in daylight hours when birds naturally move toward light.
- Do not use glue boards, adhesive traps, or sticky gels on birds themselves. Federal regulations under 50 CFR § 21.14 explicitly prohibit capture methods likely to harm migratory birds, including adhesive devices.
- Put on your PPE before entering. At minimum: an N95 or P100 respirator, disposable gloves, safety glasses, and old clothes you can bag afterward. Bird droppings can carry histoplasmosis, cryptococcosis, and other pathogens.
- Identify whether nests are active. Look for eggs, chicks, or adult birds sitting tight on a nest. If you find an active nest, do not move or destroy it. Mark the location and work around it for now.
- Block off secondary entry points temporarily. Stuff large, obvious gaps with hardware cloth, foam backer rod, or even crumpled chicken wire as a temporary measure while you plan a proper fix. Do not permanently seal any gap that still has birds using it as an exit.
- Turn off interior lights at night and place a single bright light near the main exit. Birds orient toward light, and this simple trick pushes remaining birds toward the open door.
Once birds have vacated (or are confirmed gone from a specific section), you can begin permanent exclusion work. Never seal an entry point shut while birds are still inside. One-way exit doors are the right tool for active situations, and the section on DIY fixes explains exactly how to install them.
Inspect like a pro: find entry points, roost sites, and nesting areas
A thorough inspection before you buy a single roll of hardware cloth saves money and avoids redoing work. Spend an hour doing this properly, ideally at dusk when birds are flying back in, because that reveals exactly which gaps they are using.
What to look for outside
- Gaps where the roofline meets the walls (the eave-fascia joint is the single most common entry on older barns)
- Ridge vents, gable vents, and soffit vents without screens or with damaged screens
- Loose or missing boards, especially near the peak of gable ends
- Gaps around utility penetrations: electrical conduit, water pipes, exhaust fans
- Door and sliding door tracks with daylight visible above or beside the door panel
- Gaps around loft hatches and hay chute openings
- Staining (white droppings streaks) on siding directly below a gap is a reliable marker
What to look for inside
- Roost lines: rows of droppings on beams, ledges, and hay storage edges indicate preferred perch spots
- Nesting material (straw, feathers, string) packed into beam joints, vent openings, or machinery
- Ammonia smell stronger in specific areas, pointing to high-use roost concentrations
- Light visible through gaps when you stand inside with the main doors closed
- Feathers, egg fragments, or fledgling birds on the floor below beams
Map what you find. A simple sketch of the barn footprint with entry points marked saves enormous time when you move to the exclusion phase. Number each gap, note its approximate size, and record whether it currently has active use (fresh droppings) or old use (dried, whitened droppings). This also helps you prioritize: fix the high-traffic gaps first.
Safety notes for the inspection itself
Old barn structures can have soft flooring in lofts, unstable ladders, and poor lighting. Use a work light rather than a phone flashlight, test every floor joist before walking in an attic or loft space, and never work alone at height. A ladder standoff bracket keeps your ladder off the siding and improves stability when checking eaves. If you are checking a roof ridge, use a roof harness rated for fall arrest.
Humane deterrents vs exclusion: what works and what to avoid
There are two broad categories of bird-proofing tools: deterrents (which discourage birds from landing or roosting) and exclusion (which physically prevents access). Exclusion is almost always more reliable, but deterrents have a genuine supporting role on large structures where full exclusion is impractical.
| Method | How effective | Best use case | Avoid if |
|---|---|---|---|
| Hardware cloth / wire mesh | Excellent (permanent) | Sealing gable vents, eave gaps, openings under 12 inches | Gap is actively used and birds haven't yet exited |
| Heavy-duty bird netting (UV-stabilized) | Excellent for large spans | Sealing open gable ends, hay loft openings, large doorway tops | Mesh is too wide (use 19mm or smaller for starlings, sparrows) |
| One-way exclusion doors | Excellent for active entry points | Any confirmed active entry gap where birds still use it daily | Nest with eggs/chicks is still active inside |
| Bird spikes (stainless steel) | Good for ledges and beams | Preventing perching on flat horizontal surfaces inside | Nesting has already started in the location |
| Optical gel / visual deterrents | Moderate, short-term | Supplementing exclusion in high-value areas | Used as the only method; birds habituate within weeks |
| Ultrasonic devices | Poor to marginal | Very limited indoor use in small enclosed spaces | Large open barns; birds ignore them quickly |
| Fake owls / predator decoys | Poor (habituate fast) | Initial short-term discouragement only | Left stationary; birds learn they are not real within days |
| Glue boards / adhesive traps | Illegal for birds | Never | Always: prohibited under federal regulation |
The recommendation here is straightforward: use exclusion as your foundation and layer in deterrents only where exclusion has a gap. A barn with every opening physically closed does not need any deterrents. A barn where you still have a large open working entrance (like a drive-through hay door) benefits from bird spikes on interior beams and optical deterrents near the opening while you work on a longer-term fix like a door curtain or netting panel.
DIY barn proofing fixes: sealing, screens, vents, doors, and openings
This is the hands-on section. Work through your inspection map gap by gap, starting with the highest-traffic entry points and working down to smaller cracks. The materials list below covers the most common barn scenarios.
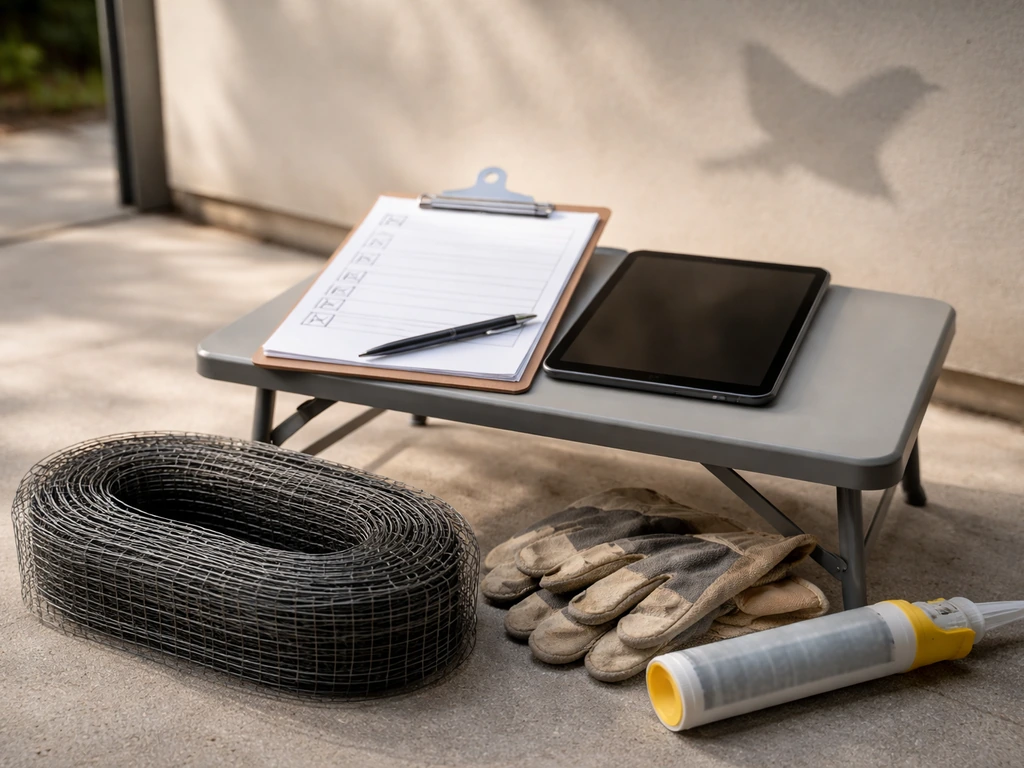
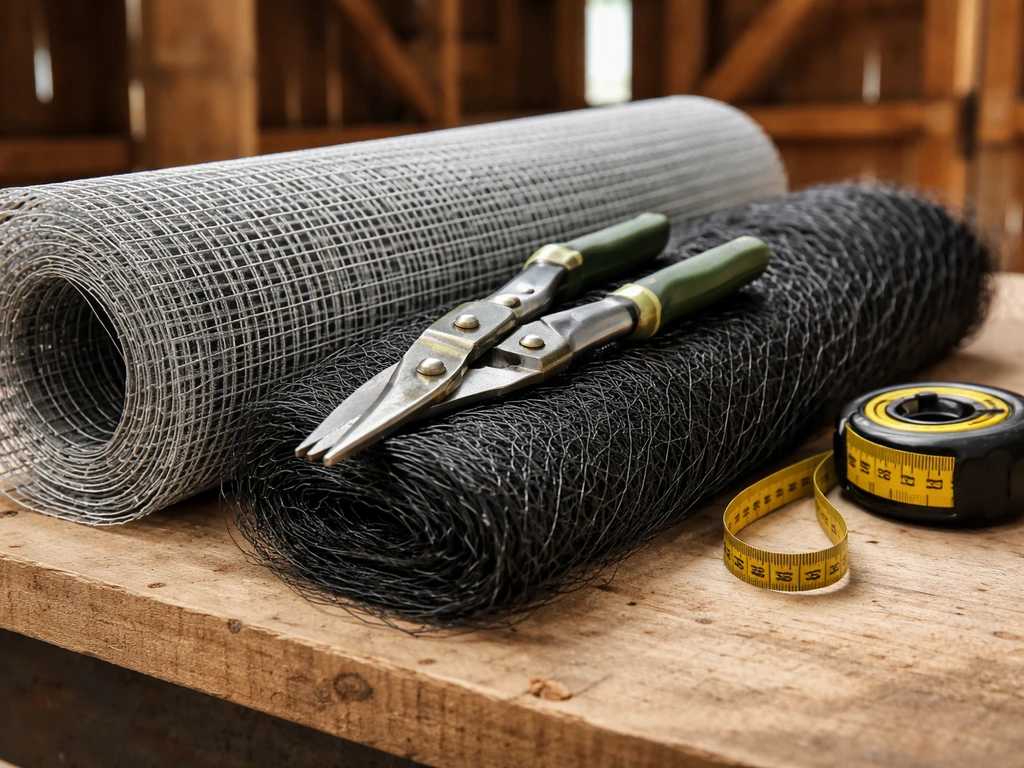
Materials and tools to have on hand
- 1/2-inch hardware cloth (galvanized or stainless), rolls of 24-inch and 36-inch width
- 19mm UV-stabilized bird netting for large open spans
- Aviation snips or angle grinder for cutting hardware cloth
- Stainless steel staple gun (with 3/8-inch staples) or wood screws and washers for securing mesh
- Expanding foam (Great Stuff or equivalent) for small cracks and pipe penetrations
- Exterior-grade caulk for gaps under 1/4 inch
- Pre-made gable vent covers with fine mesh screens
- One-way bird door (commercial flap-style or DIY from hardware cloth formed into a cone/funnel)
- Stainless steel bird spikes for ledge and beam installation
- Safety harness, hard hat, work gloves, N95 respirator, safety glasses
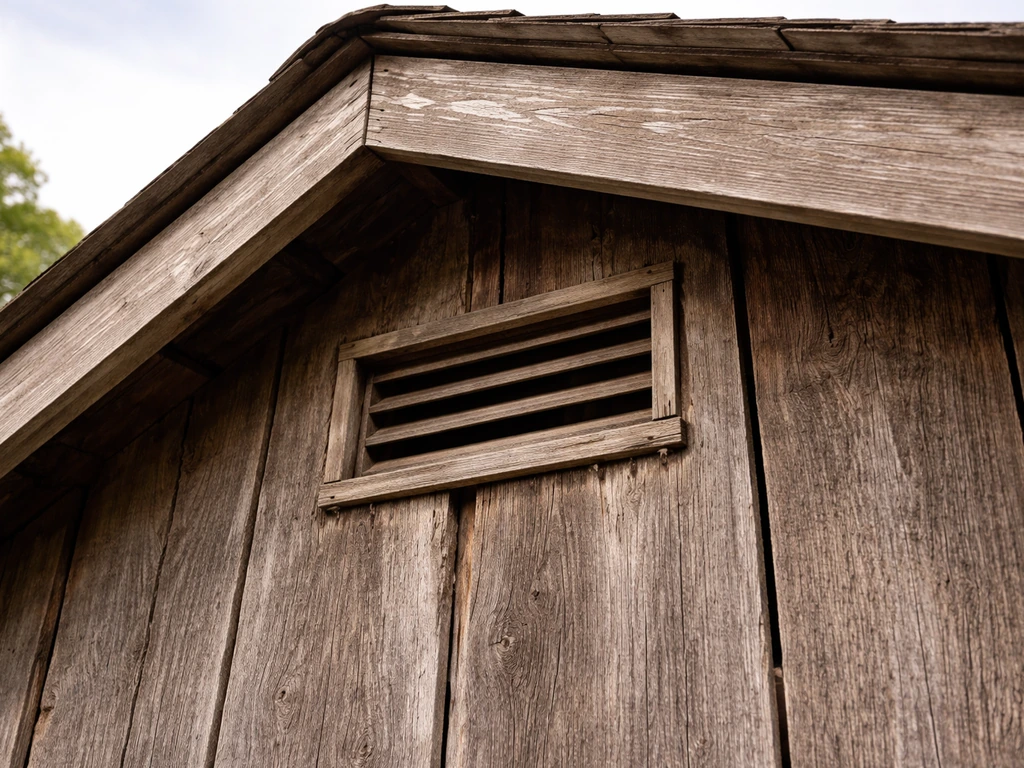
Gable vents and ridge vents
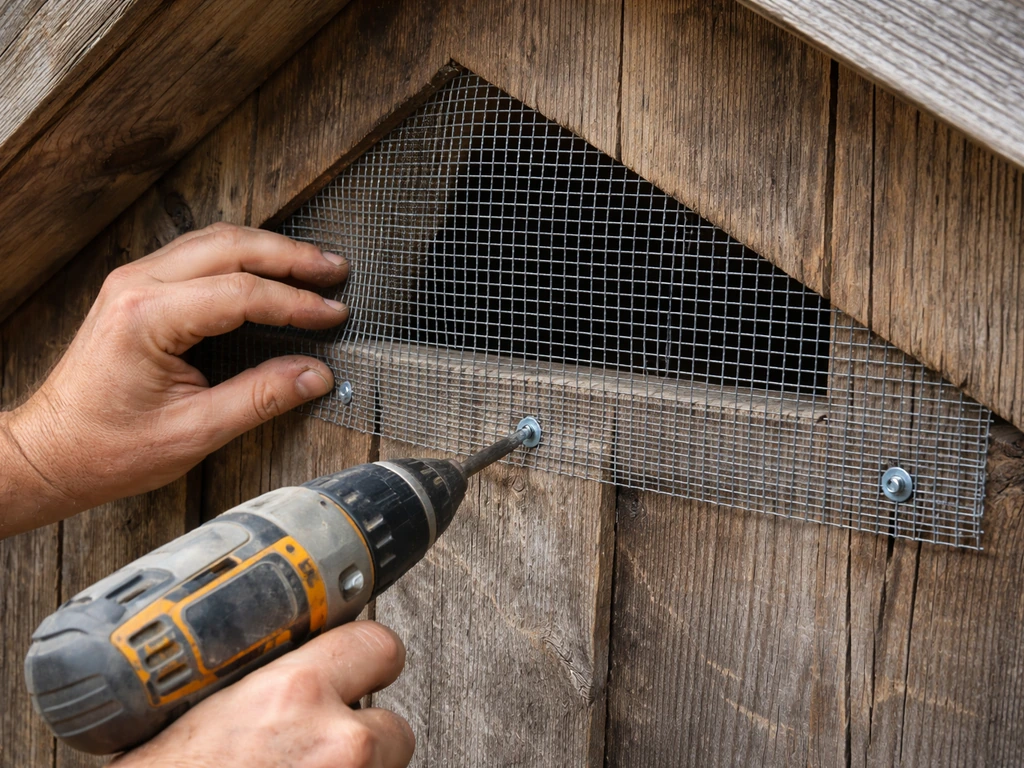
Remove the old vent cover if it has no screen or a damaged screen. Cut hardware cloth to fit the opening with a 2-inch overlap on all sides. Secure it with screws and large fender washers so the mesh cannot be pushed inward by a determined bird. Reinstall the vent cover over the mesh. This two-layer approach also keeps out insects and small mammals. For ridge vents, a ridge vent filter roll (foam or brush-strip) pressed into the vent channel blocks access while still allowing airflow. Check that the filter material does not block ventilation to the point of creating moisture buildup in the roof structure.
Eave and soffit gaps
The eave-fascia joint on older barns is rarely perfectly sealed. For gaps under 1 inch, a bead of exterior caulk and a strip of hardware cloth stapled over the joint works well. For larger gaps where the fascia board has pulled away from the rafter tails, you may need to renail or sister the board first, then caulk and screen. Check that any foam or caulk you use in the soffit area is not blocking the soffit ventilation channel, which would push moisture into the roof sheathing.
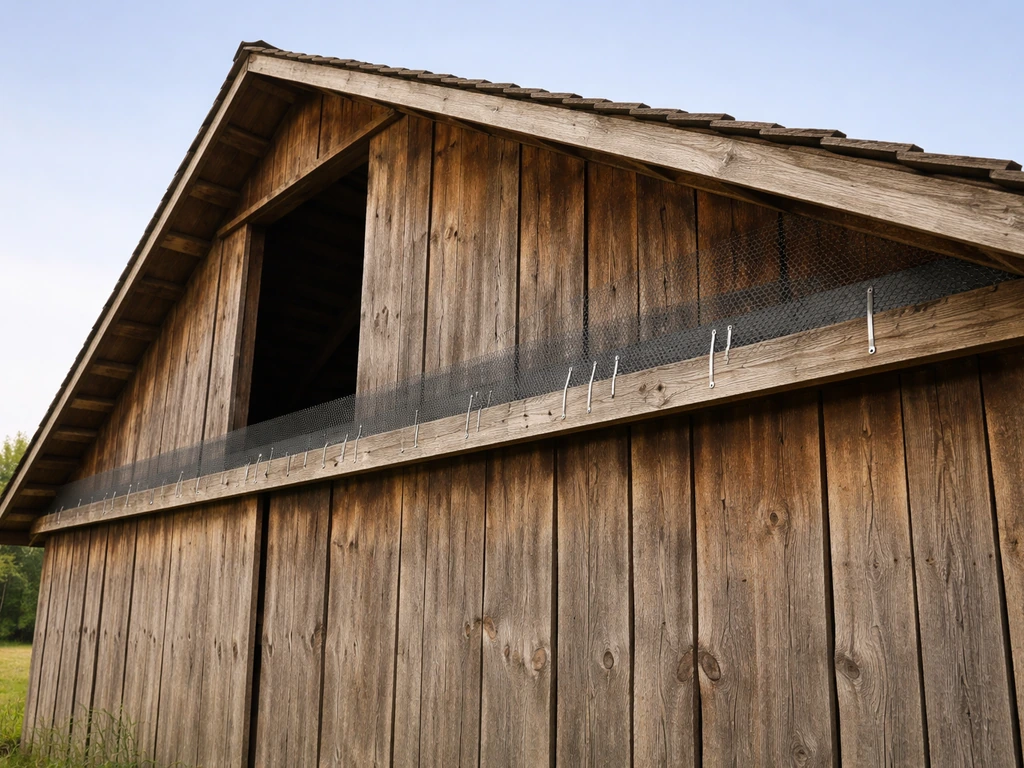
Large open gable ends and hay loft openings
Many older barns have fully open or louvered gable ends that allow air circulation but also allow free bird access. UV-stabilized bird netting stretched across the interior face of the gable (anchored with eye bolts and tensioned wire or a timber frame) is the most practical solution. Use 19mm mesh or smaller. Attach the netting with netting clips at 12-inch intervals. For hay loft doors that need to remain operable, a sliding or hinged netting panel that closes when the loft is not in active use is a workable solution. Keder rail systems (used in agriculture) allow netting to slide open and closed on a track.
Main doors and sliding doors
The top gap on a sliding barn door is often several inches wide and is one of the highest-traffic entry points on the whole building. A brush strip door seal (the kind used on commercial loading docks) mounted to the door header and draped over the top of the door panel seals this gap without interfering with door operation.
For swinging doors, a foam or rubber door sweep at the bottom and adjustable door stops at the sides handle most of the gaps. For barns that need to remain open during working hours, a PVC strip curtain hung from the header keeps birds out while letting people, equipment, and animals pass through. These strip curtains are inexpensive, durable, and highly effective.
How to install a one-way exclusion door
- Confirm the gap is an active primary entry point (fresh droppings, feathers, birds observed using it).
- Confirm no active nest with eggs or chicks is inside (check by listening and looking; do not proceed if there is one).
- Cut a piece of hardware cloth into a cone or funnel shape: wide enough to cover the gap and taper to an opening at the exit end that is just large enough for the bird species (about 1.5 inches for sparrows, 2.5 inches for pigeons).
- Attach the wide end tightly around the gap opening so birds can exit but the funnel shape prevents re-entry.
- Leave the one-way door in place for at least 5 to 7 days, checking daily for birds caught inside or attempting reentry. Maine Department of Inland Fisheries and Wildlife guidance specifically recommends checking one-way devices frequently, as animals may attempt to re-enter.
- Once you are satisfied no birds remain inside, remove the one-way door and permanently seal the gap with hardware cloth and caulk or expanding foam.
Bird spikes on interior beams and ledges
Stainless steel spikes glued or screwed to the top edge of beams eliminate the flat perching surface birds prefer. If you are wondering what a bird stop on a roof is, it is a protective barrier designed to prevent birds from landing, perching, or nesting on roof edges and other ledges. They are not harmful to birds but make perching uncomfortable enough that birds move on. Focus on beams directly under roost-heavy zones identified in your inspection. Plastic spikes are cheaper but degrade in UV light and animal dander environments within a few years. Stainless is worth the extra cost in a barn.
Seasonal plan and timing: what to do by month (and why timing matters)
Timing your work correctly is not just helpful, it is legally required in some cases. Installing exclusion over an active nest containing eggs or chicks violates the Migratory Bird Treaty Act, which prohibits destroying active nests of protected species without a permit. Here is how to sequence your work through the year.
| Season / Month range | What to do | What to avoid |
|---|---|---|
| Late winter (Jan–Feb) | Full inspection, purchase materials, plan exclusion sequence, install spikes and deterrents that don't risk trapping birds | Sealing active roost sites where birds shelter from cold without confirming they've exited |
| Early spring (Mar–Apr) | Install one-way exclusion doors on active entry points before nesting peaks; seal gaps that are confirmed inactive | Sealing any gap where nesting may have already started; work before eggs are laid if possible |
| Late spring to summer (May–Aug) | Monitor one-way doors, complete sealed repairs in sections confirmed clear; avoid disturbing active nests | Any work on gaps or openings with confirmed active nests containing eggs or chicks |
| Late summer to early fall (Sep–Oct) | Best window for permanent exclusion work: nesting season is over, birds haven't yet settled into winter roosts; seal, screen, and net comprehensively | Leaving large gaps unsealed heading into winter, as birds will establish winter roosts that become harder to break |
| Fall to early winter (Nov–Dec) | Secondary inspection and touch-up sealing; install door sweeps and brush strips before cold weather; clean up any droppings from summer roost areas | Major structural exclusion work in cold weather when caulk and foam may not cure properly (below 40°F/4°C) |
The single best exclusion window in most of North America is September through early October. Nesting season for most common barn species (pigeons, starlings, house sparrows) has ended, birds have not yet locked in to winter roost sites, and temperatures are still warm enough for sealants to cure properly. If you can only do a major push once per year, do it then.
Cleaning and cleanup safety after birds leave
Bird droppings in a barn accumulate fast. A flock of 50 starlings can deposit enough droppings to create a serious respiratory hazard within a single season. Cleanup is not optional, and the safety requirements are real, not theoretical.
Required PPE for cleanup
- P100 half-face respirator (not just an N95, especially for large accumulations or enclosed spaces)
- Disposable Tyvek coveralls or old clothes that go directly into a bag
- Nitrile or rubber gloves
- Safety glasses or goggles
- Rubber boots that can be hosed down
Cleanup process
- Ventilate the area for at least 30 minutes before entering. Open doors and windows to dilute airborne particles.
- Wet the droppings before disturbing them. Use a pump sprayer with a disinfectant solution (a 1:10 bleach-to-water ratio is effective) and apply generously. This prevents dried droppings from becoming airborne dust. Never dry-sweep or use a leaf blower on dry droppings.
- Scoop or scrape softened droppings into heavy-duty plastic bags. Double-bag everything.
- Discard contaminated nesting material the same way. Do not compost it.
- Apply a second round of disinfectant to the now-cleared surfaces and let it sit for 10 to 15 minutes.
- Rinse with clean water if the area will be used by livestock or people.
- Dispose of bagged waste in regular solid waste (most municipalities accept it; check local rules for large accumulations).
- Wash all reusable equipment with disinfectant and shower before leaving the worksite.
For very large accumulations (years of buildup on multiple beams and floors), consider hiring a professional abatement service. The risk of histoplasmosis in particular goes up sharply with disturbed large deposits, especially in enclosed, warm, humid barn environments where the fungal spores thrive.
Maintenance and troubleshooting: prevent re-entry and handle setbacks
Even a well-executed exclusion job needs follow-up. Birds are persistent, barn structures shift and settle, and new gaps appear over time. Here is how to keep your work holding up.
Annual maintenance checklist
- Spring (April): Walk the perimeter and check all sealed gaps for cracking caulk, pulled mesh, or signs of fresh droppings re-appearing near old entry points
- Summer (July): Check that netting has not sagged or torn; look for birds perching on ridge lines or eaves that suggest a new nearby entry
- Fall (October): Full re-inspection before winter; re-seal any compromised areas; check that brush strips and door seals are still making full contact
- After any significant storm: Check for lifted roofing, dislodged vent covers, or new structural gaps that could be exploited
Common failure points and fixes
| Problem | Likely cause | Fix |
|---|---|---|
| Birds are back at a sealed gap | Gap was not fully sealed (birds found a crack in the edge of the patch) | Remove patch, inspect all edges, re-seal with hardware cloth plus caulk or foam on all perimeter seams |
| New gap appeared after sealing old one | Birds are finding the next weakest entry point | Return to your inspection map and seal the next highest-traffic gaps on the list |
| Condensation forming on walls/roof after sealing | Ventilation was inadvertently reduced when vents were sealed | Confirm total vent area still meets minimum for the barn volume (1 sq ft per 150 sq ft of floor area is a common benchmark); add screened vents if needed |
| Netting has sagged or torn | Tension was insufficient or birds have been sitting on it and loading it | Re-tension with wire cable through the netting hem and add intermediate support points; upgrade to heavier netting grade |
| Birds using a new hole created by woodpeckers or other damage | Unrelated structural damage created a new entry | Patch with hardware cloth immediately; repair underlying wood damage to prevent recurrence |
| House sparrows or starlings nesting in corners despite spikes | Spikes were not installed on all available horizontal surfaces | Audit all beam tops, ledge edges, and window sills; install spikes on any flat surface wider than 1 inch |
| One-way door not working; birds staying inside | Funnel opening is too small or exit is not adequately lit | Widen funnel opening by one size increment; place a light source outside the exit; check daily and give it a full week |
One pattern that catches people off guard: after successfully excluding pigeons or starlings from a barn, sparrows sometimes move in through smaller gaps the larger birds could not use. After your main exclusion work, do a secondary inspection specifically looking for 1-inch to 1. This bird problem solving approach helps you anticipate the follow-on species and seal the smaller gaps before they become a repeat issue secondary inspection. 5-inch gaps and seal them with 1/2-inch hardware cloth. This prevents the smaller-species follow-on problem.
When to call a wildlife professional (and legal/protected-species notes)
Most barn bird problems are DIY-manageable, but there are specific situations where a licensed wildlife professional is the right call, and a few where federal law makes it mandatory.
When you are legally required to stop and get help
The Migratory Bird Treaty Act protects most native bird species. Under this law, it is illegal to destroy, move, or damage an active nest containing eggs or nestlings without a valid federal permit. Common barn species like pigeons (rock doves) and house sparrows are not protected under the MBTA, but barn swallows, chimney swifts, and most songbirds are. If you find a nest you cannot identify, or if you see birds that look like swallows or swifts (small, fast, with swept wings), stop work and contact your state wildlife agency or a licensed wildlife rehabilitator before proceeding. Getting this wrong can result in civil and criminal penalties.
Other situations that need a professional
- Large infestations with years of accumulated droppings covering a significant floor area: professional abatement reduces your health risk substantially
- Structural damage to the roof, rafters, or wall framing caused by droppings and moisture: a contractor needs to assess before exclusion work makes sense
- Birds that are sick, injured, or behaving unusually (circling, unable to fly, neurological symptoms): contact a wildlife rehabilitator, not a pest control company
- Bat co-habitation: bats are federally and state-protected and require a separate, permitted exclusion approach; do not handle bats without rabies vaccination coverage
- Any situation where you are not confident identifying the species present before beginning exclusion
- Commercial or institutional facilities where regulatory compliance documentation is needed
What to tell a wildlife professional when you call
- The species you believe are present (or a description if you are not sure)
- Whether you have seen nests, eggs, or chicks
- The approximate size of the infestation (a few birds vs. a large flock)
- The structural features of the barn (age, construction type, key gaps identified)
- Your timeline and budget
- Any exclusion or deterrent steps you have already attempted
A reputable professional will give you a written scope of work, identify the species involved, explain the legal constraints, and provide a cleanup and exclusion plan. Be cautious of any contractor who immediately proposes lethal control methods without first attempting exclusion: for most barn situations, exclusion is both more humane and more permanently effective.
The same principles that apply to bird-proofing a barn translate to other structures, from individual rooms to full roofs, but the barn's large open spans, ventilation requirements, and working access needs make it one of the more complex environments to get right. The same principles apply when you’re learning how to bird proof your roof: find entry points, use physical exclusion, and time the work so you don’t trap birds.
In many cases, the same exclusion principles help you choose the right bird-stop size, placement, and materials for a roof bird stop on a roof. If your Bird Buddy setup includes a solar roof, follow the manufacturer steps for removal and re-mounting before you make any changes to the device how to remove solar roof from Bird Buddy. If your Bird Buddy has a solar roof installed, follow the manufacturer instructions to remove it and then re-mount any parts correctly how to remove solar roof from Bird Buddy.
These same exclusion principles also apply to how to bird-proof windows by sealing gaps and using appropriate barriers around frames and openings how to bird proof windows. If you are trying to how to bird proof a room, apply the same exclusion-first approach and seal gaps after confirming the space is clear bird-proofing a room.
FAQ
Can I just use bird spikes or deterrents instead of fully sealing the barn?
You can use deterrents as a supplement, but for barns the reliable approach is exclusion-first. Spikes and similar products fail when there are ground-level or hidden roosting routes, or when birds find a new opening during cleanup and seasonal shifting.
How do I tell whether a “vacant” roost area is truly cleared before sealing?
Look for recent indicators like fresh droppings, kicked-up dust under rafters, and bird activity at dusk. Old, dried droppings alone are a better sign than a visual scan in the middle of the day, because birds may relocate briefly between checks.
What should I do about birds still inside the barn during a maintenance day?
Pause permanent sealing and switch to controlled one-way exits only for the specific entry points you can identify. Avoid temporary foams, tapes, or partial closures that can block a path out and force birds into confined corners.
Is hardware cloth the right choice for every vent and small opening?
For most openings, yes, but match the mesh size to the bird access you’re preventing. Use smaller mesh in areas where sparrows can enter, and ensure the overlap and anchoring prevent birds from pushing the mesh inward.
How can I avoid causing moisture problems when blocking vents or using filters?
After any vent-filter or mesh installation, confirm airflow is not reduced to the point of trapping moisture. If your roof has ridge or soffit ventilation, keep those channels clear and avoid overstuffing gaps with caulk or foam.
Do I need to clean droppings before installing barriers, or after?
Typically clean before or during final closure, not long after barriers are in place, because disturbed large deposits increase health risk. If the barn is actively occupied, focus first on safe one-way exit sequencing, then proceed with cleanup once sections are confirmed cleared.
How deep should I seal gaps along the soffit and fascia joints?
The goal is to eliminate the opening plane birds can reach. Apply the caulk and cover with screened material so the barrier overlaps the surrounding solid surfaces, and do not rely on caulk alone for gaps that can be widened by movement or weather.
Will sealing up the barn increase issues with insects or small animals?
Proper exclusion reduces insect entry too, but only if you address vents and damaged screens. The two-layer approach over vents (mesh plus a vent cover) is specifically helpful because it blocks both birds and small-mammal access while keeping airflow.
What’s the best way to prevent sparrow “follow-on” after pigeons or starlings are excluded?
Do a secondary sweep after the main job, specifically targeting 1-inch to 1/2-inch style gap ranges you might have skipped because they seemed too small. Filling those smaller openings with appropriately sized hardware cloth is the quickest way to prevent the new species from establishing.
Can I work in the barn at any time of day, or is dusk truly important?
Dusk (or shortly before birds return) is useful because it reveals active routes and roosting preferences. Midday checks can miss fast relocation patterns, leading you to seal the wrong gaps first and leaving an alternate access point open.
What respirator or safety gear should I use when cleaning droppings?
At minimum, use eye protection and a properly fitted respirator designed for fine particles, not just a basic dust mask. If you have heavy buildup, consider professional abatement rather than stirring material in enclosed, warm spaces where fungal spores can become airborne.
When should I hire a wildlife professional instead of DIY?
Hire one when you cannot confidently identify the species or you find an active nest you suspect could be protected, when access requires working at height on unstable structures, or when buildup is extensive enough that disturbance would be dangerous.
What if I find a nest but I am not sure whether it is protected?
Stop work at that point. If you cannot confidently identify the nest as an unprotected species, contact your state wildlife agency or a licensed wildlife rehabilitator before continuing, because removing active nests without the right permit can create serious legal exposure.
If I need the barn door to stay open for work, what’s the safest “temporary” bird stop?
Use a strip curtain or a door-mounted clearance barrier that closes the bird path while still allowing people, equipment, and animals to pass. Avoid temporary patchwork like tape or loose netting that can shift and create new entrapment or new openings.
How soon after bird-proofing can birds be considered unlikely to return?
Treat the first inspection window as immediate follow-up, then re-check again after barn materials settle or after weather cycles. If you notice new droppings near previously sealed areas, assume gaps shifted or were missed and do targeted repairs before birds establish new roost sites.
Next Article
Bird Problem Solving Guide: Triage, Deterrence, Proofing
Humane bird problem solving guide with triage, emergency control, DIY deterrence, and long-term proofing checklists by s