If birds are actively nesting on your hose reel, cable reel, or any similar outdoor mounted reel right now, do not move the nest if it contains eggs or chicks. Under the Migratory Bird Treaty Act in the US (and equivalent laws in the UK and EU), disturbing an active nest with eggs or young is illegal and can result in fines. Your job today is to stop the situation from getting worse without touching the nest, then proof the reel permanently once the birds have left on their own.
How to Stop Reels From Bird Nesting: Step-by-Step Guide

Maya Carver
9 Jun 2026
Quick emergency steps when birds are nesting on the reel right now
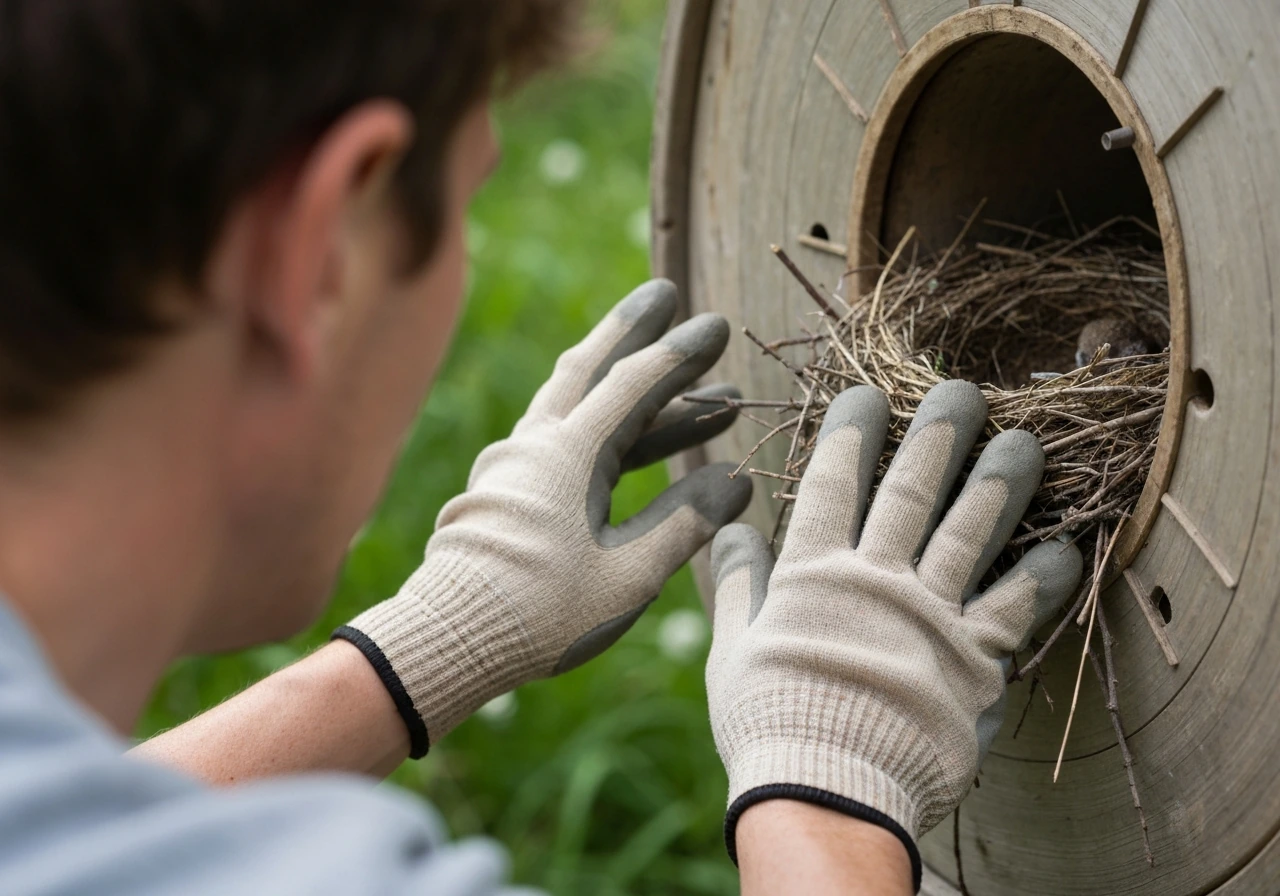
The first thing to do is figure out exactly what stage the nest is at. Peek carefully without getting close enough to alarm the birds. What you see determines everything about what you can and cannot do today.
| What you see | Stage | What you can do right now |
|---|---|---|
| Nest material being gathered, no eggs yet | Building stage | Remove the nest immediately and begin proofing — this is your window |
| Eggs present, adult sitting on nest | Incubation (roughly 10–17 days) | Do not disturb. Block further access to nearby gaps only. Wait. |
| Small naked or fluffy chicks visible | Nestling stage (roughly 14–17 days) | Do not disturb. Monitor from a distance. |
| Larger chicks, feathered, moving near nest edge | Pre-fledgling | Stay well clear. Fledging is days away. |
| Nest empty, no adult activity for several days | Post-fledgling | Safe to remove nest and begin full proofing |
If the nest is still being built and there are no eggs yet, act immediately. Remove the nest material, clean the surface, and start blocking the reel housing gaps right away. Birds do not relocate a nest if it disappears, so catching this stage early is the single most effective thing you can do. Once eggs appear, your only legal and humane option is to wait.
Most songbirds finish incubation in 10 to 17 days, and chicks leave the nest about two to three weeks after hatching. For barn swallows, incubation alone runs 12 to 17 days. You are looking at a total wait of roughly four to six weeks from egg-laying to the point where the nest is reliably empty.
- Observe from a distance: confirm eggs or chicks before doing anything else
- If nest is egg- or chick-free and still being built, remove nest material immediately
- If eggs or chicks are present, stop and do not touch the nest
- Block only the nearby entry points that are not directly adjacent to the active nest to prevent a second pair from starting nearby
- Mark your calendar: estimate fledging date and schedule full proofing for the day after activity stops
- Keep pets, children, and foot traffic away from the reel area during active nesting
Safety and legal do's and don'ts
The legal side
In the US, the Migratory Bird Treaty Act makes it illegal to destroy a nest that contains eggs or chicks, or one where young are still dependent on it. This covers the vast majority of wild birds you are likely to encounter near a reel, including sparrows, swallows, and robins. The US Fish and Wildlife Service only issues permits for taking active nests in very limited circumstances, and homeowners rarely qualify. In the UK, the Wildlife and Countryside Act 1981 gives similar protection, and Schedule 1 species get an extra layer. In the EU, the Birds Directive prohibits deliberate significant disturbance during breeding and rearing. The bottom line: if there are eggs or chicks, leave the nest alone and wait.
House sparrows are one of the few exceptions in the US because they are a non-native invasive species and are not covered by the MBTA. If you can confirm the birds are house sparrows (small brown bird with a black bib on the male, nesting in an enclosed crevice), you have more flexibility. Still, check your local and state regulations before removing an active nest, because some states add their own protections.
Cleaning up droppings safely
Bird droppings are a genuine health hazard and should be treated seriously. Dried droppings can carry Histoplasma fungus, and disturbing them kicks up fine particles that you can inhale. Psittacosis and avian influenza are also transmission risks from direct contact with contaminated surfaces. Never sweep or dry-brush droppings. Always wet the area first with a disinfectant solution (a diluted bleach solution works well) to bind the dust before you clean.
- Wear an N95 respirator or better before you get close to droppings
- Add disposable gloves and eye protection
- Wet droppings thoroughly with disinfectant before any scraping or wiping
- Double-bag all waste and dispose in the general trash
- Wash hands and forearms thoroughly with soap after removing gloves
- Avoid eating, drinking, or touching your face during cleanup
- Do not use a leaf blower or dry brush on dried droppings
Find and fix every entry point on the reel and surrounding structure
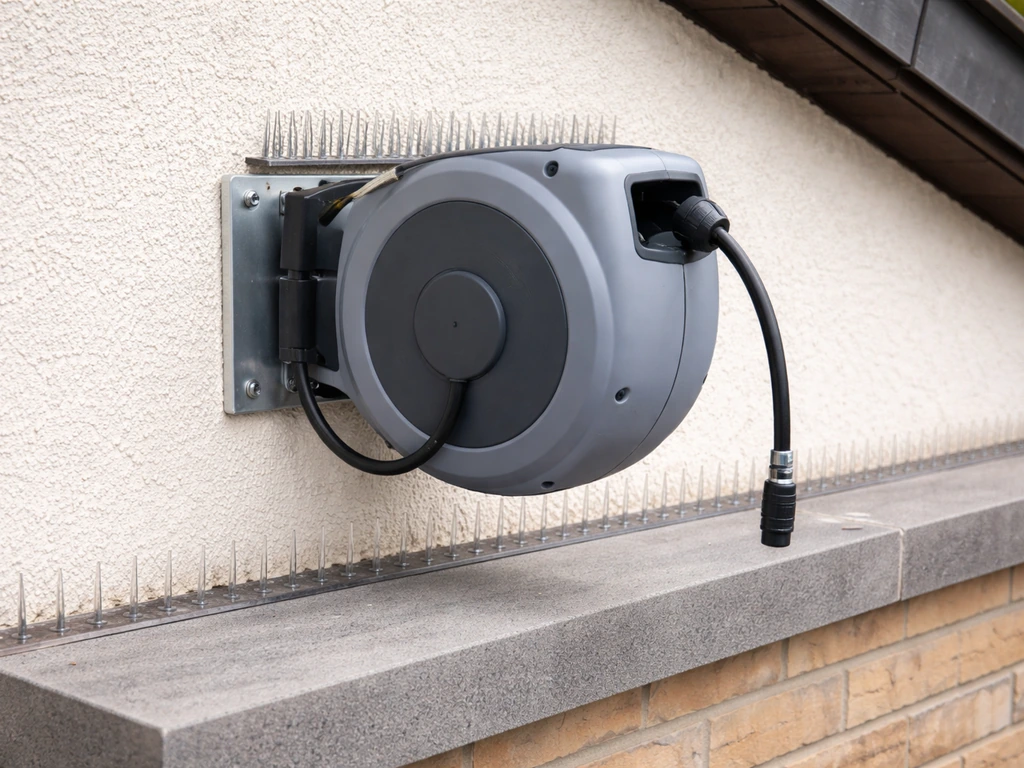
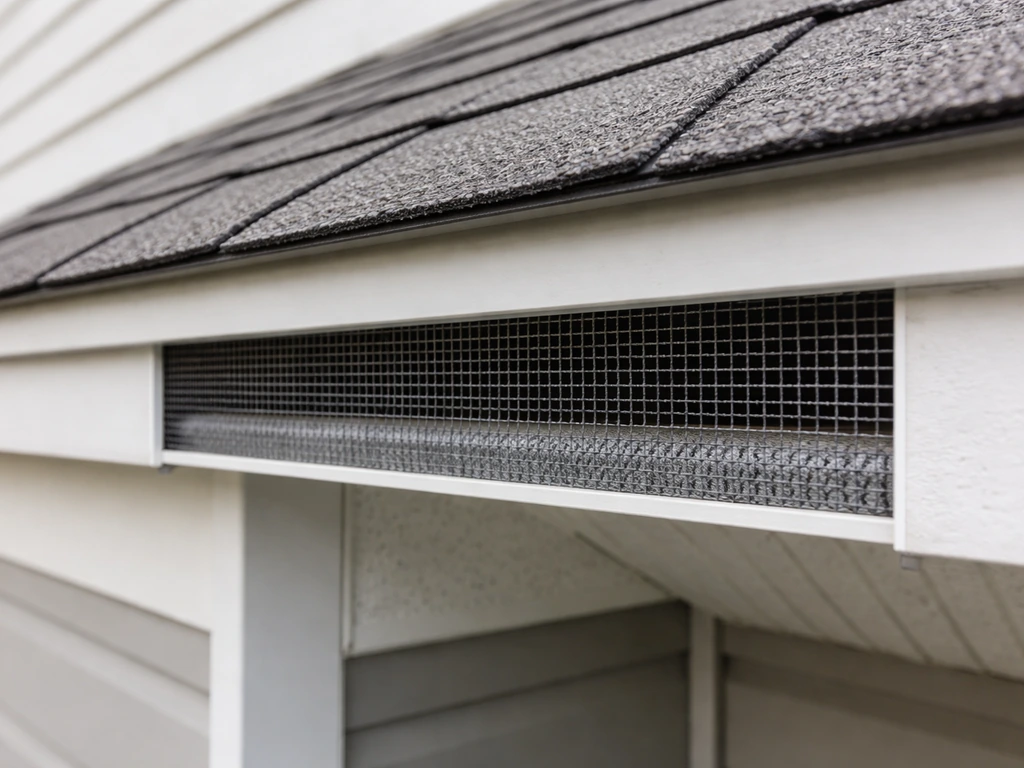
Birds nesting on a reel are almost always using a gap, crevice, or sheltered hollow somewhere on or immediately around it. Hose reels and cable reels typically have hinged lids, mounting brackets with gaps behind them, open drum holes, and sometimes a hollow backing cavity where they mount flush against a wall. Any opening wider than about 19mm (three-quarters of an inch) is a potential nest site for sparrows. Swallows prefer open ledges and rafters, but they will also use sheltered cavities if available.
Do a close inspection of the reel and the wall or post it is mounted on. Look for gaps between the reel housing and the wall, open slots in the reel drum, spaces behind mounting plates, gaps under nearby eaves or soffits, and any weep holes in the surrounding masonry. Also look above the reel: swallows especially will use an eave or ledge directly overhead as a nesting surface and then perch on the reel itself. Proofing just the reel is not enough if there is a nesting site within a meter of it.
- Inspect the reel housing all the way around, including the back where it meets the wall
- Check the lid hinge gap: even a centimeter of clearance is enough for sparrows to squeeze through
- Look inside the drum opening if the reel has an exposed slot or hole
- Inspect the eave, soffit, and fascia directly above and within a meter of the reel
- Check the wall cavity behind the mounting bracket
- Note any weep holes, expansion joints, or pipe entry holes nearby
- Take photos of every gap you find so you have a reference when buying materials
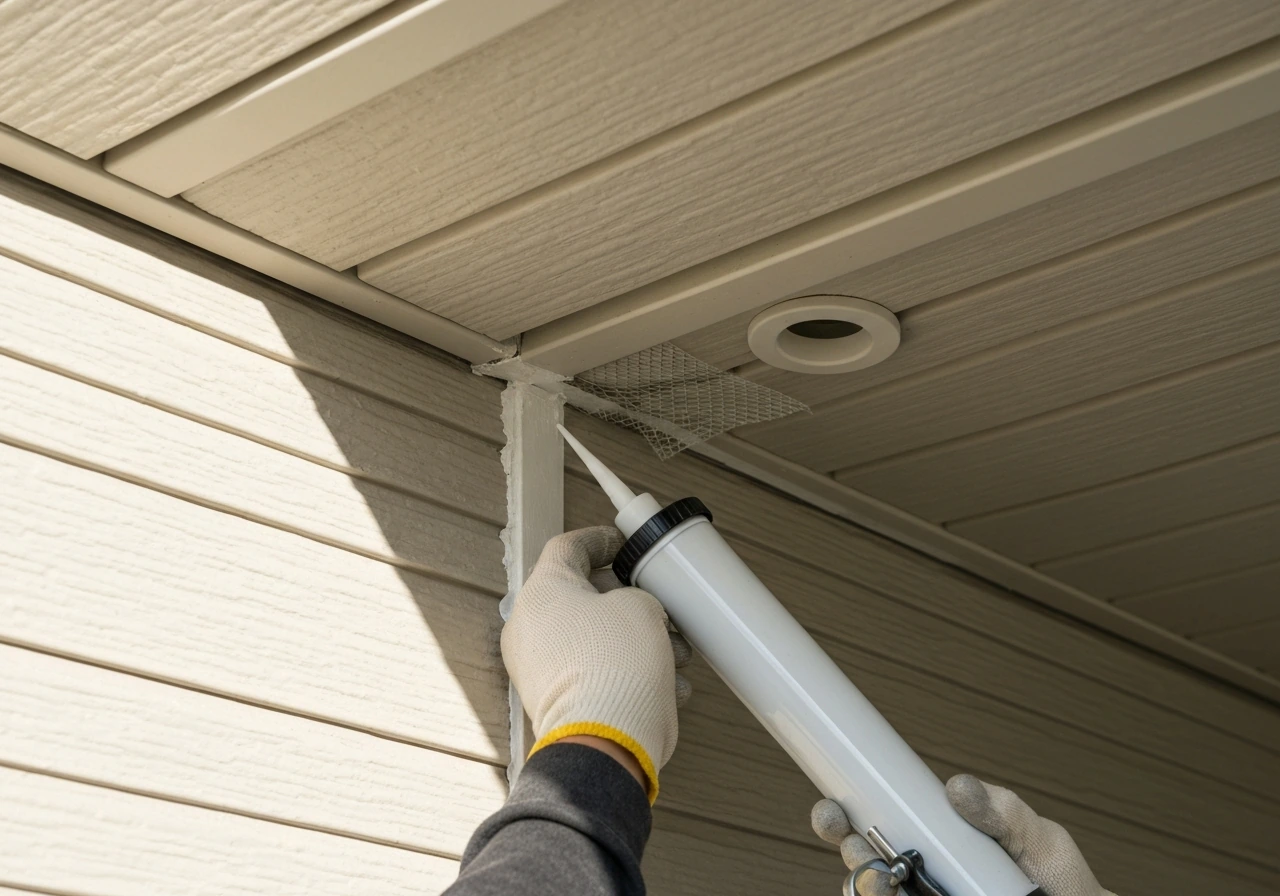
Once you have your list, prioritize the gaps by size and accessibility. Any opening into an enclosed cavity gets sealed with hardware cloth (galvanized welded wire mesh with 19mm or smaller openings), foam backer rod plus exterior-grade silicone, or purpose-made weep hole covers. The reel drum opening itself can often be blocked with a tight-fitting bung, a rubber grommet, or a short length of pool noodle foam trimmed to fit. For gaps behind mounting plates, remove the reel briefly, stuff the void with steel wool (which birds cannot pull out), and seal around the edges with exterior silicone before remounting.
Humane deterrents that stop birds from coming back
Physical exclusion is always the most reliable long-term solution, but deterrents add a useful extra layer, especially for swallows on open surfaces where total sealing is not practical. If you are trying to figure out how to prevent bird activity from returning to the reel, use physical exclusion and add deterrents only as a supporting step. The key is matching the deterrent to the surface and location. Something that works on a wide-open eave often does nothing when mounted on the narrow housing of a reel. These same exclusion and deterrent principles are the foundation of how to stop droll and lock bird behavior from returning to your reel area.
| Deterrent type | Best use case | Works on reels? | Caution |
|---|---|---|---|
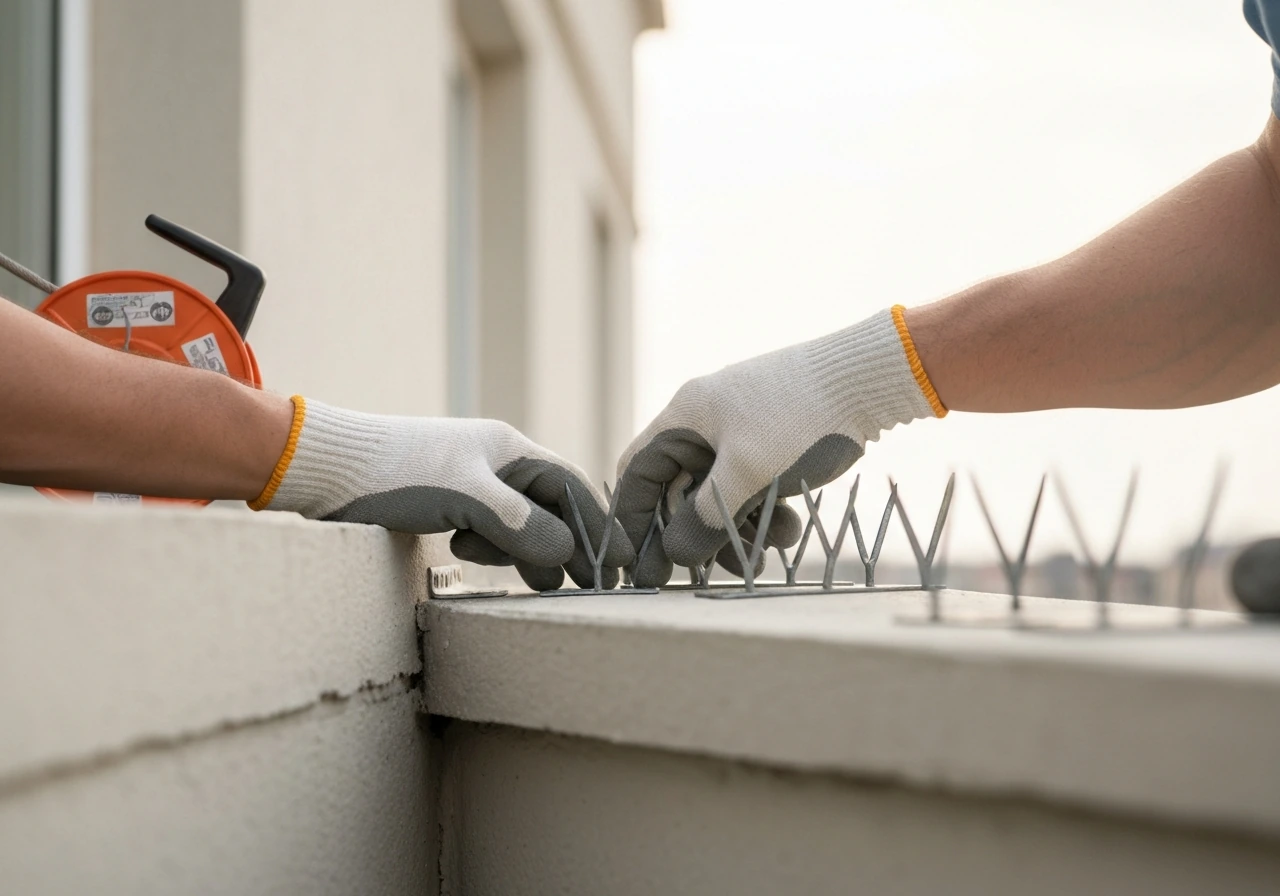
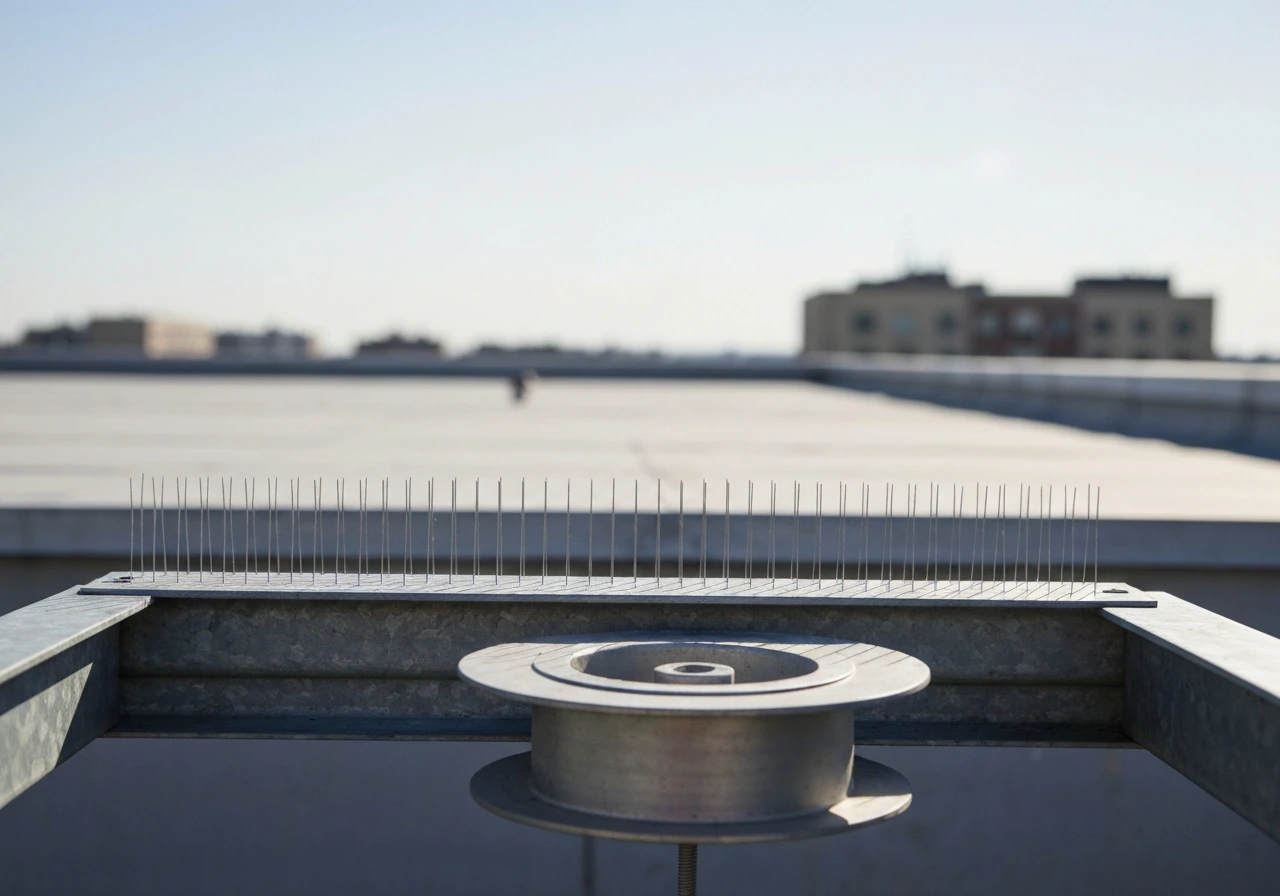
| Anti-perch spikes | Horizontal ledges, tops of reel housing, wall edges | Yes, on flat top surfaces | Must cover entire surface edge-to-edge or birds nest around spikes |
| Bird netting (fine mesh) | Enclosing reel bay under eaves, blocking cavities | Yes, for enclosing the whole area | Must be tightly secured; loose netting traps and kills birds |
| Visual deterrents (reflective tape, predator decoys) | Open, exposed areas with wind movement | Limited — works short-term only | Birds habituate quickly; rotate or combine with other methods |
| Tactile gel strips | Ledges and smooth surfaces where spikes won't attach | Yes, on reel housing top/sides | Can trap small birds if applied too thickly; use sparingly |
| Slope guards / angle brackets | Flat ledges and tops of reel housing | Yes | Needs secure fastening to weather outdoor conditions |
| Sound deterrents (distress calls) | Open outdoor areas | Rarely effective alone | Neighbors will complain; habituation is fast |
If the reel is mounted under an eave or in a sheltered alcove, netting that encloses the entire bay is your most effective deterrent and exclusion method combined. Secure the netting to the soffit above and the wall on both sides with fixings every 15 to 20cm so there are no slack pockets. Any sagging section becomes an entanglement risk for birds, so inspect it every season. Improperly installed netting is one of the most common causes of bird injury, so take your time getting it right or call a pest control professional to install it.
For exposed reels out in the open with no overhead structure, anti-perch spikes on the top surface and reflective tape on the hose guide slot are a reasonable first line. Add a physical block for any cavity openings. Avoid glue-based gels in areas with heavy dust, pollen, or leaf debris because they clog up quickly and lose effectiveness.
What to avoid
- Electric shock tracks: overkill for a domestic reel situation and a hazard around water
- Poisons or toxic substances: illegal for use against most wild birds and dangerous to pets and wildlife
- Fake owl or hawk decoys left in a fixed position: birds learn to ignore them within a few days
- Loose or baggy netting: creates entanglement traps rather than deterring birds
- Ultrasonic devices: consistently shown to have little effect on birds in real-world outdoor settings
DIY proofing upgrades for the reel, nearby ledges, and eaves
Once the active nest is gone and fledglings have left, you have a clean window to do the full proofing job. This is also the moment to think about the broader zone around the reel, not just the reel itself. Birds that used your reel once will come back and probe the area again next season, often returning within weeks of fledging. Getting the whole zone sorted now saves you repeating this process every year.
Reel housing upgrades
- Remove the reel from its mounting and clean the wall cavity behind it thoroughly using wet disinfectant method
- Fill the wall cavity with expanding foam or steel wool before remounting
- Seal all edges between the reel backing plate and wall with exterior-grade silicone
- Close any open drum slots or hose guide holes with rubber grommets or fitted bungs
- Install anti-perch spikes along the top edge of the reel housing if it is wide enough for a bird to stand on
- Add a sloped cap (cut from a length of PVC angle or aluminum flashing) to the top of the reel so nothing can sit flat on it
Ledge and eave proofing above and around the reel
- Install anti-perch spikes or slope guards on any ledge or fascia board within a meter of the reel
- Check soffit boards for gaps and seal with exterior caulk or mesh
- Fit weep hole covers on any open masonry weep holes nearby
- If the reel sits in an alcove or covered bay, consider fitting a netting panel across the entire opening
- Remove any unused wire, pipe, or bracket stubs nearby that give birds a foothold or anchor point for a nest
Reducing attractants nearby
Birds nest where they also find food and water close by. If you have a bird feeder, birdbath, or fruit tree within a few meters of the reel, that increases how attractive the whole area is. You do not have to remove feeders entirely, but moving them to the other side of the property reduces the incentive for birds to settle and nest right beside your reel. Fix dripping outdoor taps near the reel and clear up any spilled seed or pet food regularly. CDC emphasizes that outdoor activities that disturb soil contaminated with bird or bat droppings can increase risk for histoplasmosis.
Seasonal prevention checklist and when to call a pro
Annual prevention schedule
The most important window for proofing is late winter, before birds start scouting nest sites. In most of the US and UK, the main nesting season runs from roughly March through August, with early nesters like robins starting as soon as February in warmer regions. If you get the proofing done in January or February, you sidestep the whole problem. If you missed that window and birds are already nesting, work through the steps above and schedule your full proofing for right after fledging.
| Time of year | Task |
|---|---|
| January to February | Inspect reel and surrounding structure for gaps, install all exclusion measures before birds begin scouting |
| March to April | Monitor for early nest-building attempts; remove nest material immediately if found before eggs are laid |
| May to August | Do not disturb any active nests; mark nests found, estimate fledge dates, schedule post-fledge cleanup |
| August to September | Remove old nests after confirming they are empty; deep-clean reel area with wet disinfectant method |
| October to November | Final inspection, repair any damage to sealant, spikes, or netting before winter; replace worn deterrents |
| December | Order replacement materials so you are ready for the January proofing window |
When to stop DIY and call a wildlife professional
Most reel nesting situations are completely manageable as a DIY job once you know the rules. But there are a few circumstances where you should bring in a licensed wildlife professional or pest control specialist with wildlife experience.
- You suspect the nesting birds are a Schedule 1 (UK) or otherwise specially protected species: call your local wildlife authority before doing anything
- There is a large accumulation of droppings (more than a couple of square feet) that will require professional-grade cleanup and respiratory protection beyond a standard N95
- The reel is mounted at height and proofing it requires working from a ladder above head height: fall risk is real, hire someone with the right equipment
- Birds are nesting in the reel structure and there is evidence of structural damage (water ingress, wood rot, compromised electrical conduit) that needs to be assessed
- You have removed the nest after fledging and birds have immediately rebuilt in the same spot two or more seasons in a row: a professional can assess whether there is a gap or attractant you have missed
- You find a bird that is injured, orphaned, or grounded near the reel: contact your local wildlife rehabilitator, not a general pest control company
When you call a professional, tell them the bird species if you know it, whether there are eggs or chicks currently in the nest, how many seasons the problem has repeated, and what DIY measures you have already tried. That information lets them arrive with the right tools and advice rather than starting from scratch.
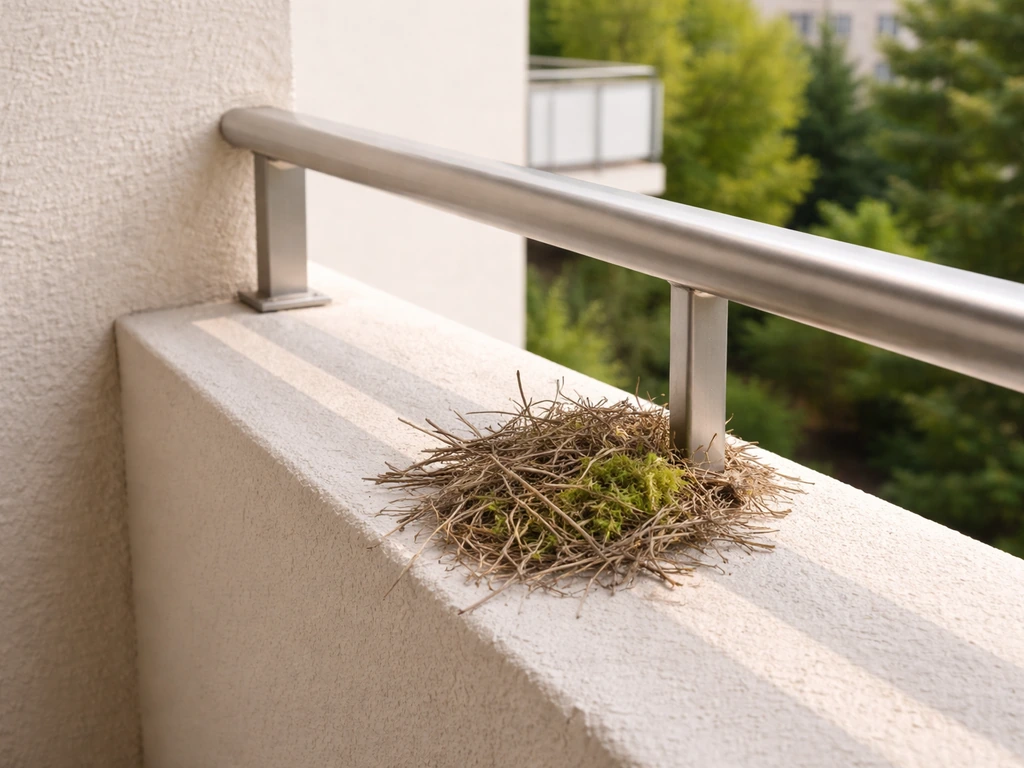
Reel nesting is a specific version of a broader eaves and structure nesting problem. If birds are also getting into your roof space, nesting on your balcony railing, or colonizing other spots around the building, the same principles apply: act immediately during the building stage, pause and wait if eggs or chicks are present, then proof thoroughly after fledging. Fixing all the nest sites around your property at the same time rather than one at a time each season is by far the most efficient approach and the best way to break the annual cycle for good. Once you break the annual cycle with thorough proofing and deterrents, you are effectively learning how to control bird population around your home.
FAQ
What should I do right now if I notice a reel nest and I am not sure whether there are eggs or chicks yet?
Do not touch anything and treat it as active. Carefully watch from a distance to see if adults are carrying nesting material or food. If you see obvious adult brooding behavior, feeding visits, or newly stuck-down lining, wait for fledging and then proof the reel, because disturbing an active nest with eggs or young can be illegal.
Is it okay to move the reel to stop nesting when there are birds using it?
No, not if the nest is active or contains eggs or chicks. Moving the reel can displace young and disrupt incubation. Instead, secure the area from human and pet access, wait until fledging, then remove and re-mount it as part of proofing once the cavity is confirmed empty.
How long should I wait after the birds stop showing up before I seal the gaps?
Use a conservative window. For most songbirds, wait at least two to three weeks after hatching for chicks to fledge, then do proofing soon after you confirm the nest is empty and there are no signs of begging behavior. If the same pair returns repeatedly to check the site, extend the wait and confirm the nest has truly become inactive.
Can I clean bird droppings immediately to reduce health risk while nesting is still happening?
Avoid disturbing the nesting area during breeding. Health cleaning should be done after proofing or when the nest is inactive, because disturbing droppings and the surrounding cavity can also disrupt dependent young. When you do clean later, wet the area first and do not dry-brush or sweep, then dispose of debris safely.
What if I find a nest in a small weep hole or behind masonry near the reel, not directly inside the reel housing?
You should treat it as a separate nest site. Proofing only the reel often fails because birds use the nearby cavity. Identify all openings within about a meter, then seal or cover the specific masonry or weep-hole access using appropriate hardware cloth or purpose-made covers, after fledging.
Do I need to remove the nest material when the birds are still building?
If there are no eggs yet and the nest is truly only in the building stage, removal can be effective because birds typically do not relocate if the structure is deleted. Still, do it carefully and keep contact minimal. Once eggs appear, switch to waiting and proof later.
Is it legal to remove a house sparrow nest in the US if I confirm it is a house sparrow?
House sparrows can be an exception to the MBTA protections, but local and state rules may still impose restrictions. Before removing any active nest, verify the species clearly and check your local regulations, because enforcement can vary by jurisdiction.
Will deterrents like reflective tape or spikes work by themselves on a reel?
Often not. Deterrents help mainly on exposed surfaces, but reels usually offer sheltered cavities and crevices. If you do not block access points (gaps, drum openings, mounting-plate voids, nearby eaves), birds can ignore the deterrent and keep using the cavity.
How do I choose between steel wool, foam backer rod, hardware cloth, or silicone sealants?
Use them based on the opening type. Stuff enclosed gaps with steel wool where birds cannot pull it out, then seal edges with exterior silicone. For vent-like or cavity openings, hardware cloth with small openings (around 19mm or less) is best. Foam backer rod plus exterior silicone works well for sealing larger cracks, but only when it is fully supported and sealed so it cannot be removed.
What is the safest way to install netting under an eave if I have to wait until after fledging?
Plan for full enclosure of the entire bay, secure to soffit and both side walls, and eliminate slack pockets. Inspect every season for sagging, because loose netting can entangle birds. If the area is hard to access or requires complex fastening, hiring wildlife-experienced pest control is often safer than DIY.
What should I tell a wildlife professional so they arrive prepared?
Share the species if known, whether eggs or chicks are present, how long the problem has repeated across seasons, and what you have already tried (for example, deterrents used or gaps you suspect). Also mention whether the reel is under an eave, inside an alcove, or near other bird-attracting features like feeders or fruiting plants.
How can I reduce repeat nesting without removing all nearby feeders?
Move feeders and birdbaths farther from the reel, ideally to the other side of the property, and fix any dripping outdoor taps and spilled food sources. You do not have to eliminate feeding, but reducing nearby food and water right next to the reel lowers the incentive for birds to settle there again next season.
Next Articles
How to Stop Bird Nesting on a Balcony: Step-by-Step
Step-by-step how to stop balcony bird nesting with safe removal, cleaning, exclusion, and seasonal prevention tips.
How to Stop Bird Nesting in Your Roof Step by Step
Humane step by step guide to stop bird nesting on your roof using quick action, ID, exclusion, sealing, and safe cleanup
How to Stop Droll and Lock Birds Fast and Prevent Recurrence
Stop droll and lock birds fast with safe steps, troubleshooting, secure the area, then prevent reentry and roosting.