To control bird populations around a building, you need to work in a specific order: stop the immediate problem first (roosting, nesting, or entry), then seal the building against re-entry, clean up health hazards, and set a maintenance routine so birds don't come back. Done right, most situations are manageable without a professional, but a few scenarios (active nests with eggs, protected species, large infestations) require you to call in help. Here's exactly how to do it.
How to Control Bird Population Around Buildings Safely

Maya Carver
11 Jun 2026
Quick emergency actions to take today
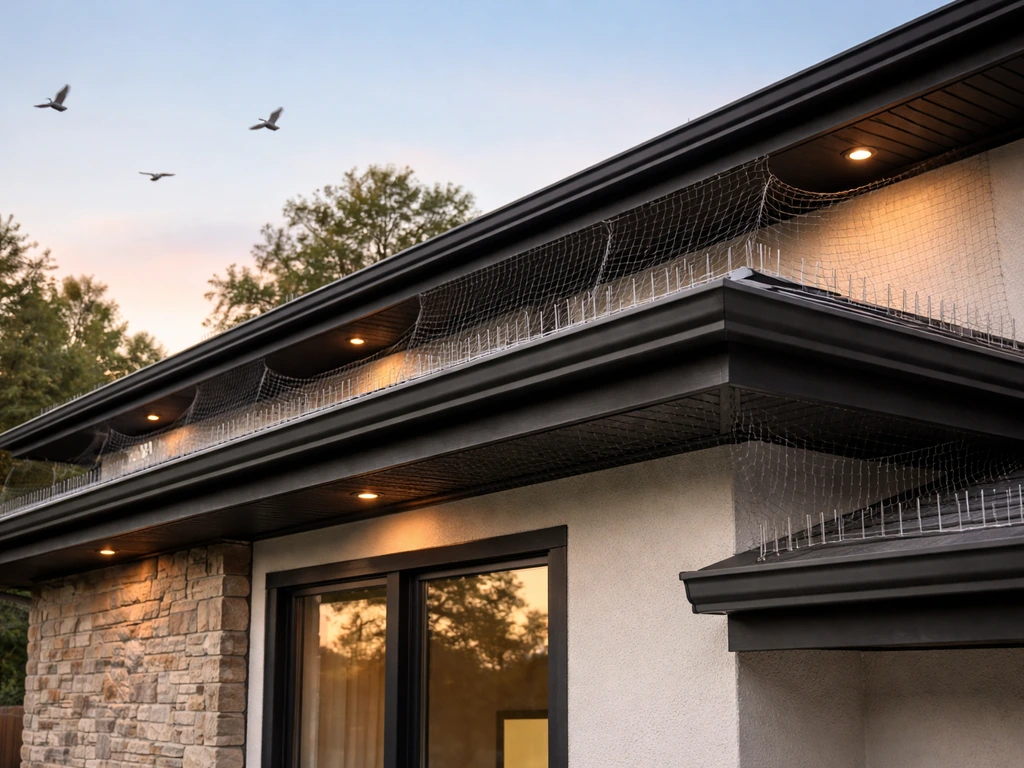
If birds are actively roosting on your roof, ledge, or balcony right now, your first move is to disrupt the space without harming the birds. The goal is to make the area uncomfortable enough that they relocate before they settle in or start nesting.
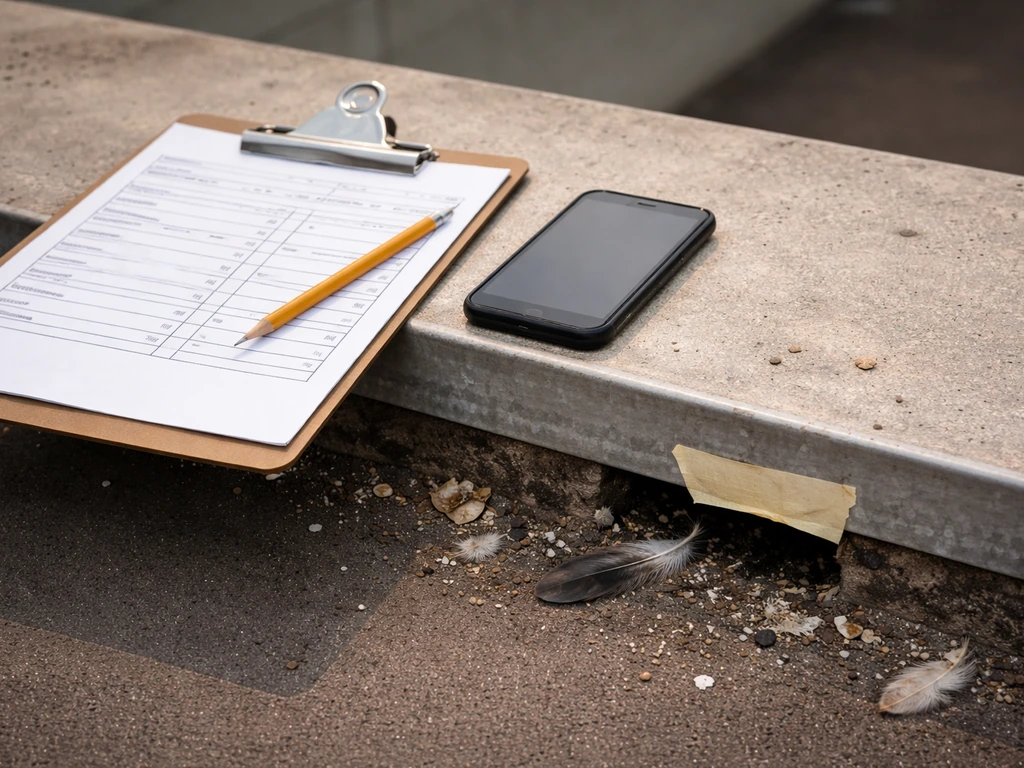
- Walk the perimeter and identify exactly where birds are landing, roosting, or entering. Note species if you can — pigeons and starlings are the most common culprits near buildings, and neither is federally protected under the Migratory Bird Treaty Act.
- Install a temporary physical deterrent on the problem surface within 24 to 48 hours. Anti-roosting spikes, coiled wire, or even a taut monofilament line strung across a ledge will interrupt landing behavior immediately.
- Remove any food or water source that's drawing them in. Uncovered trash, pet food left outside, leaking HVAC condensate lines, and standing water in gutters are all common attractants.
- If you see an active nest with eggs or live chicks, stop and do not disturb it. Check the legal notes section at the bottom of this article before touching anything.
- Block any open vents, gaps, or holes larger than half an inch with a temporary cover (hardware cloth works fast) to prevent birds from entering the structure while you plan a permanent fix.
These five steps won't solve the problem permanently, but they stop it from getting worse while you work through the rest of this guide.
Identify what you're actually dealing with: roosting vs nesting vs feeding
Before you spend money on deterrents, you need to know what behavior you're trying to interrupt. The fix for roosting birds is completely different from the fix for birds that are nesting inside your soffit or repeatedly landing on your roof to feed. Misidentifying the behavior is the single biggest reason people waste money on deterrents that don't work.
| Behavior | What you'll see | Key risk | Primary solution |
|---|---|---|---|
| Roosting | Birds gathered on ledges, rooftops, or beams at dusk; droppings accumulate directly below | Slip hazards, structural damage, disease from dropping accumulation | Physical deterrents on landing surfaces, habitat modification |
| Nesting | Nesting material (twigs, feathers, debris) in vents, soffits, or gutters; birds actively carrying material or returning repeatedly | Blocked vents, fire risk near HVAC, legal complications if active with eggs | Exclusion before nesting starts; one-way exits if birds are inside |
| Feeding | Birds landing briefly, pecking at surfaces, or gathering near food sources; scattered droppings over a wide area | Attracts more birds, can escalate to roosting | Eliminate food/water sources, add visual deterrents near entry points |
Use this as a quick decision framework: if birds are coming and going from inside a structure, treat it as a nesting or roosting-inside problem and prioritize exclusion. If they're landing on exterior surfaces, treat it as a roosting problem and focus on deterrents. If they're appearing and disappearing quickly in patterns around food or water, eliminate the attractant first.
Humane deterrents that actually work (and why they often fail)
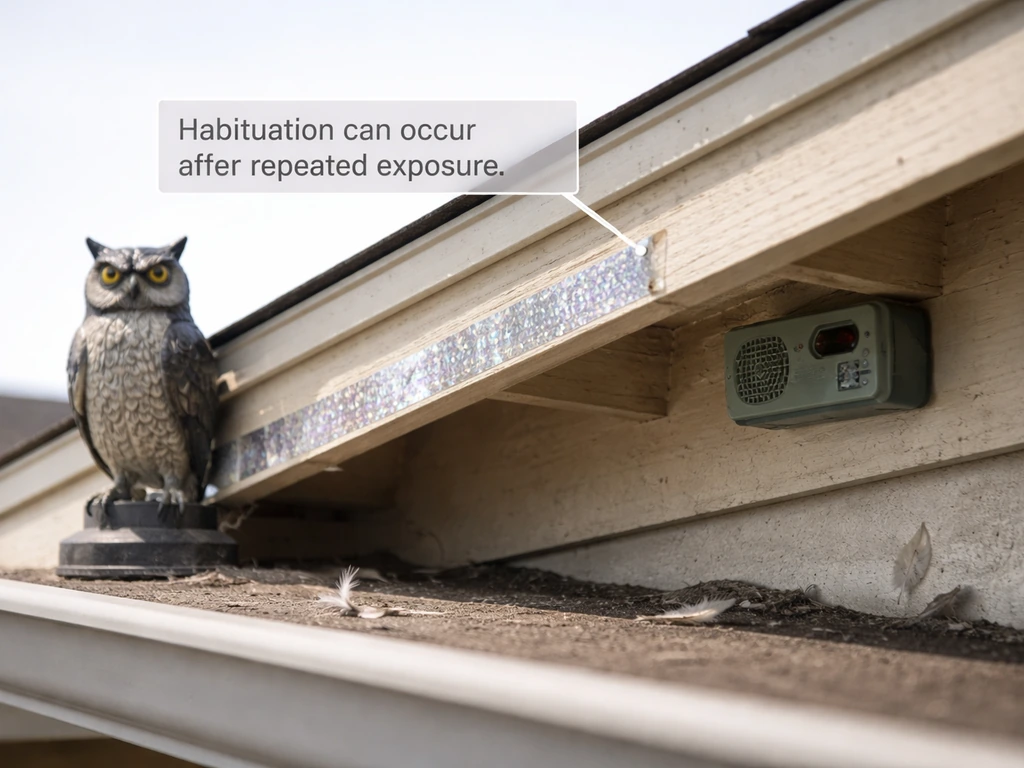
There's no shortage of bird deterrent products on the market, but most of them share the same weakness: birds habituate to them. A study-backed principle in bird management is that any deterrent that poses no real danger will eventually be ignored. Shiny tape, plastic owls, and ultrasonic devices are the biggest offenders. Birds figure out within days or weeks that nothing bad happens, and they go right back to using the space.
Deterrents with the best track record
- Anti-roosting spikes (stainless steel or polycarbonate): Mounted on ledges, beams, parapet walls, and AC units. Effective long-term because they're a physical barrier, not a psychological one. Install them flush with the surface edge so birds can't land beside them.
- Coiled wire or tension wire systems: Strung between anchor posts on ledges, these make landing unstable. Less visible than spikes and good for historic buildings. Requires precise tensioning.
- Bird netting: The most complete solution for enclosed areas like loading docks, covered parking, courtyards, and eaves. Use 3/4-inch mesh for pigeons and starlings; 1/2-inch or smaller for sparrows. HDPE netting with UV stabilization lasts years outdoors.
- Hazing and hazing programs: Noise cannons, laser deterrents, and trained raptors are used commercially and are effective when deployed with timing and consistency. The key per bird management research is rapid deployment when birds first appear — not after they've established a habit — and rotating stimuli to slow habituation.
- Bird gel/optical gel: A sensory deterrent that birds dislike on contact. Works well on narrow ledges, window sills, and signage. Not a substitute for exclusion in high-pressure locations.
Why your current deterrent probably isn't working
If you've already tried something and it stopped working, here's the likely cause. First, birds habituate to static deterrents (owls, tape, noisemakers) in under two weeks when those deterrents don't change position or behavior. Second, the deterrent may not cover the full surface area birds are using, so they simply shift a few feet. Third, an underlying food or water source is strong enough to override any discomfort the deterrent creates. Fix the attractant first, then deploy the deterrent.
Bird exclusion and habitat proofing for buildings (DIY steps)
Exclusion is the permanent fix. It physically prevents birds from entering or landing, and unlike deterrents, it doesn't rely on the birds deciding to leave. USDA APHIS describes exclusion methods that separate animals from the protected resource, including one-way-door concepts that allow exit but prevent re-entry. The challenge is doing it safely and doing it without trapping birds inside.
Step-by-step exclusion for homeowners and facility managers
- Audit the building exterior completely. Walk the full perimeter and check roofline, soffits, fascia boards, vents (plumbing, attic, HVAC, dryer), gaps where pipes enter walls, and any open weep holes. Mark every gap larger than 1/2 inch.
- Confirm no birds are inside before sealing. Watch each opening for several days. You can stuff a loose plug of paper into a suspected entry point: if it's disturbed the next day, something is using it. Never seal an entry point while birds are inside.
- Install a one-way exit device before permanently sealing if you suspect birds are already inside. A one-way door or cone allows birds to leave but not return. Leave it in place for 3 to 5 days until you confirm no more activity, then seal permanently.
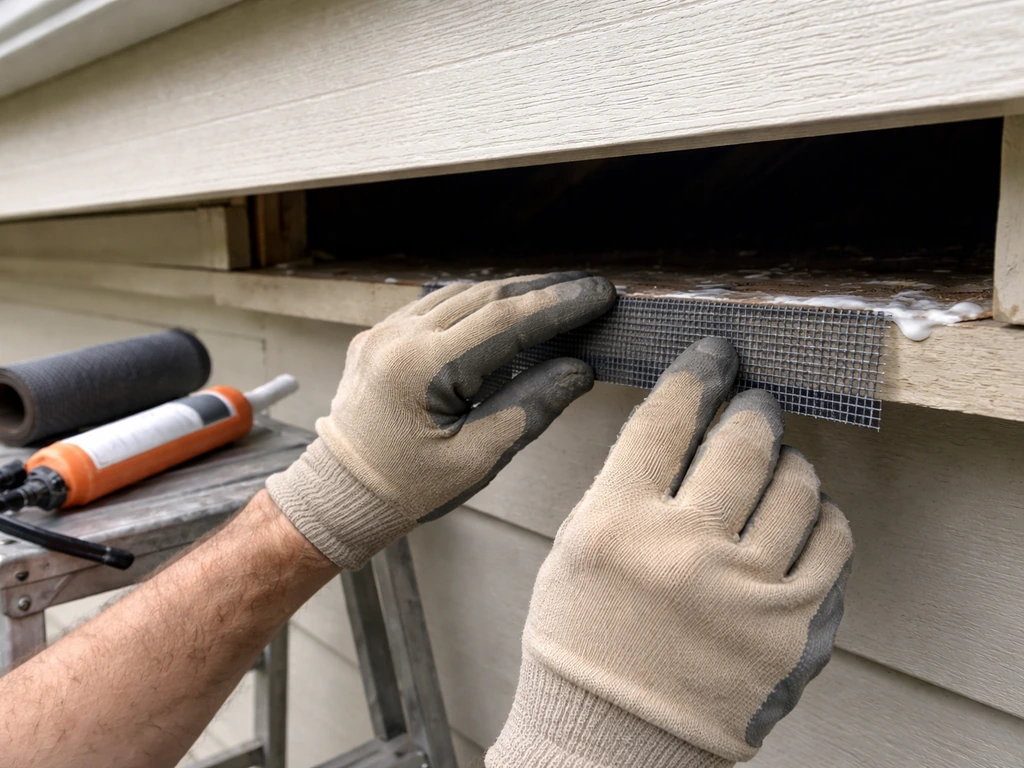
- Seal all openings with the right material. For gaps under 1/2 inch: copper mesh or steel wool temporarily, then caulk or foam. For vent openings: use galvanized welded wire mesh (1/2-inch square) or purpose-built chimney guards made from expanded metal mesh. For large gaps in soffits or fascia: use 16-gauge galvanized hardware cloth fastened with screws, not staples.
- Net enclosed spaces. For larger open areas (loading docks, warehouse bays, covered walkways), HDPE bird netting is the most durable solution. Anchor it to a cable system with tension, not just tied at the edges. Match mesh size to the target bird: 3/4-inch (19 mm) for pigeons, smaller for sparrows and starlings.
- Modify the habitat. After exclusion, reduce what makes the site attractive. Fix leaking water sources, secure waste containers, remove dense shrubs right against the building, and trim branches within 6 feet of the roofline.
Safety reminders before you get on a ladder or roof
- Never work on a roof or elevated surface alone. Fall risk is the number one injury hazard in bird-proofing work.
- Wet bird droppings on roofing surfaces are extremely slippery. Wear non-slip footwear and consider a harness on any pitched surface.
- For anything above a single-story roofline, seriously consider hiring a contractor with proper fall-arrest equipment rather than DIYing it.
Safe cleanup: managing droppings, odor, and disease risk
Bird droppings are a genuine health hazard, not just an aesthetic problem. Three diseases you need to take seriously are histoplasmosis (a lung infection from fungal spores in dried droppings, especially accumulations in enclosed spaces), psittacosis (a bacterial infection that can be aerosolized from dried feces), and avian influenza (transmissible through contact with contaminated surfaces and mucous membranes). These are not hypothetical risks when you're disturbing large accumulations of dried droppings in a confined attic or crawlspace.
Cleanup protocol
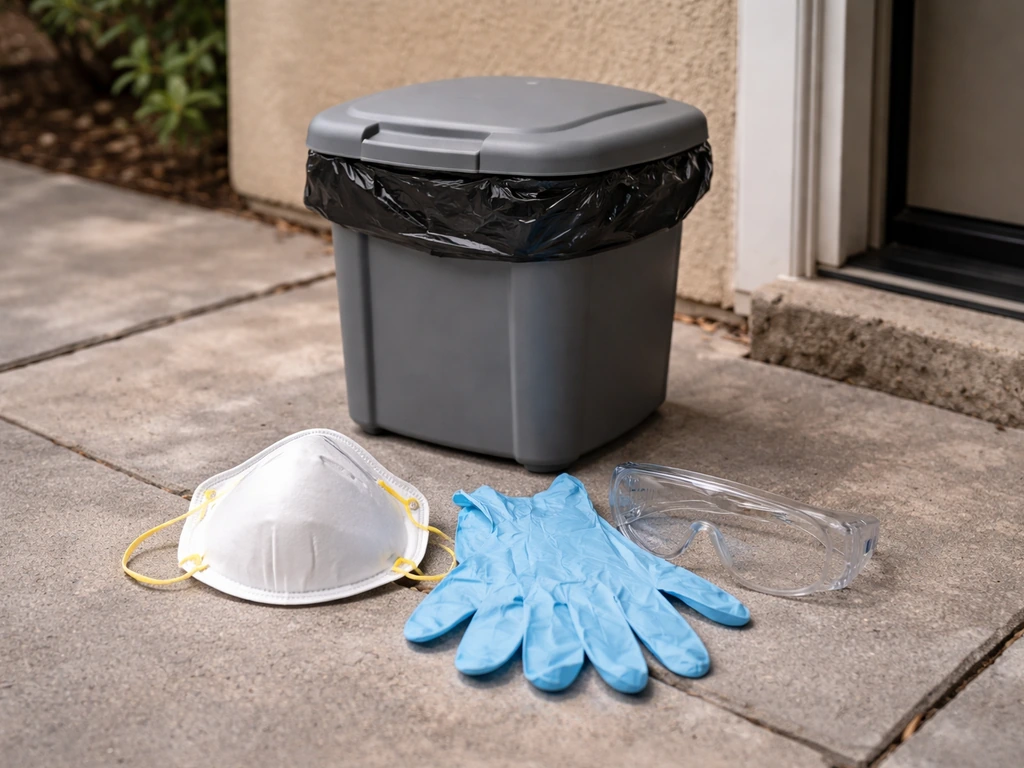
- Put on PPE before touching anything. Minimum: an N95 respirator (NIOSH-certified), safety glasses or goggles, disposable gloves, and disposable coveralls or clothes you'll wash immediately. For large accumulations or enclosed spaces, a P100 half-face respirator is a better choice than an N95.
- Wet the material before disturbing it. This is the single most important step. Spray droppings and nesting debris with water or a disinfectant solution before scooping, brushing, or vacuuming. Wetting prevents the dust and spores from becoming airborne, which is how you inhale them.
- Collect and bag the material while wet. Use a HEPA-filtered shop vacuum or scoop into heavy-duty plastic bags. Double-bag and seal.
- Disinfect the surface after removal. A 10% bleach solution or an EPA-registered disinfectant applied to the surface and allowed to dwell for 10 minutes is effective.
- Dispose of PPE properly. Bag and discard disposable items. Shower and wash hair if you were working in an enclosed or heavily contaminated space.
- Address the odor source. Persistent odor after cleanup usually means residual organic material in crevices or nesting debris. A commercial enzyme-based odor neutralizer applied after disinfection works better than masking agents.
If you're dealing with a large accumulation (more than a few square feet in a confined space), this is worth calling a professional remediation service. The health risk is real, and professional crews have the right equipment.
Seasonal plan and maintenance schedule to prevent birds from coming back
The most common mistake after a successful bird-proofing job is assuming the work is done. Birds will probe a building again seasonally, especially in late winter and early spring before nesting season. A simple annual schedule keeps the problem from rebounding. A strong bird-control plan also includes how to prevent bird activity from returning after cleanup, with sealing and exclusion.
| Season | Priority tasks |
|---|---|
| Late winter (January to February) | Inspect all exclusion materials installed the previous year. Check mesh for rust, netting for tears, and caulked gaps for cracking. Repair before birds scout nesting sites in spring. |
| Early spring (March to April) | Final pre-nesting inspection. Clear any debris from gutters (debris = nesting material). Confirm all vent covers and chimney guards are secure. Install or refresh deterrents on known roosting surfaces before peak nesting season. |
| Peak nesting season (May to mid-July) | Minimize disturbance to any occupied nests you find. Monitor for new entry attempts but avoid exclusion work near active nests. Document locations of problem nesting spots for post-season sealing. |
| Late summer to fall (August to October) | Primary exclusion and repair window. After chicks have fledged and nests are empty, this is the safest and most effective time to seal, proof, and install permanent deterrents. Clean up accumulated droppings. |
| Winter (November to December) | Light inspection pass. Clear droppings from ledges before freeze-thaw cycles make them harder to remove. Confirm food/water attractant controls are in place. |
For facility managers responsible for large buildings or multiple sites, schedule this as a formal maintenance task in your work order system. Consistency is what separates buildings that stay bird-free from buildings that face the same problem every spring.
Legal and ethical rules you need to know
Most birds you encounter near buildings in the US are protected under the Migratory Bird Treaty Act (MBTA). This includes common species like sparrows, swallows, starlings (actually not covered by the MBTA), and pigeons (also not federally protected). The birds that catch people off guard are ones that look like nuisance birds but are fully protected: chimney swifts, barn swallows, cliff swallows, and any raptor. If you're unsure of the species, identify before you act.
The nesting season rule
Under the MBTA, destroying an active nest containing eggs or live chicks is generally illegal for protected species, even on your own property. An unoccupied nest (no eggs, no birds) is generally not protected, and you can remove it. The risk window is roughly May through mid-July, which is when the majority of migratory birds are actively nesting, though this varies by species and region. The practical takeaway: if you find a nest and aren't certain it's empty, don't touch it. Wait, watch for a few days, and confirm before acting.
When to call a wildlife professional
Some situations genuinely require a licensed wildlife professional or pest control operator with bird management expertise. Calling one isn't admitting defeat; it's the right move when the risk of DIY is too high.
- You've identified a protected species (swallows, swifts, any raptor) nesting on or in your building
- There's an active nest with eggs or chicks and you're unsure of the species or the law
- Birds are inside a wall cavity, attic, or enclosed mechanical space that you can't safely access
- The infestation is large (hundreds of pigeons or starlings), and deterrents have repeatedly failed
- You need to clean up a large accumulation of droppings in a confined space
- The building is a commercial facility with regulatory compliance obligations (healthcare, food service, schools)
When you call, be ready to describe the species if you know it, the location and size of the problem area, how long it's been happening, and what you've already tried. A good wildlife professional will start with an inspection and give you a tiered plan that includes exclusion as the long-term solution, not just trapping or removal.
Your next steps starting today
If you're reading this with an active problem, here's your action plan. To stop a reel from bird nesting, focus on the underlying nesting behavior first, then seal entry points to keep birds from returning. Today: do the five-step emergency checklist at the top of this article. If your issue is specifically about droll and lock bird activity, you can follow a targeted approach to stop it and prevent return how to stop droll and lock bird. This week: identify the behavior (roosting, nesting, or feeding) using the table above, audit every gap in your building exterior, and confirm no birds are already inside. This month: install permanent exclusion on all identified entry points, add physical deterrents to roosting surfaces, and address any food or water attractants. Over the next one to three months: follow the seasonal maintenance schedule and monitor for new activity. The birds that keep coming back are usually finding something you missed, so systematic inspection beats repeated deterrent purchases every time. Related problems like stopping birds from nesting on your balcony or sealing them out of your roof require the same core approach: identify, exclude, clean, and maintain. Related problems like stopping birds from nesting on your balcony or sealing them out of your roof require the same core approach: identify, exclude, clean, and maintain. To stop bird nesting, you’ll need to remove nesting opportunities and then seal and exclude entry points so birds cannot return.
FAQ
How can I tell if birds are roosting on the outside or nesting inside the building?
Watch their timing and destinations. If you see consistent flights to the same exterior opening, and birds appear to go into wall gaps, soffits, chimneys, or vents, it is usually an inside roosting or nesting issue. If they mainly perch on ledges or roof edges and leave after short resting periods without entering the structure, it is more likely an exterior roosting problem.
What should I do if birds are inside but I am not sure there are eggs yet?
Do not seal openings immediately. First confirm whether birds are actively entering and exiting a specific gap, and keep the area quiet while you observe for a few days. If you suspect eggs or chicks, wait until the activity stops before closing entry points, then seal to prevent re-entry.
Why do “do not land here” products fail even when I place them correctly?
Most failures happen because the birds can still use an adjacent surface, or the deterrent does not cover the exact landing and probing spots. Also, static items lose effectiveness as birds habituate. Plan for coverage that matches the birds’ chosen perching lines, then switch to exclusion so the birds cannot access the space.
Can I use loud noises or ultrasonic devices as a long-term solution?
They usually do not provide durable control because birds can habituate, especially if conditions and the sound source do not change. Use them only as a temporary interruption while you complete identification, cleanup, and permanent exclusion.
Is it safe to clean droppings when birds are still roosting or nesting nearby?
It is generally better to avoid disturbing active nests and to postpone heavy cleanup until you have stopped birds from entering that area. If you must handle droppings during an active situation, use proper respiratory protection and keep exposure low, but exclusion and timing matter more than cleaning alone.
What are the “high risk” situations where I should not DIY?
Avoid DIY when you have large accumulations in enclosed spaces, suspected bird diseases from significant droppings, active nests with eggs or chicks, or when protected species are involved. Also call in help for hard-to-reach areas like steep roofs, crawlspaces with heavy buildup, or locations requiring access equipment.
How do I avoid trapping birds inside during exclusion?
Do not close both the entry and the exit at the same time. Identify the access points, use one-way systems where appropriate, and confirm birds have left before sealing completely. A professional can advise the safest method for your building layout, especially with complex attic or chimney spaces.
What should I seal first, and what should I leave for later?
Start with the most direct entry routes birds are using. If birds are still actively entering, prioritize temporary control and confirmation, then complete sealing after activity stops. Sealing too early can lock birds inside, while sealing the wrong gaps can waste material without stopping the problem.
Do I need to remove nests even if the birds keep coming back to the same spot?
Unoccupied nests can often be removed, but you should not remove active nests containing eggs or live chicks for protected species. If you are unsure, observe for several days to confirm whether the nest is occupied, then remove or exclude only when it is safe and permitted.
When is nesting season, and what timing should I use for exclusion?
A key window is roughly May through mid-July for many migratory species, but timing varies by region and species. The practical rule is to do permanent exclusion after you confirm the birds have finished nesting and you are not blocking an active nest.
What should I tell a wildlife professional when I call?
Share the species if you can identify it, the exact location (roof edge, soffit gap, vent, chimney, balcony), the approximate size of the problem area, how long it has been happening, whether birds are entering and exiting, and what you have tried so far. Photos or short video clips of the access points also help them choose the right exclusion approach.
After I exclude birds, how do I know it worked and I did not just move the problem elsewhere?
Monitor the same surfaces for new landing or probing within the next weeks, especially during late winter and early spring. If you see repeat activity on a nearby ledge, you likely missed an access route or created an alternative landing path, so re-audit gaps and surfaces.