Birds most often get into houses through gaps they can fit through with ease: open or unscreened windows and doors, broken or missing vent covers, gaps between roofing and soffits, deteriorating fascia or eave boards, uncapped chimneys, dryer vents without flaps, and small cracks around siding or gable ends. Once inside, they panic, fly toward light, and can hurt themselves fast. The fix has two phases: get the bird out safely right now, then find and seal the entry point so it never happens again.
How Can a Bird Get in Your House and What to Do Now

Maya Carver
4 May 2026
Why birds get inside: the most common entry routes
Understanding exactly how a bird got in helps you find the gap afterward and choose the right fix. Most entries fall into a handful of predictable categories.
Open or unscreened doors and windows

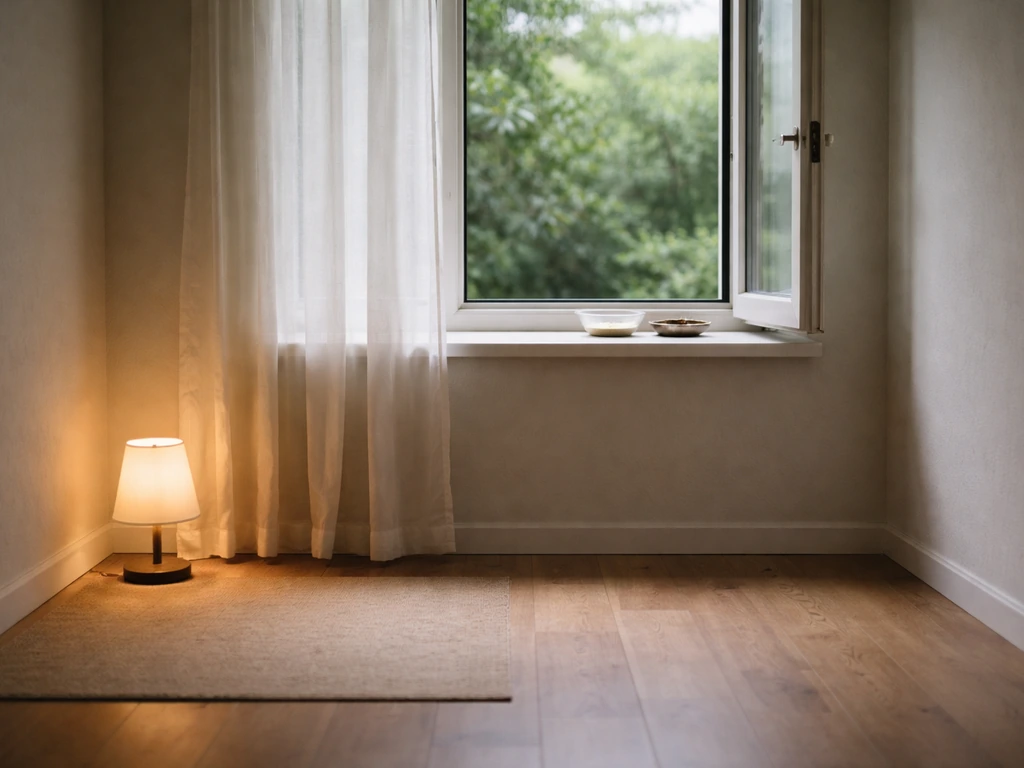
This is the most obvious one, and it happens constantly in warm months. A door propped open for five minutes, a window screen with a torn corner, a sliding door left ajar while you bring in groceries: that is all it takes. Songbirds, starlings, and sparrows will fly straight in when they see an opening, especially if there is food, water, or light on the other side.
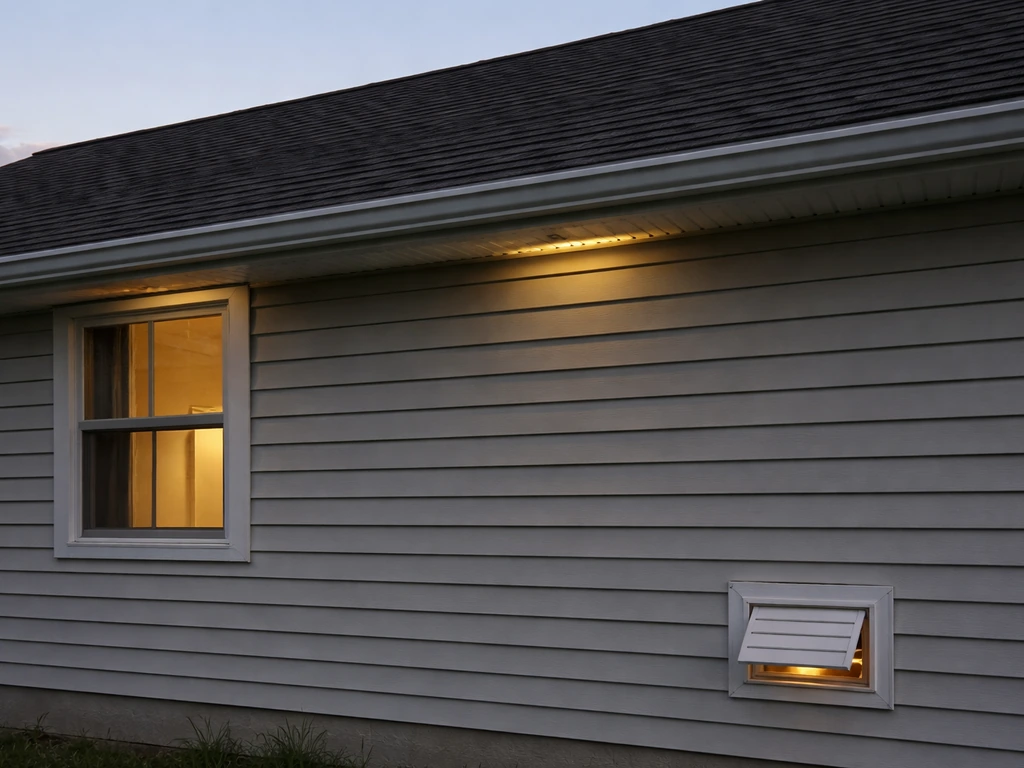
Roof gaps, soffits, and eaves
House sparrows and starlings are the two species most likely to exploit roof spaces. They squeeze through the gap between roof tiles and the gutter line, or through rotted soffit boarding. Swifts specifically target spots where overhanging roofing felt is torn or where soffit boards have become soft and loose. Any gap wider than about half an inch at the roofline is a potential doorway. House sparrows actively nest in building eaves and wall cavities, so once one bird finds the gap, a colony can follow.
Vents and exhaust openings
Gable vents, soffit vents, bathroom exhaust vents, and dryer vents are major entry points if they lack functional covers or mesh. Starlings in particular exploit these construction gaps. Dryer vents are especially risky because the spring-loaded flap wears out and stops closing fully, leaving a warm, dark, protected tunnel that looks like a perfect nest site to a starling or sparrow.
Chimneys and flues
An uncapped chimney is an open invitation. Birds (and other wildlife) drop in, sometimes intentionally to nest on the smoke shelf, and sometimes accidentally. Every flue in a masonry chimney should have a professionally manufactured chimney cap that meets local building requirements. Without one, you are essentially leaving a skylight open into your home.
Gaps around siding, fascia, and basement openings
Rotted or warped wood siding, gaps where utility lines enter the house, cracked foundation vents, and deteriorating fascia boards all create entry points. Basements are particularly vulnerable when window wells lack covers or when old utility penetrations were never properly sealed.
Quick safety steps the moment a bird gets in
Before you do anything else, take 60 seconds to set the room up correctly. A panicked bird can injure itself badly within a few minutes by flying into windows and walls. These steps calm the situation down for both you and the bird.
- Remove or confine pets immediately. Dogs and cats trigger extreme stress responses in birds and can injure or kill them in seconds.
- Clear the room of children if possible, or keep them calm and still. Sudden movement makes the bird more frantic.
- Close all interior doors to contain the bird in one room. The smaller the space, the easier the removal.
- Stop the noise: turn off TVs, music, and fans. A quieter room helps the bird calm down.
- Do not chase, wave at, or try to grab the bird yet. Give it two to three minutes to land somewhere and settle.
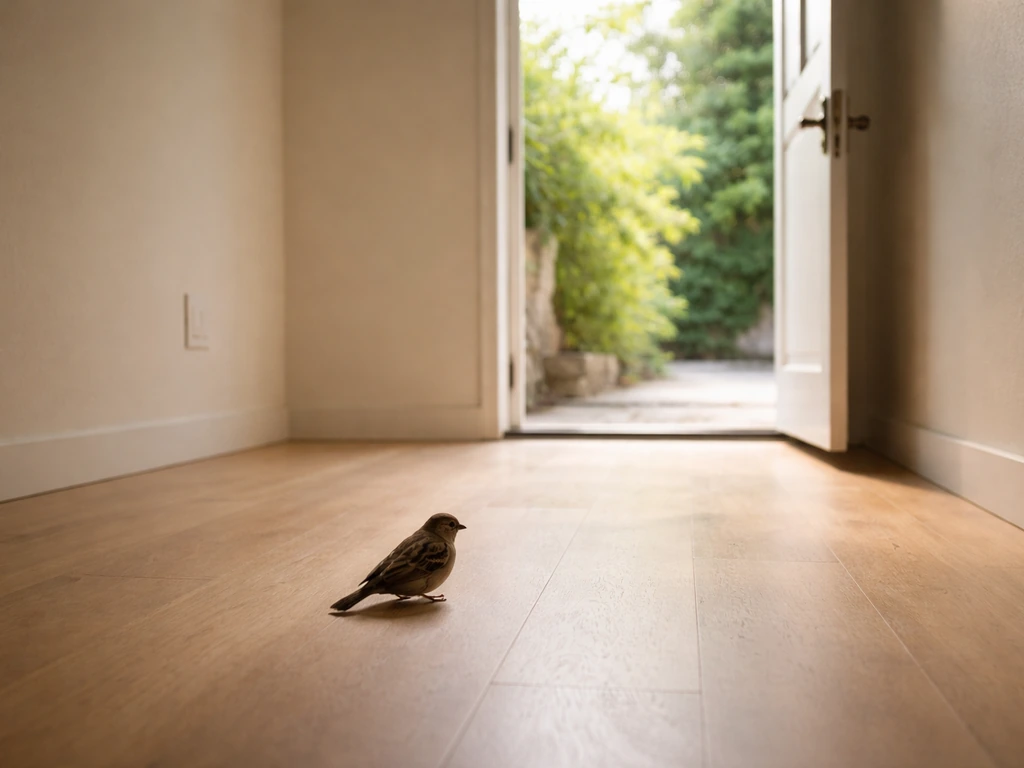
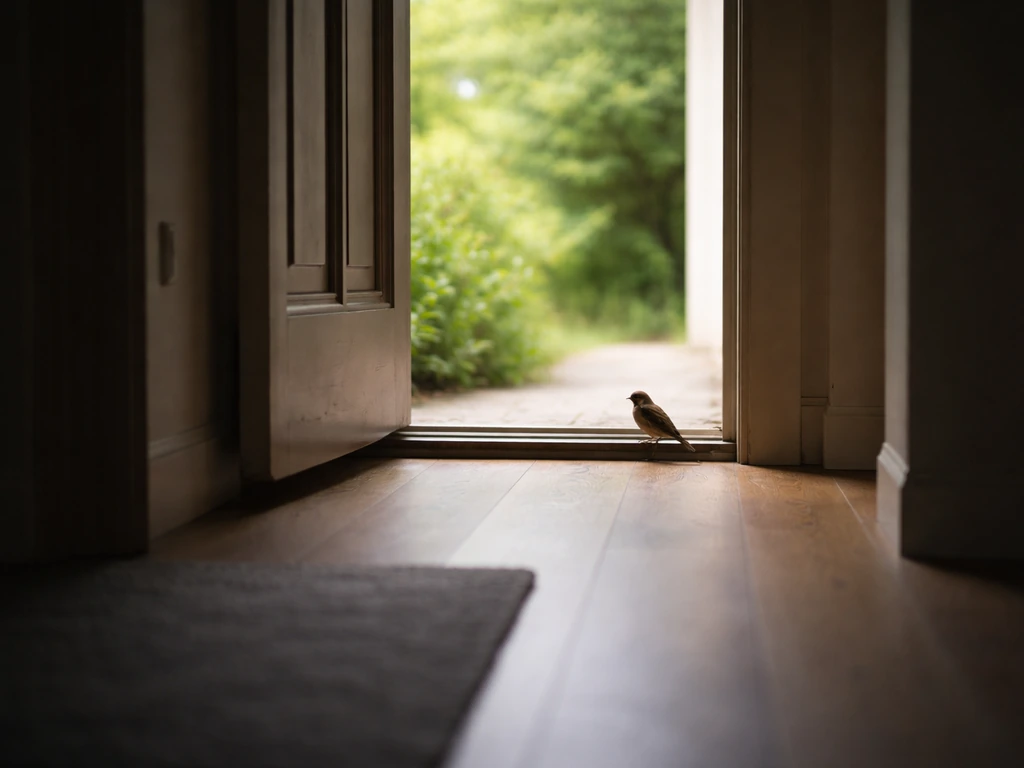
Once the room is contained and calm, move to the light-and-exit technique. If you still have a bird inside and need immediate next steps, see bird in house what to do for the light-and-exit approach and safety actions. Turn off all interior lights in the room. Then open one exterior window or door as wide as possible (remove the screen if needed) so that opening becomes the brightest, most obvious point in the space.
Cover any other windows with blinds, drapes, cardboard, or towels so the bird does not mistake closed glass for an exit and collide with it. Many birds will find the open exit on their own within a few minutes. If you are wondering how to catch a bird already loose inside, start with the light-and-exit method described earlier how to catch a bird in your house.
How to find and remove the bird safely: step by step
If the bird does not leave on its own after 10 to 15 minutes using the light-and-exit method, use one of these approaches depending on where it is. If you cannot locate where it is hiding, start by checking common shelter areas like attics, wall cavities, and behind vents.
Bird in a main room or living area
- Keep lights off and the exit window or door fully open.
- If the bird has flown up to a curtain rod or ceiling light fixture, use your arms or a broom held horizontally to gently encourage it downward and toward the open exit. The broom should not make contact with the bird, just guide the air around it.
- If it lands on the floor or a low surface and seems calm, place a lightweight cardboard box or large towel over it gently, slide a piece of cardboard underneath, and carry it outside.
- Release it at ground level away from the house so it can reorient safely.
Bird in a garage or shed
- Turn off all garage lights.
- Open the main garage door fully.
- Cover any side windows so the bird is not drawn to closed glass.
- Leave the space undisturbed for 15 to 20 minutes. Most birds exit when the large opening is the only light source.
- If it is still inside after that, use the broom guidance technique described above.
Bird in a chimney or fireplace
- Keep the damper closed until you are ready to act, to prevent the bird from entering the main living area.
- Darken the room completely and open an exterior door or window nearby.
- Open the damper slowly and step back. The bird may fly toward the light on its own.
- If it lands in the firebox and does not move, use a fine-meshed net (a butterfly net works well) to capture it gently while it is still inside the firebox, then carry it directly outside and release it.
- Do not light a fire to scare it out. That causes serious harm.
Bird in a basement
- Open a basement window or exterior door and remove any screens.
- Turn off basement lights and cover any windows the bird keeps flying toward.
- If there is a window well, remove the cover and prop it open as an additional exit.
- Use the towel-and-cardboard method if the bird lands and appears exhausted.
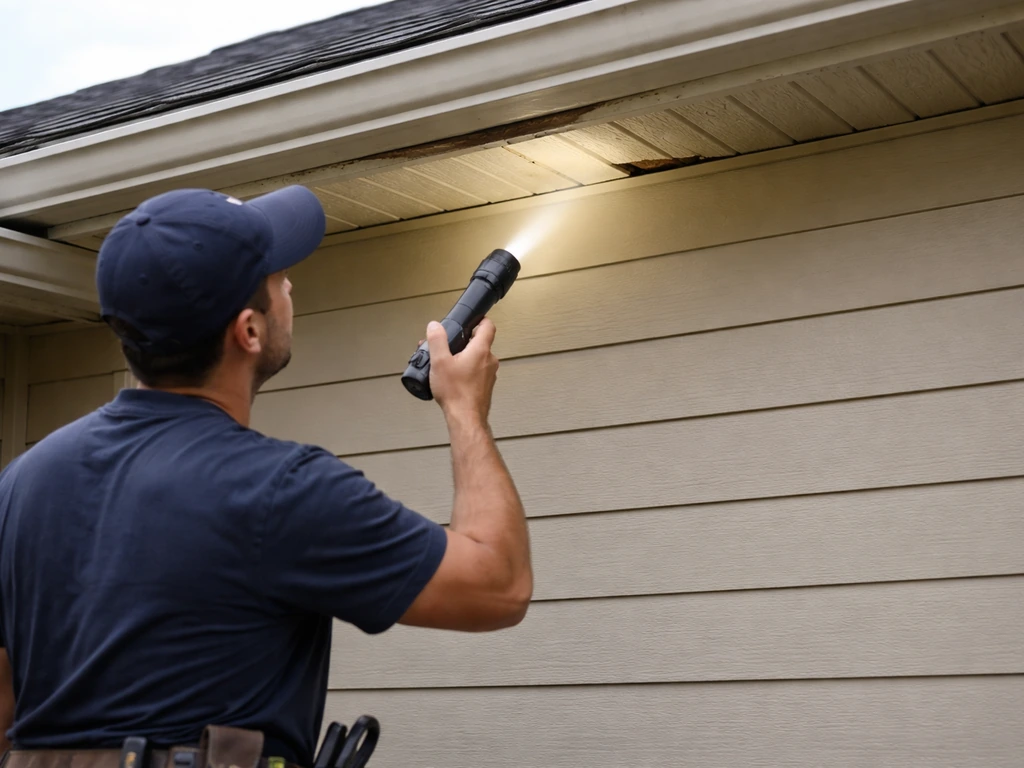
Finding the exact entry point after the bird is out
Once the bird is safely outside, your next job is to find how it got in. If you need help tracing the exact route from start to finish, use this guide on how to find a lost bird in your house find how it got in. Do this the same day if possible, before another bird finds the same route. Start inside and work outward.
Inside inspection
- Look for droppings, feathers, or nest material near walls, vents, or the fireplace as directional clues.
- Check the fireplace smoke shelf and damper area for nesting debris.
- Inspect the attic hatch: open it and look for daylight coming through roofline gaps or vents.
- Check dryer vent duct connections in the wall for gaps or loose fittings.
- Look at basement window frames and any utility penetrations (pipe, wire, conduit entries) for open spaces.
Outside inspection
- Walk the roofline from ground level and look for missing, lifted, or damaged soffit panels.
- Check gable-end vents for missing or broken mesh covers.
- Look at the gap where roof tiles or shingles meet the gutter fascia for open spaces wider than half an inch.
- Inspect dryer and exhaust vent covers on the exterior wall: push the flap; if it does not spring back firmly, it is compromised.
- Check chimney tops for caps: if there is no cap, that is your entry point.
- Look for warped or rotted siding boards, especially near foundation level and where utilities enter.
- Do the daylight test in the attic on a bright day: turn off all attic lights and look for pinpoints or streaks of light coming through the roof deck or eaves.
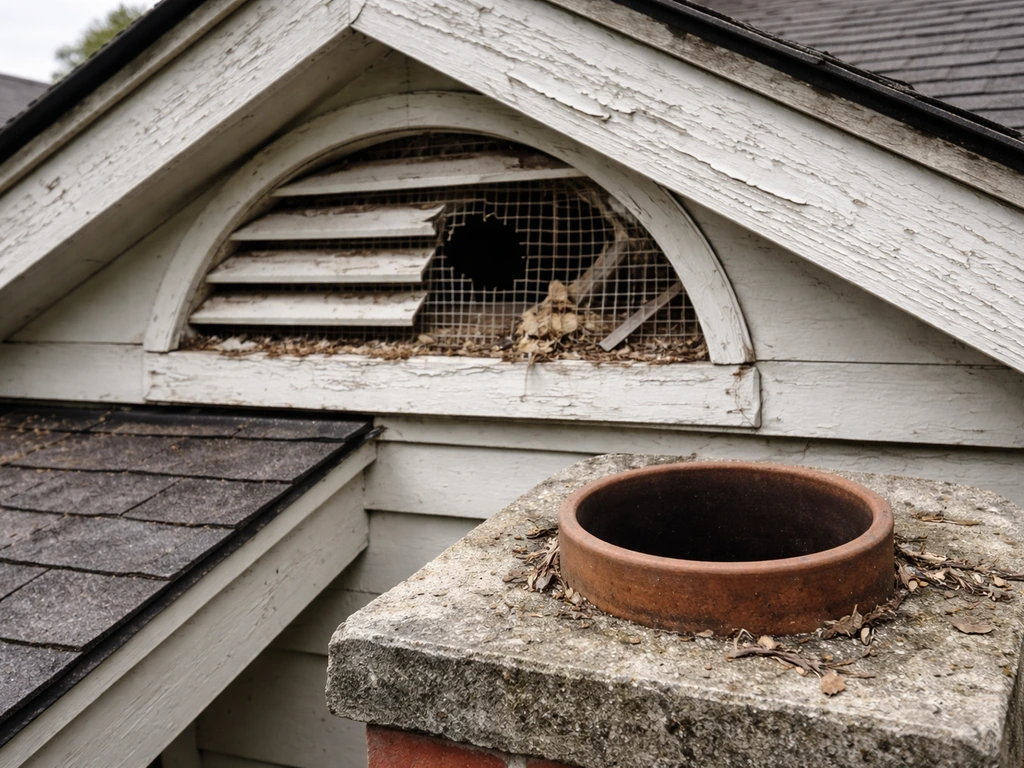
If you find evidence of nesting material in the attic, chimney, or a wall cavity, treat that area carefully before sealing. Nests with eggs or live young have legal protections (more on that below).
Bird-proofing fixes: seal, screen, and exclude
Once you know the entry point, here are the right fixes for each type. USDA APHIS also describes exclusion devices as part of wildlife management, using barriers such as bird netting and wire mesh to help keep birds from entering buildings exclusion devices as part of wildlife management using barriers such as bird netting and wire mesh. These are repairs you can often do in an afternoon with hardware store materials.
| Entry point | Recommended fix | Material notes |
|---|---|---|
| Soffit gaps or rotted soffit boards | Replace damaged boards; seal gaps with caulk or foam before repainting | Use exterior-grade materials; check for nesting before sealing |
| Gable or soffit vents | Install 1/2-inch stainless steel or vinyl-coated hardware cloth over the vent opening | Do not use mesh smaller than 1/2 x 1/2 inch on functional vents; smaller mesh significantly reduces airflow |
| Dryer or exhaust vents | Replace the exterior vent cover with a model that has a functional spring-loaded damper flap | Add 1/2-inch hardware cloth behind the cover if the duct is large; check seasonally |
| Chimney flue | Install a professionally manufactured chimney cap that meets local code | One cap per flue; stainless steel caps outlast galvanized; confirm fit for flue size |
| Roofline tile/gutter gap | Use bird-proof foam or mortar to fill the gap; add a mesh strip along the gutter line | Stainless or vinyl-coated mesh resists rust and lasts longer than galvanized |
| Broken window or door screens | Replace the screen mesh; repair the frame if bent | Use 18x16 fiberglass or aluminum mesh for standard use |
| Utility penetrations (pipe/wire/conduit) | Seal with exterior caulk, mortar, or expanding foam depending on gap size | Fill gaps over 1/2 inch with hardware cloth first, then foam over it |
| Basement window wells | Install polycarbonate window well covers | Covers also keep out rain and debris; check that they do not block emergency egress |
For any screening on functional vents, the rule is straightforward: do not use mesh smaller than 1/2 x 1/2 inch on an active airflow path. Finer mesh blocks too much air and can cause moisture problems or reduce dryer efficiency. Stainless steel or vinyl-coated hardware cloth is stronger than galvanized and will not rust, which matters for exterior installations that face rain and humidity year after year.
Long-term prevention: a seasonal plan
One repair is not enough on its own. Birds are persistent, and buildings develop new gaps every year as materials age and shift. A simple seasonal routine catches problems before birds find them. The Internet Center for Wildlife Damage Management (ICWDM) also recommends using a professionally manufactured chimney cap sized to the flue dimensions to protect the flue top from rain damage and deter wildlife A simple seasonal routine catches problems before birds find them..
Spring (February to April)
- Inspect roofline, soffits, and eaves before nesting season begins. This is your most important window.
- Check all vent covers and chimney caps after winter weather. Ice and wind damage them.
- Seal any new gaps you find before sparrows and starlings start scouting for nest sites.
- Confirm dryer vent flaps are working; replace covers that no longer close fully.
Summer (May to August)
- Keep window and door screens in good repair during peak open-window season.
- Check screens monthly for tears, especially in high-traffic areas like kitchen and back-porch doors.
- Do not leave exterior doors propped open unattended.
- Manage indoor attractants: keep pet food stored, fix dripping faucets, and do not leave standing water near open windows.
Fall (September to November)
- Do a full exterior inspection before winter closes in. Look for gaps created by summer heat expansion and contraction.
- Clean out any inactive nest material from vents and eave cavities (confirm nests are empty and inactive first).
- Check chimney caps before you start using the fireplace for the season.
- Trim back tree branches that overhang the roofline. Overhanging branches give birds a launching pad directly to roof gaps.
Winter (December to January)
- Inspect for ice-damaged soffit panels and fascia after freeze-thaw cycles.
- Check that chimney caps are still secured after high winds.
- Note any new gaps or shifted siding for repair as soon as weather allows.
Controlling attractants
Birds come closer to buildings when there is food and water nearby. Bird feeders placed directly against the house wall are an invitation to explore further. Move feeders at least 10 to 15 feet away from the building. Clean up spilled seed regularly. Fix any dripping outdoor faucets and eliminate standing water in gutters by keeping them clear. Inside, store pet food in sealed containers and repair any leaky pipes that create moisture near wall penetrations.
Roosting deterrents for ledges and eaves
If birds are roosting on window ledges, beam ends, or parapet walls before they ever get inside, address those roosting spots directly. Angled ledge strips (also called bird slopes or anti-roosting spikes for flat surfaces) make landing uncomfortable without harming birds. These are widely available and easy to install on flat ledges. For facility managers dealing with larger buildings, combining physical deterrents with exclusion mesh at known entry points is the standard approach.
When to call a wildlife professional instead of DIYing it
Most single-bird situations are manageable on your own. But there are several scenarios where you should stop, step back, and call a licensed wildlife rehabilitator or a professional wildlife control operator.
The bird appears injured
If the bird is not flying, is lying on its side, has a visibly injured wing, or is bleeding, do not attempt an extended DIY capture. Under U.S. federal regulations (50 CFR § 21.76), any person who finds a sick, injured, or orphaned migratory bird may take temporary possession without a permit for the sole purpose of transporting it to a licensed wildlife rehabilitator or veterinarian. That is the right move: contain it gently in a ventilated box, keep it dark and quiet, and get it to a rehabilitator the same day. Do not offer food or water unless instructed by a professional.
There is an active nest with eggs or young
This is where the law matters most. Under the U.S. Migratory Bird Treaty Act, it is illegal to destroy a nest that contains eggs or chicks, or where young birds are still dependent on the nest, unless you have a valid federal permit. The USFWS typically only issues nest removal permits when there is a genuine human health or safety concern. If you find an active nest while investigating your entry point, do not seal that opening until the nest is confirmed empty and the young have fledged. If you are in Canada, the Migratory Birds Regulations, 2022 generally protect nests that contain a live bird or viable egg, with permits (Section 70) required for removal in most cases.
Note that House Sparrows and European Starlings are not native species and are not protected under the Migratory Bird Treaty Act in the U.S. However, many other common visitors (robins, swallows, wrens, finches) are protected. If you are not certain of the species, treat the nest as protected until confirmed otherwise.
Inaccessible or structural locations
If the bird has gotten into a wall cavity, an inaccessible attic section, or deep inside a chimney flue and you cannot confirm its location or safely reach it, call a wildlife control operator. Attempting to seal an entry point while a bird is still inside is both inhumane and a source of odor and damage as the bird cannot escape. A professional can use acoustic detection, thermal imaging, or direct inspection to confirm the space is clear before sealing.
Recurring or large-scale entry
If birds are getting in repeatedly despite your repairs, or if you are dealing with a facility-scale problem involving multiple entry points, a flock of starlings in an HVAC system, or a colony nesting in a commercial roof, that is beyond DIY scope. A licensed National Wildlife Control Operator (NWCO) can conduct a full exclusion audit, install commercial-grade screening, and provide documentation for insurance or facility compliance purposes.
For topics like how to catch a bird already loose inside, what to do when you cannot locate where the bird is hiding, or who exactly to call in your area, those are each specific situations worth looking into further depending on what you are dealing with. If you need help figuring out who to call in your area, start with a licensed wildlife control operator or wildlife rehabilitator who exactly to call in your area.
For specific local guidance, look up who to call for wildlife control or a licensed wildlife rehabilitator in your area who to call in your area. If the bird dies inside, focus on safe cleanup and hygiene, then check and seal the entry point so it does not happen again what to do when you cannot locate where the bird is hiding.
FAQ
What should I do if I cannot keep the bird in one room?
If you cannot fully contain the room, still use the light-and-exit setup (one open exterior door or window, turn off interior lights, cover other windows). Then keep everyone away from the room edges and close interior doors leading to the rest of the home so the bird is less likely to spread into hallways or other floors.
How can I tell if there is more than one entry point?
Yes. After the bird is out, check for gaps you may not notice right away, like the space around dryer vent ducts where they meet the wall and any loose or missing exterior backdraft dampers. Even if the bird seems to have entered through an obvious window, a second, smaller opening can still be present and reused.
Can I seal the entry point while I still hear the bird?
Avoid sealing before you are sure the bird is gone. If you suspect it is hidden, wait and re-check for movement or sounds, and only seal when you have confirmed the space is empty. Sealing too early can trap a bird inside, leading to strong odor and cleanup damage later.
What if the bird is hiding high up or behind furniture, and I cannot see it clearly?
Use the light-and-exit technique first and generally avoid chasing. If the bird is perched high or wedged, open the nearest exit you can manage (an exterior door or the closest window), then give it time to move toward the brighter opening instead of trying to grab it.
Is it okay to use a net or towel to catch a panicked bird?
Don’t rely on homemade “bird catcher” tools or nets near windows. A panicked bird can break bones on impact, especially when there are reflections. If the bird is injured or not flying, use the “contain gently in a ventilated box” approach and contact a licensed rehabilitator the same day.
If the bird left on its own, does that mean the problem is fixed?
Not always. Some birds may enter briefly and only settle later, especially in rooflines or wall cavities. After a bird comes out, look for signs like droppings near vents, scratching near roof edges, or feathers on window ledges to confirm whether the entry occurred recently.
What should I do if I discover nesting material near the entry point?
If you find a nest, delay repairs of that specific opening until it is confirmed empty and the young have fledged, since active nests are protected under relevant wildlife laws. For any nesting evidence in attics, chimneys, or wall cavities, focus on keeping access limited and arranging help rather than sealing immediately.
What are the best steps if the bird dies inside?
If the bird is found dead after it got in, handle cleanup with gloves and mask, ventilate the area, and remove droppings and debris carefully. After cleanup, still trace and seal the entry route so another bird cannot enter and die in the same inaccessible spot.
What prevention steps work best after repairs?
For prevention, use two layers: exclusion on the building openings (proper vent caps, intact screens, and correct mesh sizing) and reduction of attractants. Keep feeders away from walls, remove spilled seed, fix drips, and eliminate standing water, because these greatly increase how often birds investigate your facade.
When should I stop DIY and hire a wildlife control professional?
If you are repeatedly seeing birds or you find multiple suspicious openings, bring in a pro for an exclusion audit rather than patching randomly. Repeated entry can indicate a systemic issue like aging roofline materials, multiple unsealed penetrations, or improper vent installations that a single DIY repair would not address.
Next Articles
How to Find a Lost Bird in Your House: Step-by-Step
Step-by-step humane plan to find and capture a lost bird indoors, handle injuries, and prevent future entry points.
What to Do If a Bird Is in Your House: Steps to Get It Out
Humane steps to safely get a bird out and prevent it nesting again with entry-point fixes and safety guidance.

How Do You Catch a Bird in Your House Safely
Humane, safety-first steps to catch or contain an indoor bird, then release or transfer and prevent repeat entry.