To make your windows bird-safe, apply a visual deterrent pattern to the outside surface of each pane using markers, film, tape, or parachute cord spaced no more than 2 inches apart in any direction. That single step stops the majority of collision deaths. From there, combine it with a nesting audit, light management at night, and a quick check of any gaps or ledges birds are using near the frame. The sections below walk you through every situation in order: emergency first, then prevention, then long-term proofing.
How to Make Windows Bird Safe: Step-by-Step Guide

Maya Carver
4 May 2026
Quick check: what kind of bird-window problem do you actually have?
Before spending money on products, spend five minutes figuring out exactly what is happening. The fix for a confused migrant hitting a reflective pane at dawn is completely different from the fix for a sparrow that has built a nest on your window ledge or a pigeon roosting on the sill every morning. There are really only three categories of problem, and knowing yours saves you a lot of trial and error.
| Problem type | What you notice | Primary fix |
|---|---|---|
| Window collisions | Feathers, smudges, or dead/dazed birds on the ground below the window | Outside visual barrier with 2-inch grid spacing |
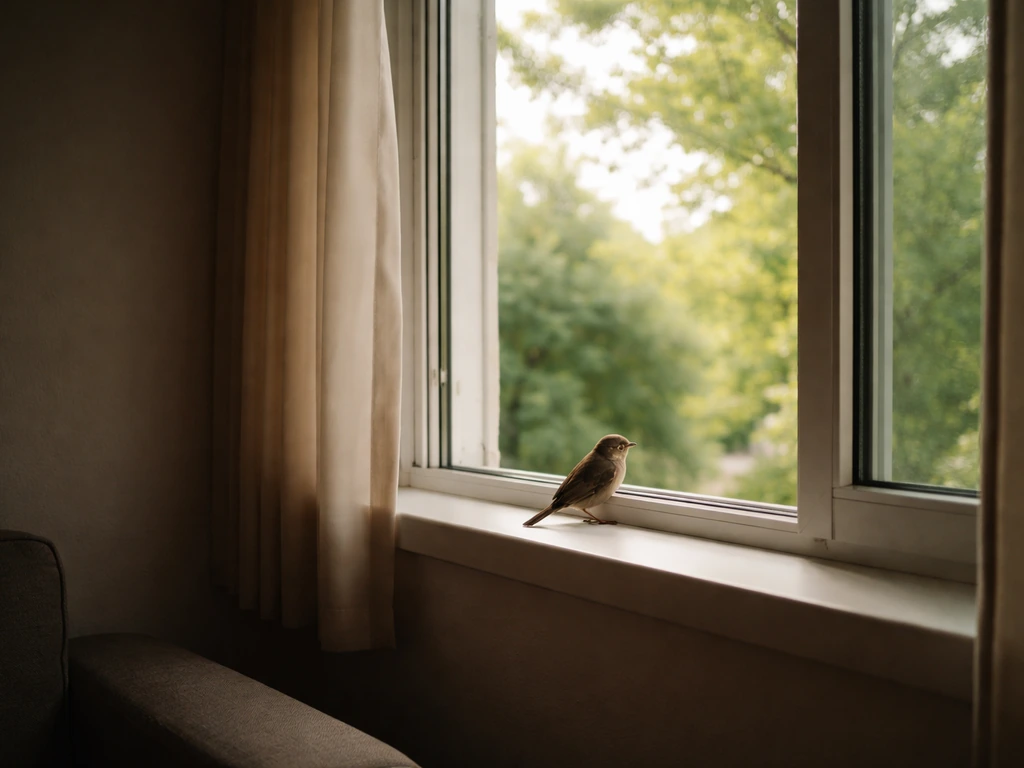
| Territorial striking (same bird, repeatedly) | One bird, usually spring/summer, hitting the same pane over and over without apparent injury | Block the reflection from outside; cover that pane temporarily |
| Nesting or roosting on/near the window | Nest material, droppings, or birds consistently perching on ledges, sills, or in window gaps | Physical exclusion after nest cycle ends; ledge deterrents |
Walk around the building at different times of day. Collision smudges (oily feather marks) tell you which panes are the worst offenders. Look for which direction each problem window faces: south- and east-facing glass that mirrors sky or nearby vegetation causes the most strikes. Note whether incidents happen at dawn, dusk, or during both, because night-migrating species are more likely to hit lit windows at night. Once you have a clear picture, the rest of this guide will map directly onto your situation.
Emergency actions for birds in distress or repeated window collisions
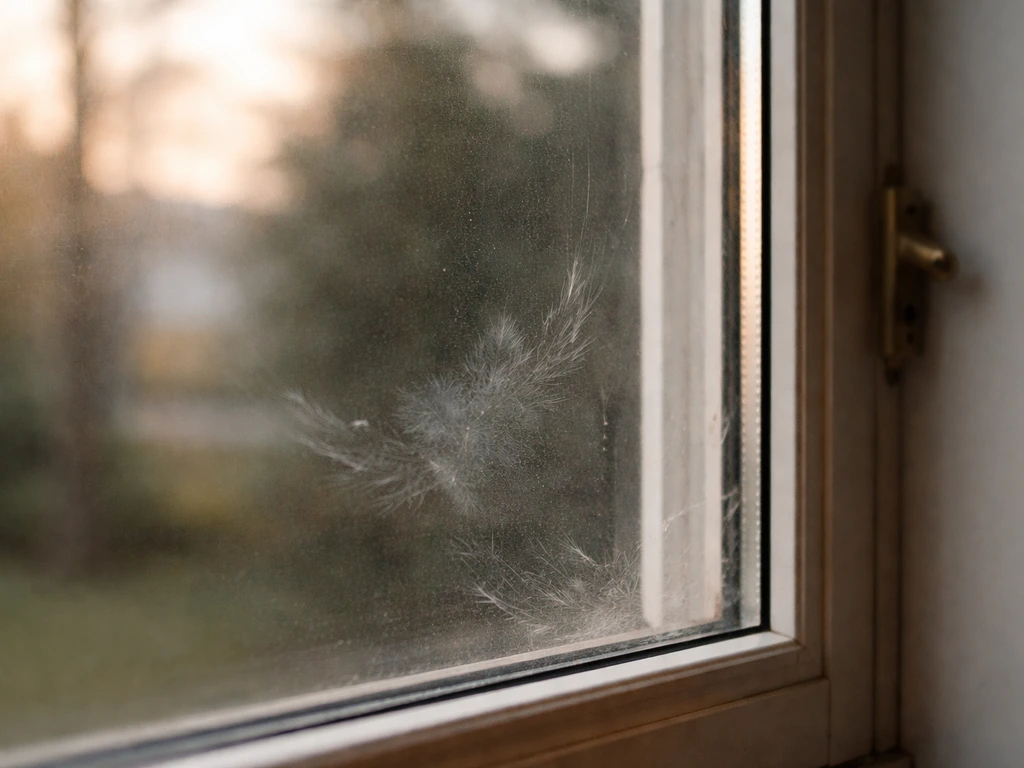
If you just found a bird on the ground under a window, act quickly but calmly. The most important thing is not to handle the bird more than necessary and not to try feeding it. Internal injuries from a collision are common even when the bird looks fine.
- Put on gloves if you have them, then gently scoop the bird up without squeezing its body.
- Place it in a paper bag (not plastic) or a small cardboard box with a few small breathing holes punched in the top. Line the bottom with a piece of cloth or paper towel so the bird can grip.
- Close the bag or box loosely. Darkness reduces stress and helps the bird rest.
- Set the container somewhere warm, quiet, and completely out of reach of pets and children. Do not put it in direct sunlight or near a heat source.
- Do not give it food or water. A concussed bird cannot swallow safely.
- Check after 30 to 60 minutes. If the bird is alert and upright, take it outside, open the container, and let it fly away on its own. If it cannot stand, is bleeding, or shows no improvement, contact a permitted wildlife rehabilitator or veterinarian immediately.
In the US, birds that collide with windows and fall to the ground should receive attention from a permitted wildlife rehabilitator or veterinarian if they do not recover quickly. You can find your nearest wildlife rehab center through your state wildlife agency. In the UK, the RSPCA handles injured wild bird calls on 0300 1234 999. Once the immediate emergency is handled, your next step is preventing the same window from striking again, which the next section covers in full.
Repeated strikes at the same window: territorial behavior vs. genuine collision risk
If one bird keeps hitting the same spot over and over during spring or early summer and seems unhurt each time, it is almost certainly seeing its own reflection and treating it as a rival. This is most common with robins, cardinals, and mockingbirds. The fix is temporarily covering or breaking up that specific reflection from the outside (paper, cardboard, or temporary film works), not deterring the bird itself. This behavior usually stops on its own within a few weeks once the bird's hormones settle after breeding season. You do not need a permanent solution, just something to block the reflection until the urge passes.
Prevent window collisions: reduce reflections and make glass visible
Birds hit windows because they genuinely cannot see glass the way we do. What they see is either a reflection of open sky and trees (which looks like a flight path) or a clear view through the window to a plant or room on the other side (which also looks like open space). The goal of every treatment is the same: make the glass itself visible as a solid barrier.
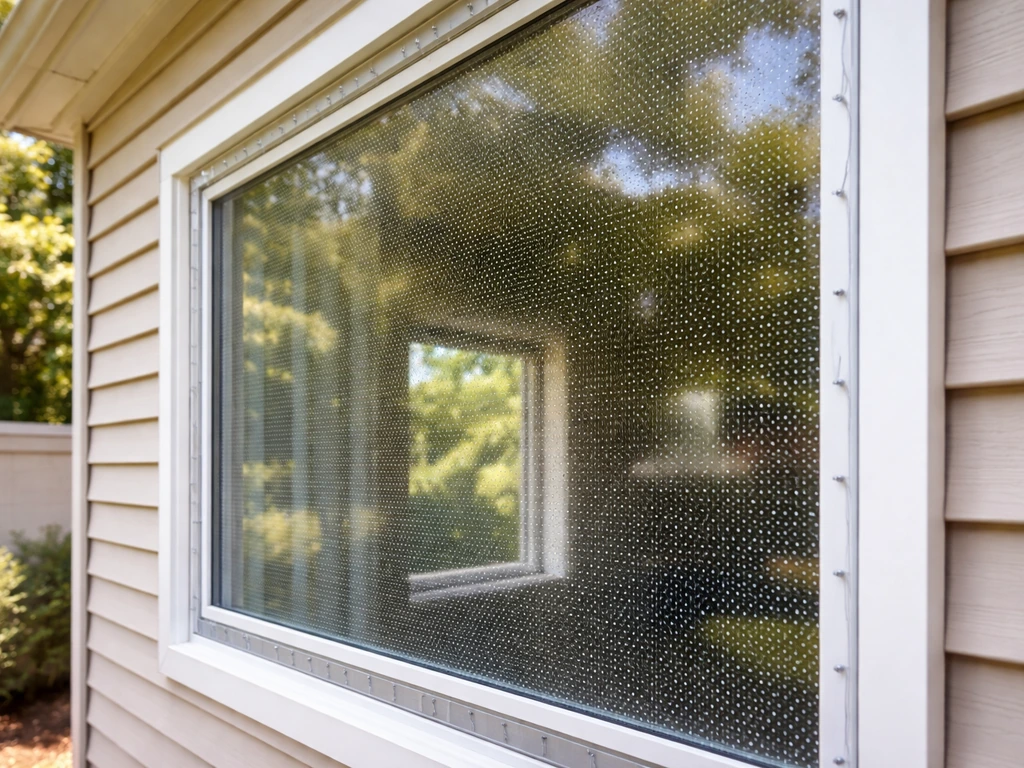
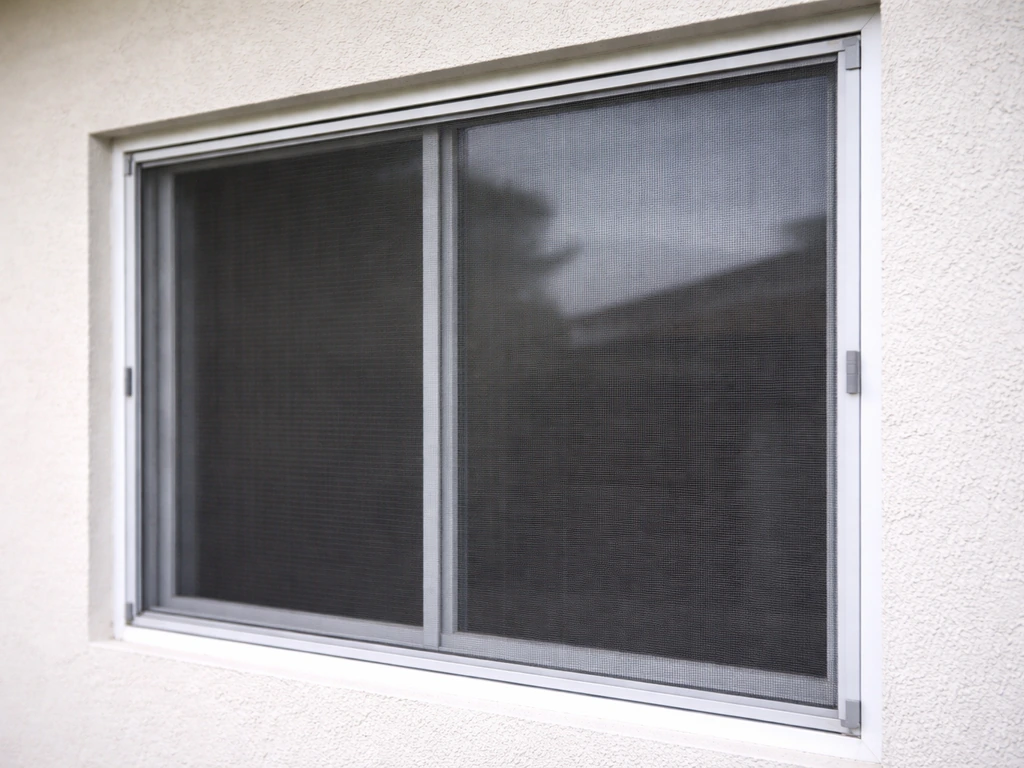
The key rule from US Fish and Wildlife Service guidance is that treatments must go on the outside of the window, and pattern elements must be spaced no more than 2 inches apart in any direction. Install collision deterrents on the outside of each window using patterns with elements spaced uniformly 2 inches apart across the entire glass surface [install collision deterrents on the outside of the window](https://www. birds. cornell.
edu/home/seven-simple-actions-to-help-birds/). Decals or blinds placed on the inside of the glass do not deter birds during the day.
What actually works (and what doesn't)
One or two hawk silhouette decals in the center of a pane do not work. Research and guidance from the National Park Service are clear on this: a small number of predatory-bird decals leaves too much open space, and birds simply fly around them. What works is a pattern that covers the whole pane with elements no more than 2 inches apart.
- Dot or stripe patterns on exterior film: products like CollidEscape or Feather Friendly use a dot or stripe grid at 2-inch spacing. Apply to the outside surface. These are among the most effective and least obtrusive options for residential windows.
- Parachute cord or string: attach parallel vertical strings to the outside of the window frame spaced no more than 2 inches apart. Cheap, easy, and effective. UV-stabilized cord lasts longer outdoors.
- Tempera paint or liquid chalk markers: apply a grid directly to the glass outside. Paint dots or lines with no more than 2-inch gaps. Washes off in rain eventually, so reapply every few months or after heavy rain.
- Window screen on the outside: a screen mounted a few inches in front of the glass breaks the reflection entirely and is one of the most effective physical solutions (more detail in the next section).
- Frosted, etched, or fritted glass: if you are replacing windows anyway, specify bird-safe glass with a fritted or etched pattern on the outer surface at the standard 2-inch grid. This is the permanent solution.
- Move feeders closer to windows, not further: place feeders within 3 feet of the window. A bird hitting glass from 3 feet away does not build up fatal momentum. Feeders placed 15 to 30 feet away give birds enough flight distance to be seriously injured or killed on impact.
Nighttime light management
Night-migrating birds (warblers, thrushes, sparrows, and many others) are attracted to and disoriented by light spilling out of buildings. During spring migration (roughly March through May) and fall migration (August through November), close your blinds and curtains at night to reduce the light spill from interior rooms to the outside. Turn off decorative exterior lighting where possible. This is a low-effort step that meaningfully reduces overnight collision risk, especially if you live near a migration corridor, coastline, or large body of water.
Physical prevention: screens, netting, and sealing gaps
Visual deterrents handle collisions well, but if birds are roosting on sills, nesting in window frames, or getting into gaps around air conditioning units or broken seals, you need physical barriers. Physical prevention for roosting, nesting, and access gaps is also the core of how to mouse proof a bird aviary, since both often hinge on tight barriers and excluded entry points. Here is how to approach each type.
Window screens and exterior netting
A taut screen or netting mounted a few inches in front of the glass is the most reliable all-in-one solution. It breaks the reflection, cushions any bird that does fly into it, and keeps nesting material off the frame. For residential windows, standard insect screens on the outside work well. For larger commercial or facility windows, a loose-hung polypropylene bird netting (1.75-inch mesh or smaller) stretched across the facade is the professional standard. The net needs to be at least 3 inches away from the glass so a bird that hits it bounces clear rather than getting pinned.
Sealing gaps around window frames (DIY vs. calling a pro)
Small sparrows, starlings, and house finches exploit gaps as small as an inch to nest inside window frames, behind shutters, or around HVAC units built into walls. Before you seal anything, verify the space is empty and no active nest is present (more on legal protections below). Once confirmed empty, use a combination of hardware cloth (galvanized 1/4-inch or 1/2-inch mesh), foam backer rod, and exterior-grade caulk to close any gap larger than half an inch.
This is a straightforward DIY job for ground-floor windows. For anything above the first floor, use a ladder with proper footing, have someone stabilize it, and wear non-slip footwear. For multi-story buildings or large commercial facades, hire a licensed pest control or bird management contractor who carries liability insurance and works at height safely.
| Method | Best for | DIY or pro | Cost range | Durability |
|---|---|---|---|---|
| Exterior dot/stripe film | Collision prevention on any window | DIY | Low to moderate | 3 to 5 years depending on UV exposure |
| Parachute cord strings | Collision prevention, any size window | DIY | Very low | 1 to 2 years; easy to replace |
| Exterior insect screen | Collision prevention + minor roosting deterrent | DIY | Low | 5 to 10 years |
| Polypropylene netting | Large commercial windows; serious collision or roosting problems | Pro recommended for upper floors | Moderate to high | 5 to 10 years |
| Hardware cloth + caulk gap seal | Nesting exclusion around frames and HVAC | DIY for ground floor | Low | Permanent if installed correctly |
| Fritted or etched replacement glass | New construction or full window replacement | Pro installation | High | Lifetime of window |
Deterring nesting and roosting safely around windows
This section deals with birds that have decided your window ledge, sill, shutter box, or frame is a good place to live rather than just fly into. The approach depends entirely on whether nesting has already started.
Legal protections you must know before you act
In the US, the Migratory Bird Treaty Act makes it illegal to disturb, harm, or destroy the nests, eggs, or young of migratory birds without a federal permit. The U. S. Fish & Wildlife Service’s updated Migratory Bird Permit Memorandum (MBPM-2 NestDestruction) provides current guidance on how permitting for nest destruction works when a [federal permit](https://www.
fws. gov/sites/default/files/documents/2025-01/mbpm-2-nest-memorandum-2025. pdf) is required. This covers the vast majority of songbirds, raptors, and waterfowl.
In the UK and EU, all wild birds and their nests are protected under the Wildlife and Countryside Act 1981 and the EU Birds Directive respectively, with enhanced protection for Schedule 1 species. The practical takeaway: if there is an active nest with eggs or chicks in or near your window, you cannot legally remove it or seal the gap until nesting is completely finished and the birds have left.
Moving a nest at the wrong time can constitute a criminal offence. If you are unsure whether a nest is active, leave it alone and contact your local wildlife agency or a licensed pest controller for advice.
Deterrents for ledges and sills (outside active nesting season)
Once a nest cycle is complete and birds have left, act quickly before the next season begins. These are the most effective and humane physical deterrents for window ledges and sills.
- Bird spikes: polycarbonate or stainless steel spikes installed on flat sill surfaces stop pigeons, gulls, and starlings from landing. Install with exterior-grade adhesive or screws. Make sure the spike strip covers the full width of the sill with no gaps at the ends.
- Slope barriers: a 45-degree sloped surface (sold as ledge guards) physically prevents birds from standing or nesting on the sill. Works well on wide flat ledges where spikes leave usable flat space at the base.
- Netting over recessed areas: for arched windows, shutter boxes, or decorative ledges, stretch fine bird netting across the entire recess and secure it to the surrounding masonry. Use stainless steel fixings to prevent rust staining.
- Visual and tactile deterrents: reflective tape, holographic ribbon, or predator decoys near the sill can discourage initial interest, but birds habituate to these quickly. They work best as a supplement to physical barriers, not a replacement.
- Remove attractants: bird droppings, spilled seeds from window-box feeders, and debris that accumulates on sills all invite birds back. Clean ledges regularly with a disinfectant safe for outdoor masonry.
What to avoid
Do not use sticky gel products (polybutylene-based bird repellent gels) on surfaces where small birds are present. These products are designed for large birds like pigeons but can trap and injure small songbirds, causing them to lose feathers or limbs. Avoid any method that involves poisoning, trapping without a permit, or physically harming birds. These approaches are illegal in most jurisdictions, ineffective long-term, and create welfare problems that can result in significant fines.
Seasonal plan, monitoring, and when to call a wildlife professional
Bird-window problems are not evenly distributed through the year. Getting ahead of peak periods saves a lot of reactive scrambling.
A simple seasonal schedule
| Season | Main risk | Action |
|---|---|---|
| Late winter (Jan-Feb) | Pre-breeding scouting; birds checking ledges and gaps | Inspect and seal gaps before nesting begins; install ledge deterrents now |
| Spring (Mar-May) | Peak migration collisions; territorial striking begins; nesting starts | Apply or refresh exterior window treatments; manage interior lighting at night; do not disturb nests once established |
| Summer (Jun-Aug) | Active nesting; fledglings leave nests and are vulnerable to glass | Monitor for fledgling collisions near ground-level windows; do not remove nests with young present |
| Fall (Aug-Nov) | Second major migration peak; high collision risk at night | Check and repair any deteriorated treatments; close interior blinds at night during migration weeks |
| Winter (Dec-Jan) | Lower collision risk; good time for maintenance and upgrades | Inspect treatments, replace worn film or cord, seal gaps, plan any window replacement or upgrade projects |
Monthly monitoring routine (5 minutes)
- Walk the perimeter of the building once a month and look for feather smudges or impact marks on panes. A fresh smudge means a collision happened recently and that window needs treatment.
- Check that exterior films, cord, or netting are still taut and undamaged. UV and weather degrade these materials faster than you expect.
- Look for fresh nest material appearing on or near ledges, sills, or in gap areas. Early removal of loose material (before eggs are laid) is legal and far easier than waiting.
- Note any patterns: same window, same time of day, same species. A pattern usually points to a specific structural or reflective feature you can fix.
When to call a wildlife professional
DIY fixes handle most residential window-bird problems well. Call a professional in these situations: a bird is injured and not recovering after 60 minutes in a dark container; you have a protected or Schedule 1 species nesting in or near your building (raptors, owls, swallows in the US; Schedule 1 species in the UK); you manage a multi-story facility where working at height is involved; or you have a persistent, building-wide collision or roosting problem that targeted treatments have not solved after two full seasons. When you call, have ready: photos of the affected windows and any bird marks, a description of the species involved if you know it, the approximate number of incidents per week, and what you have already tried. That information lets a professional give you a faster, more accurate recommendation and quote.
If you are also managing birds in enclosed spaces, the approach shifts significantly from what is covered here. Making a specific indoor room bird-safe, or dealing with rodents and pests that enter through aviary or enclosure gaps, involves different exclusion and hygiene protocols that are worth looking at separately once your window hazards are under control.
If ants are getting into or around your bird aviary, you can address the issue safely by focusing on exclusion, removing attractants, and using aviary-safe ant control methods how to get rid of ants in bird aviary. If you want to do that, start by addressing window collisions, sealing entry gaps, and adjusting lighting and placement so birds can navigate safely make a specific indoor room bird-safe.
For rodent problems in a bird aviary, focus on thorough gap-sealing, sanitation, and safe trapping so the birds are never exposed to poison or stress rodents and pests that enter through aviary or enclosure gaps.
FAQ
Can I make windows bird safe using only blinds or curtains?
Day collisions often need an outside visual pattern, because inside-only measures usually do not reduce daytime reflections. Curtains help most with night-migration risk, so use them overnight during migration seasons, but plan an outside deterrent or screening for daytime strikes.
Will UV or “bird-safe” glass (or anti-reflective coatings) replace the need for deterrent patterns?
If the window still produces reflections or see-through views, you should treat it like any other pane. Coatings may reduce glare, but they do not guarantee the pane becomes a fully solid barrier to birds. After installing, check collision smudges again at dawn and dusk and add a pattern if strikes continue.
How do I space the deterrent dots or lines if my window has different pane sizes or muntins?
Apply deterrents per pane so coverage is continuous across each bird-facing surface, including areas near muntins. Keep spacing at or under 2 inches in any direction between pattern elements, and do not leave “open corridors” larger than that gap width.
What if my problem bird is roosting on the sill every morning but not nesting?
Start with a small access audit and exclude landing spots, then shift to either a taut screen/netting or properly sealed exterior barriers around the sill area. Persistent roosting can be driven by easy access and shelter, so adding just a reflection fix may not fully stop the behavior.
Do I need to cover the entire pane, or can I treat only the center where the bird hits?
Treat the whole bird-facing pane with a uniform pattern, not just the center. Small numbers of predator silhouettes or partial coverage leave enough open space for birds to fly around and still strike.
Is it safe to use tape, cord, or decals on the outside if the weather is wet or cold?
Choose materials that stay secure when temperatures swing and when storms hit, and avoid anything that can peel into the air gap. Recheck the spacing after wind events and during seasonal maintenance, because loosened pieces can create new gaps birds will target.
How long should I wait after applying the deterrent pattern before deciding it failed?
Give it at least a few weeks and monitor across multiple times of day, especially dawn and dusk. If you see ongoing repeated hits to one exact spot, you may need to improve outside coverage, adjust lighting, or add physical screening for access gaps.
If a bird crashes into a window once, do I need to do anything long-term?
One isolated strike can be an accident, but look for smudges, repeated impacts at the same pane, and patterns linked to the sun direction or night lighting. If you cannot find a repeat pattern, start with the low-effort lighting adjustments and check for visible reflections before doing major installation.
What is the safest way to handle an injured bird found under a window?
Minimize handling time and do not attempt to feed it. Use a dark, quiet container only to support recovery logistics, then contact a wildlife rehabilitator or veterinarian promptly if it does not improve quickly.
Are sticky bird deterrents always a bad idea?
Sticky gel can injure small songbirds by trapping them, even when the goal is to stop landing. If birds are present on or near the surface, avoid gels and use barriers such as screens/netting or exclusion materials instead.
What if there is an active nest near my window but I still need to seal gaps soon?
Do not seal or remove anything if eggs or chicks are present. In the US and UK/EU, active nest removal or disturbance can be illegal without the correct permits, so pause and contact local wildlife authorities or a licensed professional for a nest-safe plan.
How can I tell if the bird activity is collisions versus birds seeing inside spaces?
If birds show interest during the daytime and appear to “commit” to flying into the pane aligned with what is visible through it, it points to see-through cues. If it correlates with sunny, reflective conditions and dawn or dusk timing, it points more toward reflection cues, which are solved by outside solid-pattern deterrents.
When should I hire a pro instead of DIY?
Call for help when work is above the first floor with ladders, when you cannot confirm whether a protected species is nesting, or when you have building-wide collisions that persist after two full seasons of targeted fixes. Also consider pros for large facades because professional netting placement requires correct standoff distance and secure anchoring.
How do I check for access gaps birds use around HVAC units or window frames?
Inspect the perimeter for openings larger than about half an inch and look for usable entry space around units, trim, and behind shutters. Before sealing, verify the space is empty, then close gaps using exterior-appropriate materials so they stay closed through weather cycles.
Next Article
How to Get a Trapped Bird Out of Your House Safely
Humane, step-by-step guide to get a trapped bird out safely, handle injuries, and prevent future entry.